Web browsers not loading websites, Sophos Web Protection

Web browsers not loading websites, Sophos Web Protection

Some users with Sophos installed on macOS computers have reported the following issue:

-All web browsers do not load any and all web pages

-Other network activity like email and video conferencing continue to work

One troubleshooting / workaround that has “fixed” the issue in the past are the following steps:

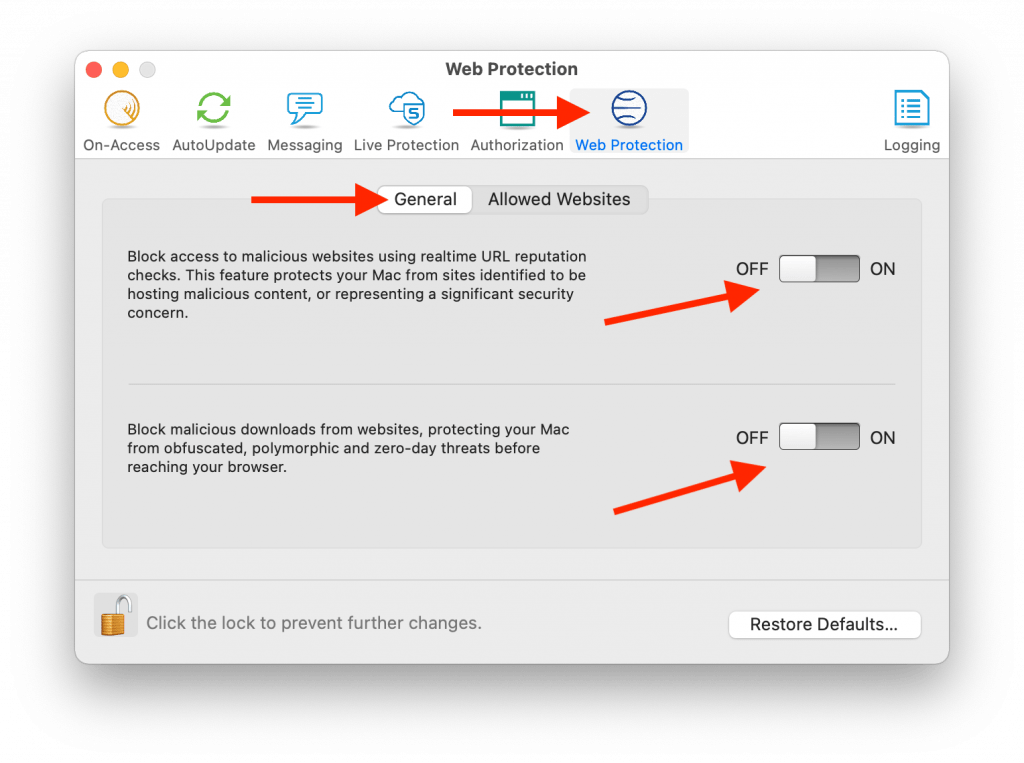
1) Click the Sophos icon in the top-right menu bar, click Open Preferences….

2) Click Web Protection, click General, click both switches OFF.

3) Switch to any web browser application. Load any website. Confirm websites and pages load as expected.

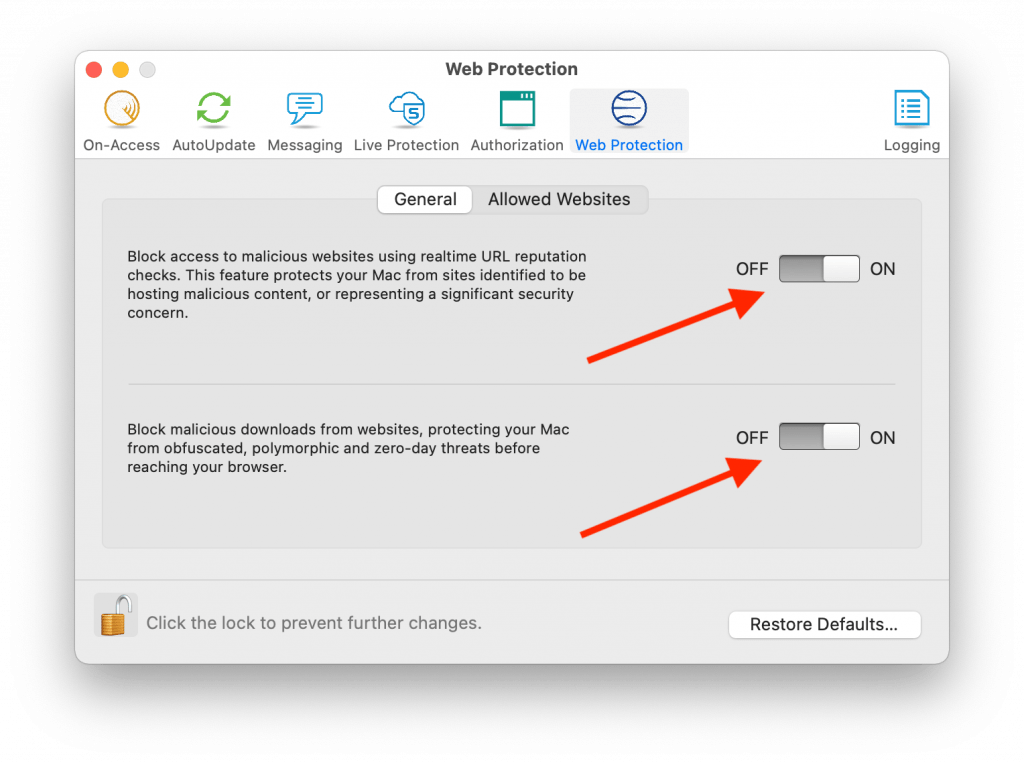
4) Back in Sophos, click both Web Protection switches back ON. Switch back to a web browser and confirm web pages continue to load and work as expected.

Set up iSchool issued macOS computer

Set up iSchool issued macOS computer

The following steps need to be done to set up an iSchool-issued macOS computer. Please contact the iSchool IT Help Desk, 206-616-3086 or ihelp@uw.edu, if there are any questions or issues during this setup process.

This process could take around 30-45 minutes or more to complete.

(The following screenshots are a reference based on the time of writing. The actual screens and options you see and click through are subject to change at any time per Apple macOS updates.)

1) Plug in the power adapter if the computer is a laptop. Turn on the computer.

2) Select language, click the forward-arrow.

3) Select your country or region, click Continue.

4) Select and adjust any or all accessibility features or click Not Now to set up later.
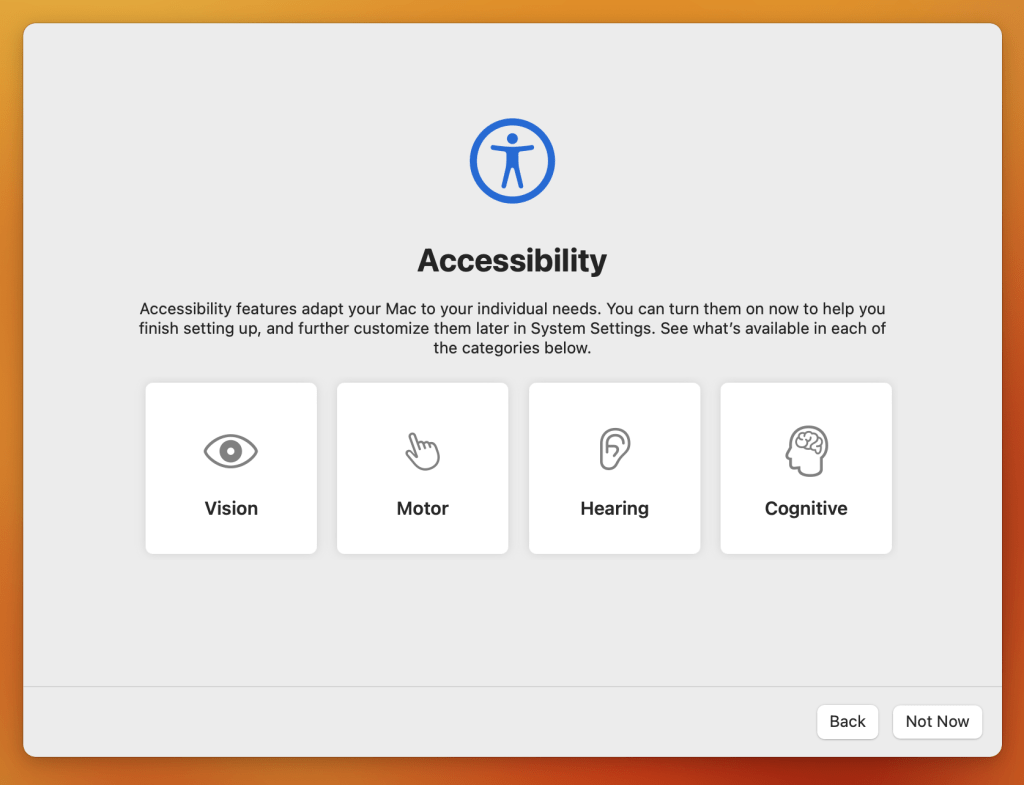
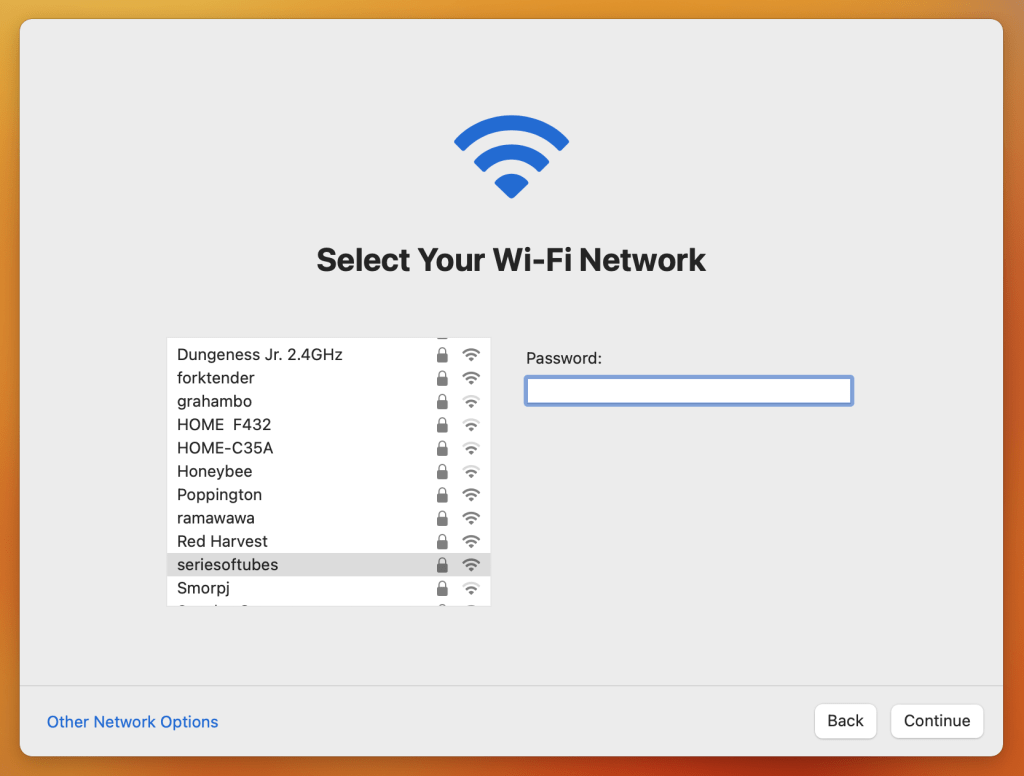
5) Connect to any available Internet network.
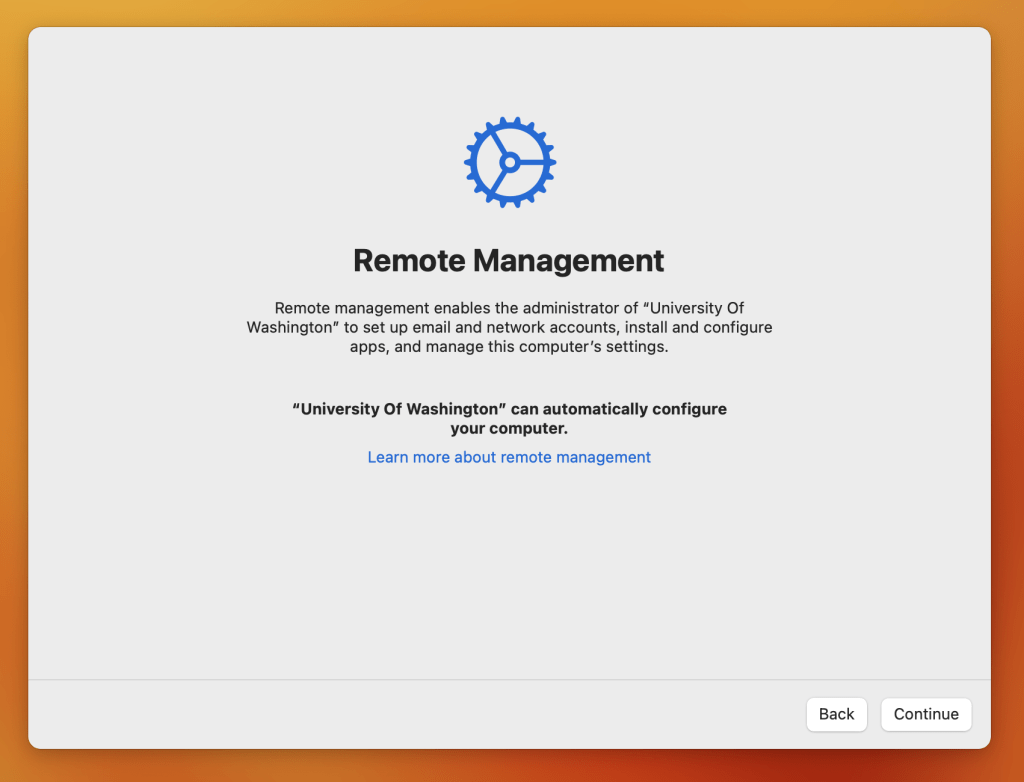
6) Click Continue at the University of Washington Remote Management screen.
7) Authenticate with your UWNetID@uw.edu credentials.
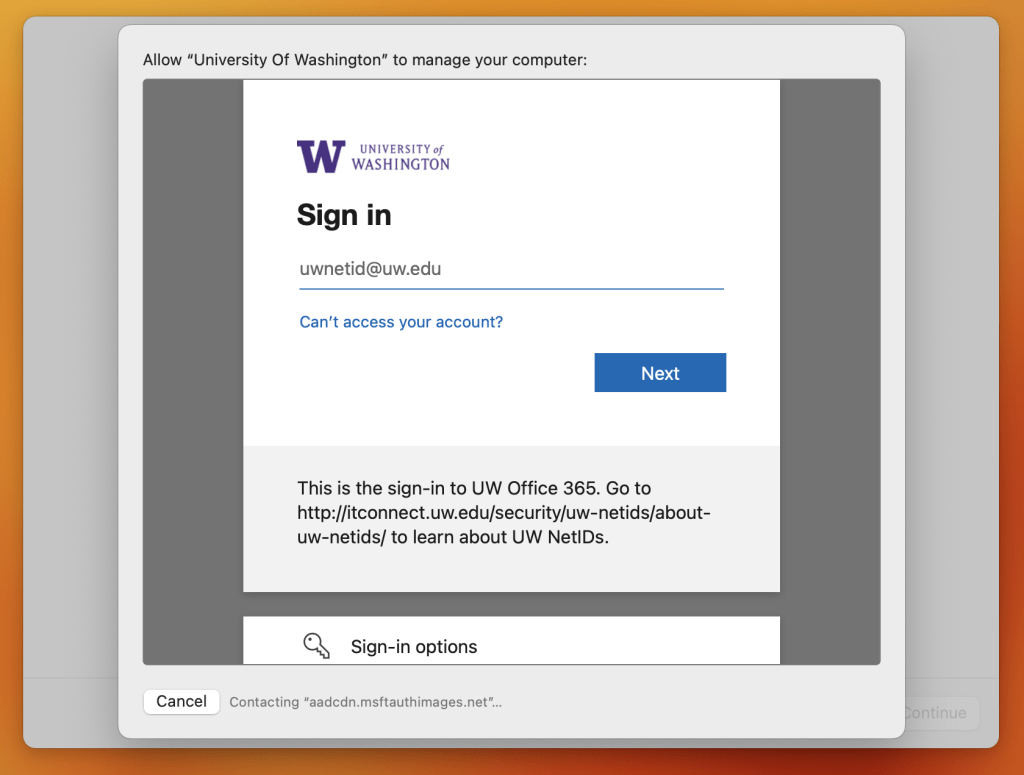
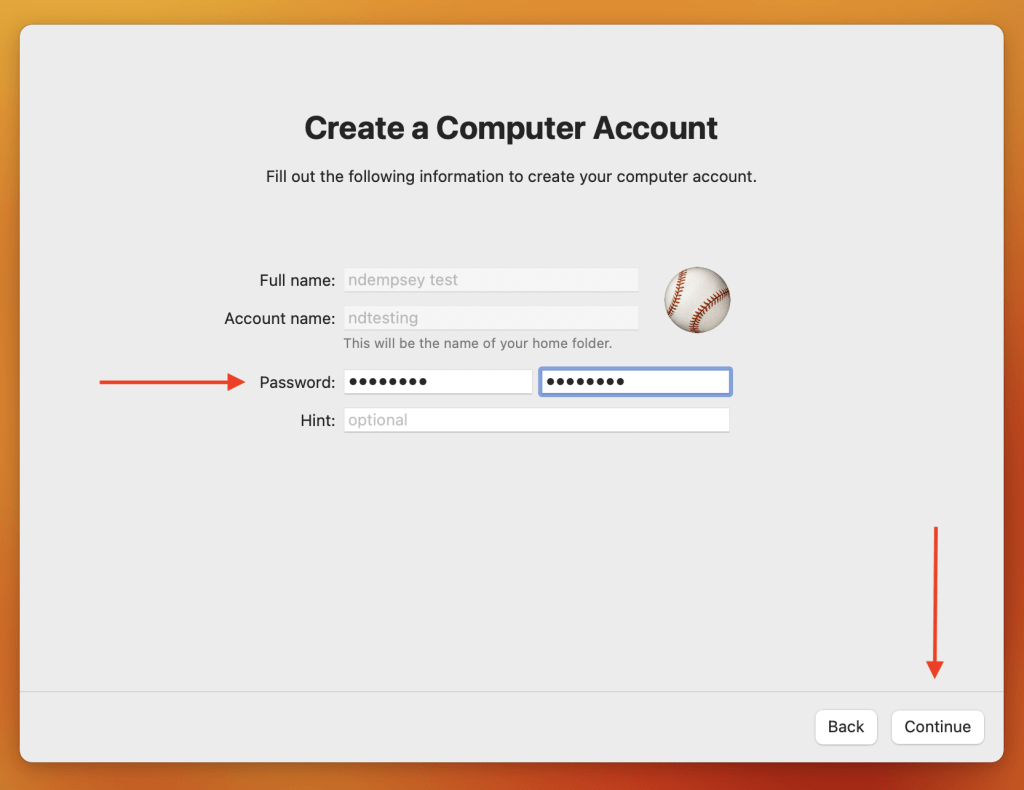
8) The “Full name:” and “Account name:” will be filled-in with your UW NetID information. Enter your UW NetID password twice, edit the icon to your liking, click Continue.
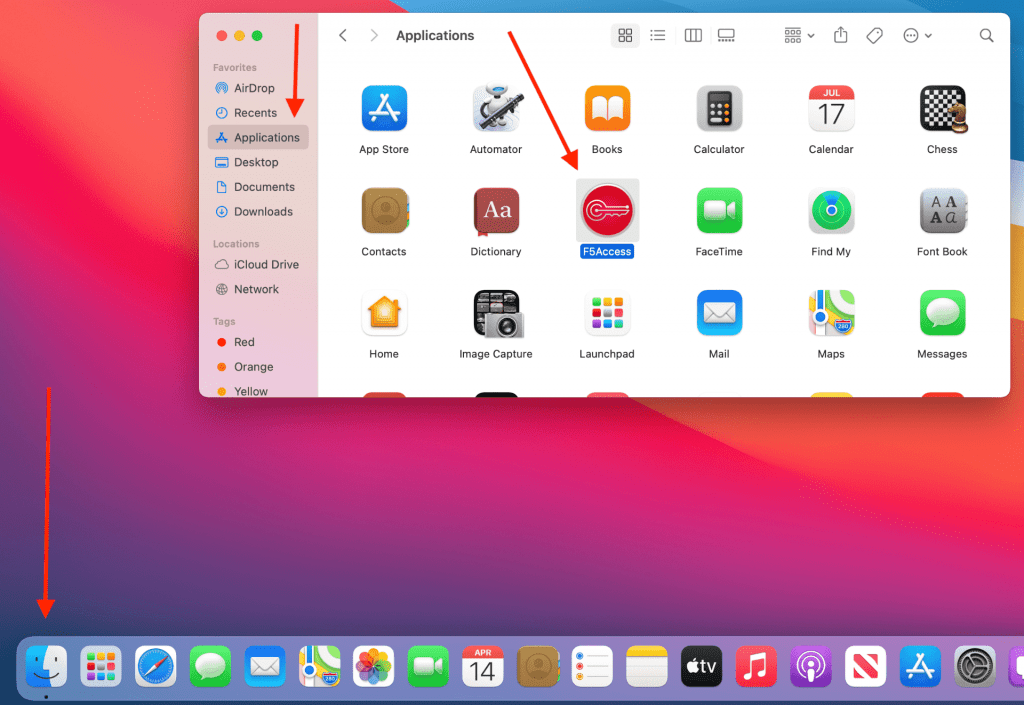
9) If you and the computer are on the University of Washington campus, skip to step 11. Open a Finder window, go to the Applications folder, start the “F5Access” application. (The “F5Access” application should appear within a few minutes if it is not already in the Applications folder.)
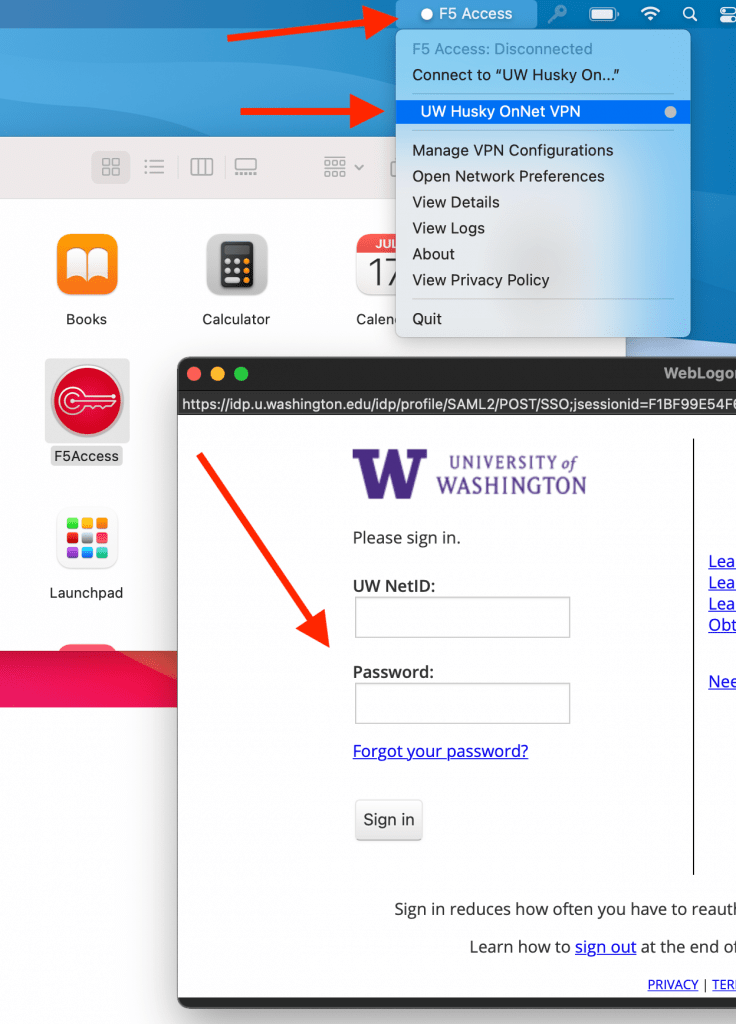
10) Click “F5 Access” in the top-right menu bar, click “UW Husky OnNet VPN”, authenticate using UW NetID credentials in the University of Washington WebLogon screen. (This action is connecting you to the UW network via Virtual Private Network (VPN) to make the next few steps possible.)
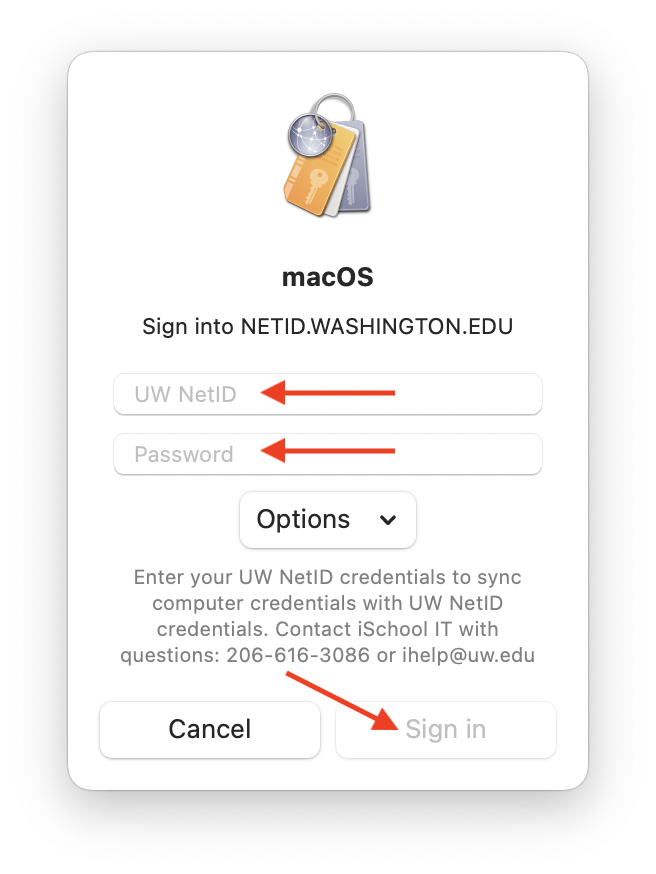
11) Enter your UW NetID credentials in the “Sign into NETID.WASHINGTON.EDU…” box, click Sign in.
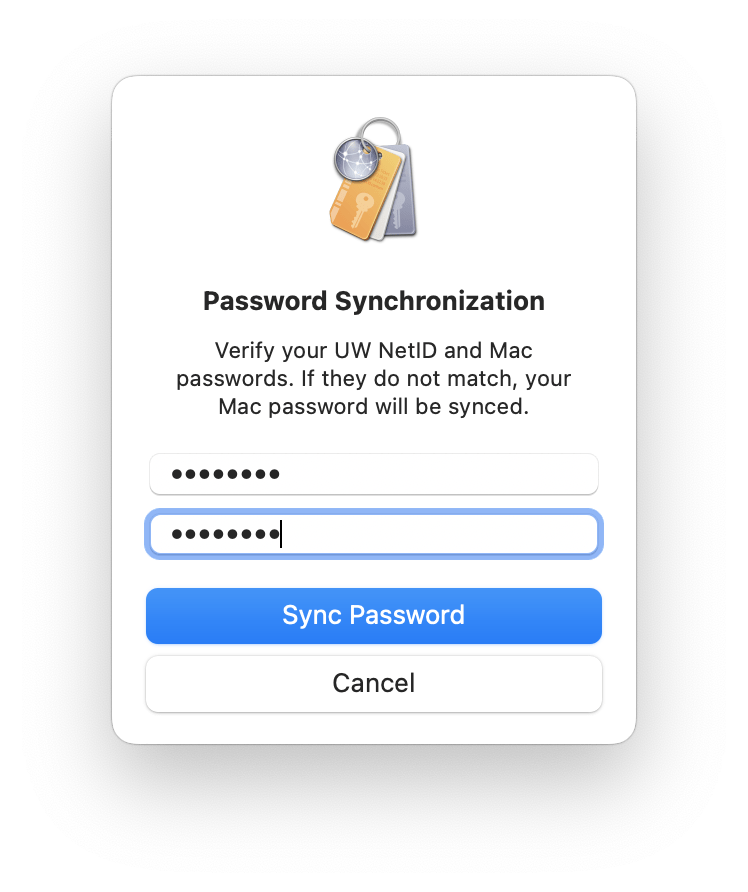
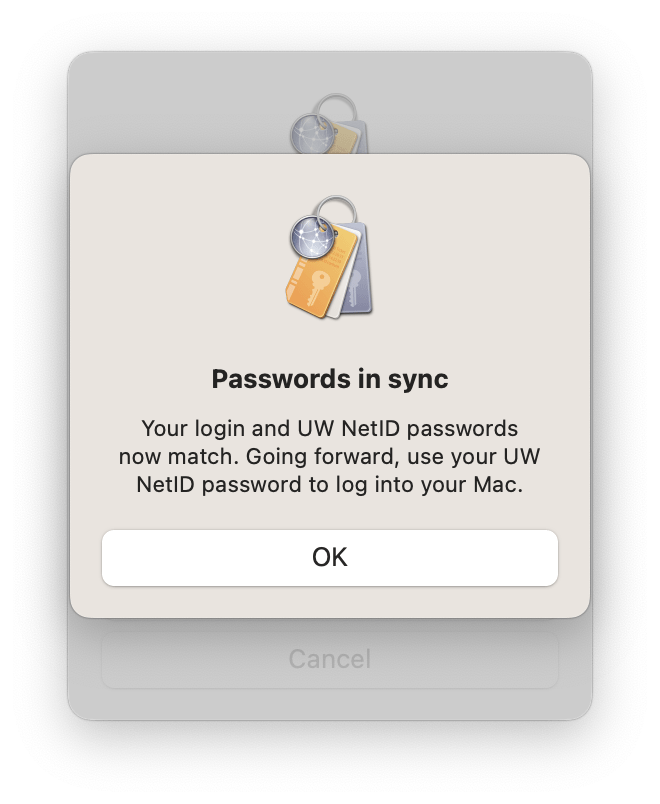
12) In the “Password Synchronization” box enter your UW NetID password in both fields, click Sync Password. Note the “Passwords in sync” message. Click OK. You will be using your UW NetID credentials for the username/password combination for your macOS device.
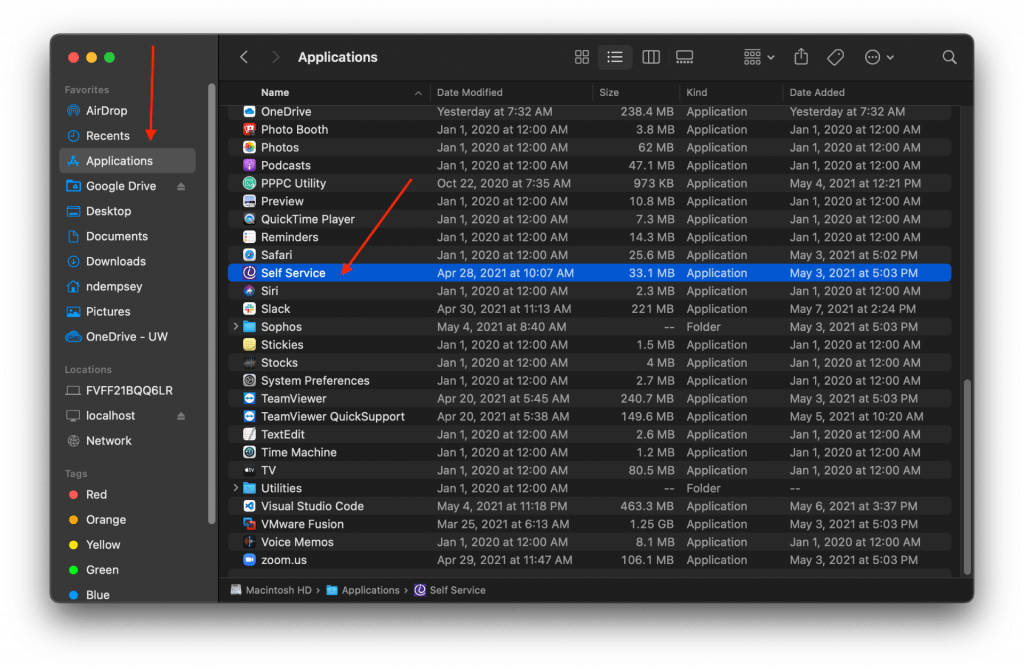
13) Open a Finder window, go to the Applications folder, start the Self Service application, sign in with UW NetID credentials if prompted.

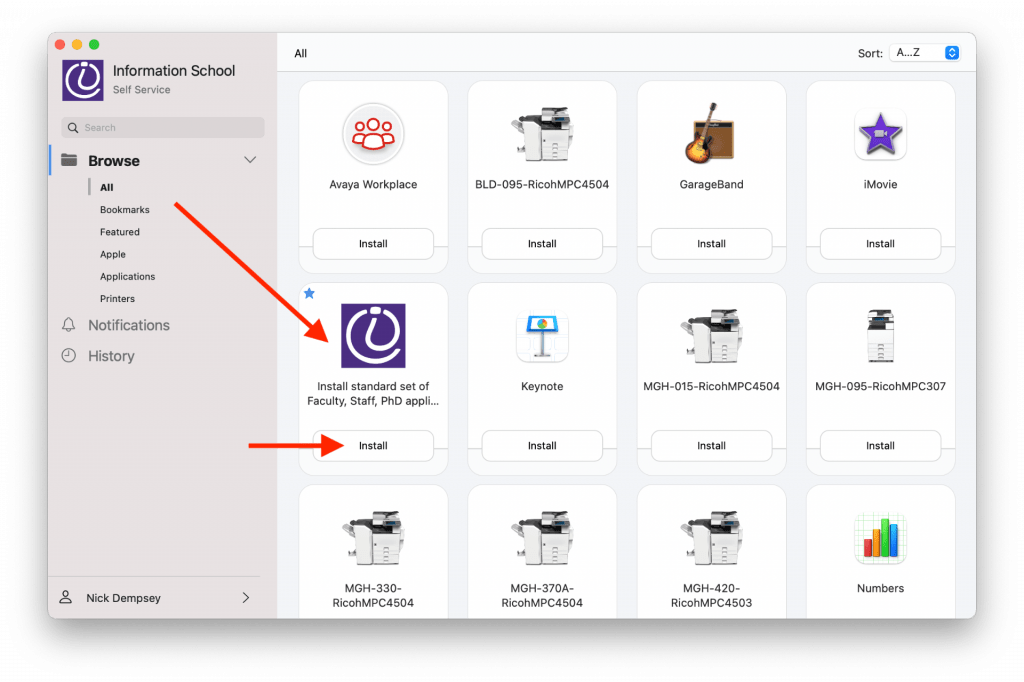
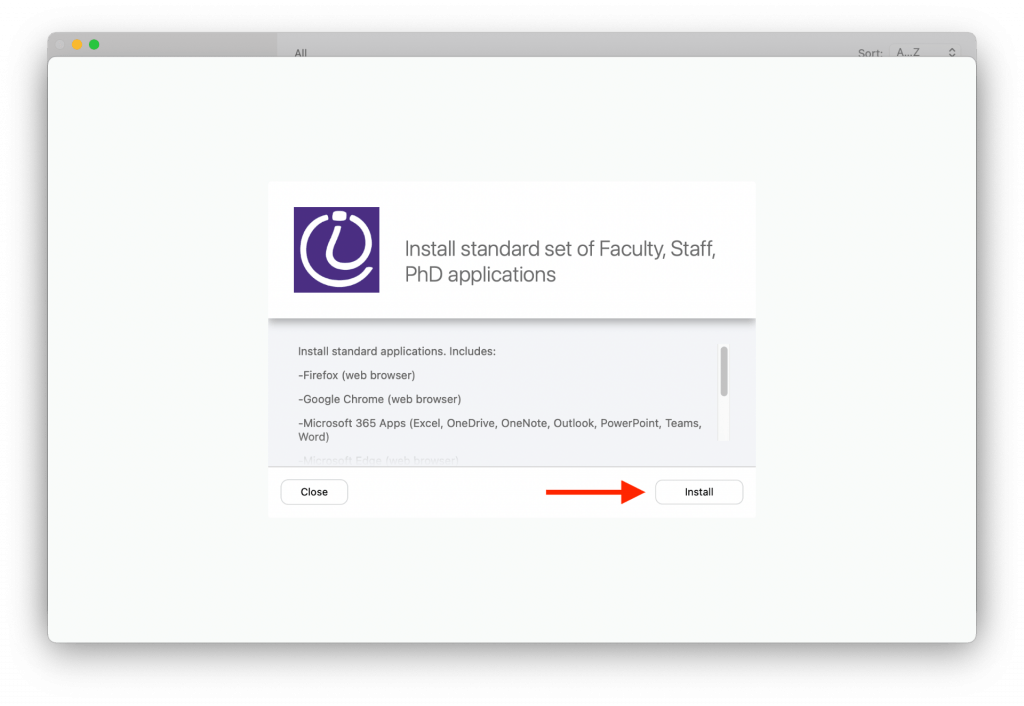
14) Look for the item named “Install standard Faculty, Staff, PhD applications”, click Install, click Install.

Note well: The total installation time could take ~30 minutes or more depending on your network connection. “Self Service” will give you the messages “Executing” and “Installing” and “Running” while installation is happening. “Done!” will appear briefly when installation is complete. If you do not see any glaring “failure” messages, the installation happened correctly. The Applications folder will be populated with the software titles mentioned in Self Service. There are other miscellaneous applications and printers you may install if you wish before exiting the Self Service application.
15) Install the Code42/CrashPlan file backup software by following the steps on this web page: Install the CrashPlan file backup software

Use the Code42/CrashPlan software to restore files from a previous computer if necessary. Detailed directions are on this web page:

How to restore files using the Code42/CrashPlan application

Restoring files via Code42/CrashPlan is not necessarily a trivial step. Please contact the iSchool IT Help Desk if there are any questions about restoring files via Code42/CrashPlan.

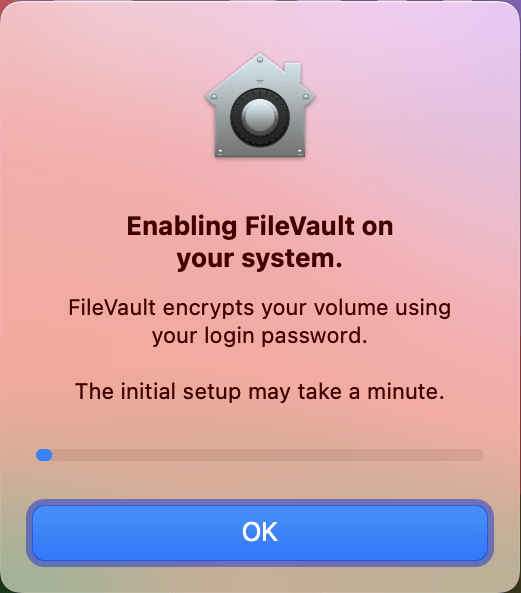
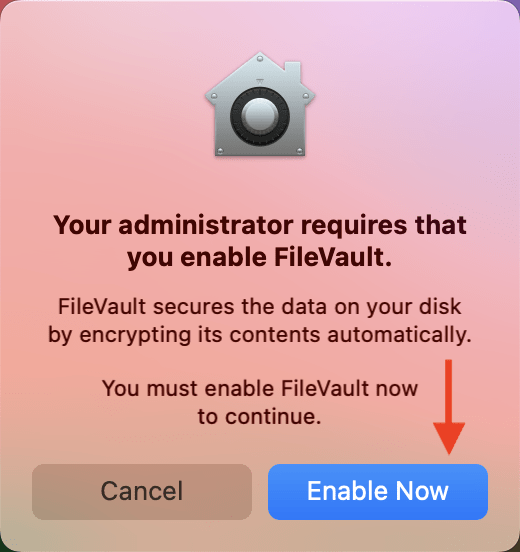
16) Restart the computer. After the first time the computer is restarted, you will be met with the setup of “FileVault” disk encryption.

When you see the “…enable FileVault” message click Enable Now, click OK.
At this point, your iSchool macOS computer has completed the necessary one-time-setup-steps and is ready to use but may not have all of the customizations you need. Some examples of further actions you may need to take:

If Microsoft Outlook is your email application of choice, find and start the Microsoft Outlook application. Follow the instructions provided by Outlook to add your @uw.edu email address.

If you have access to a shared @uw.edu email account and need to add the account to Outlook: https://www.kb.ischool.uw.edu/how-to-add-shared-netid-email-account-to-outlook/

If you need to install Zoom: https://zoom.us/download

If you need to install SecureCRT (to access The UW Student Data Base): https://itconnect.uw.edu/uware/securecrt/

You may need or want to sign in to your web browser of choice to sync bookmarks:

Google Chrome sync directions

Firefox sync directions

Microsoft Edge sync directions

Please contact the iSchool IT Help Desk, 206-616-3086 or ihelp@uw.edu, if there are any questions or issues during this setup process.

Self Service

Self Service

iSchool owned Apple computers have access to an application named Self Service. Self Service allows you to install things like applications and printers. To access Self Service:

1) If you are off campus, connect to the Husky OnNet VPN.

2) Start the Self Service application, found in the Applications folder.


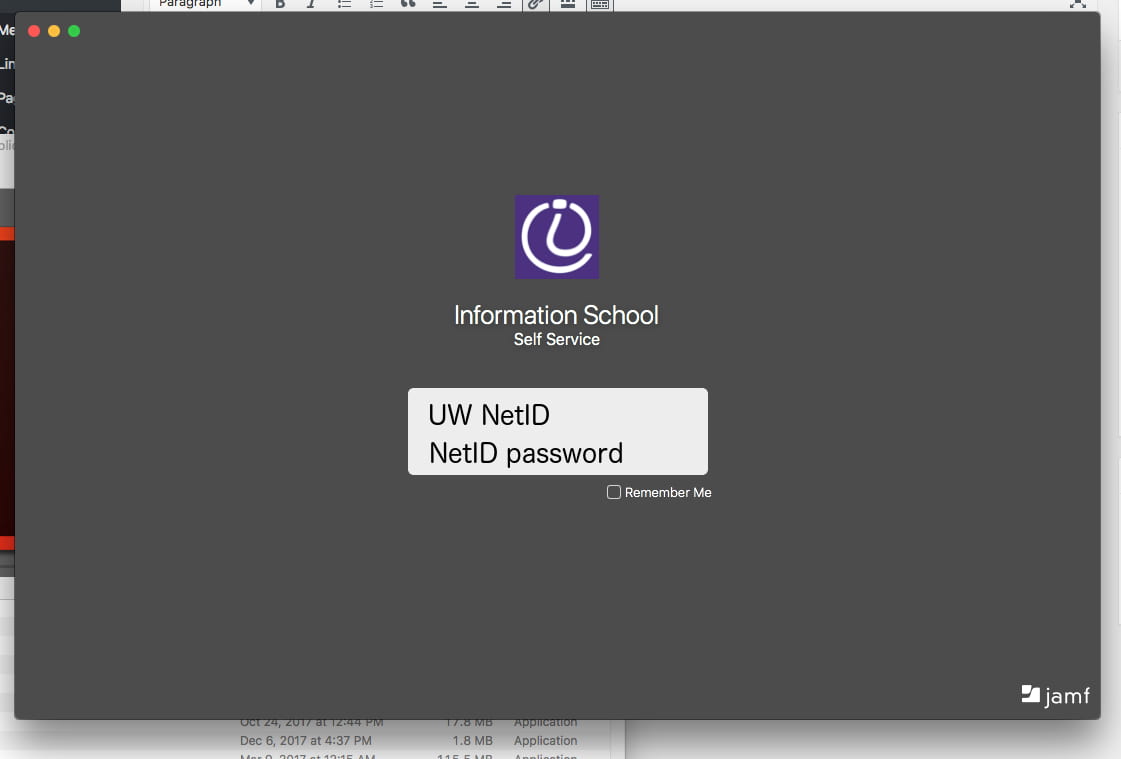
3) Sign into Self Service using your UW NetID credentials.

self_service_sign_in_info


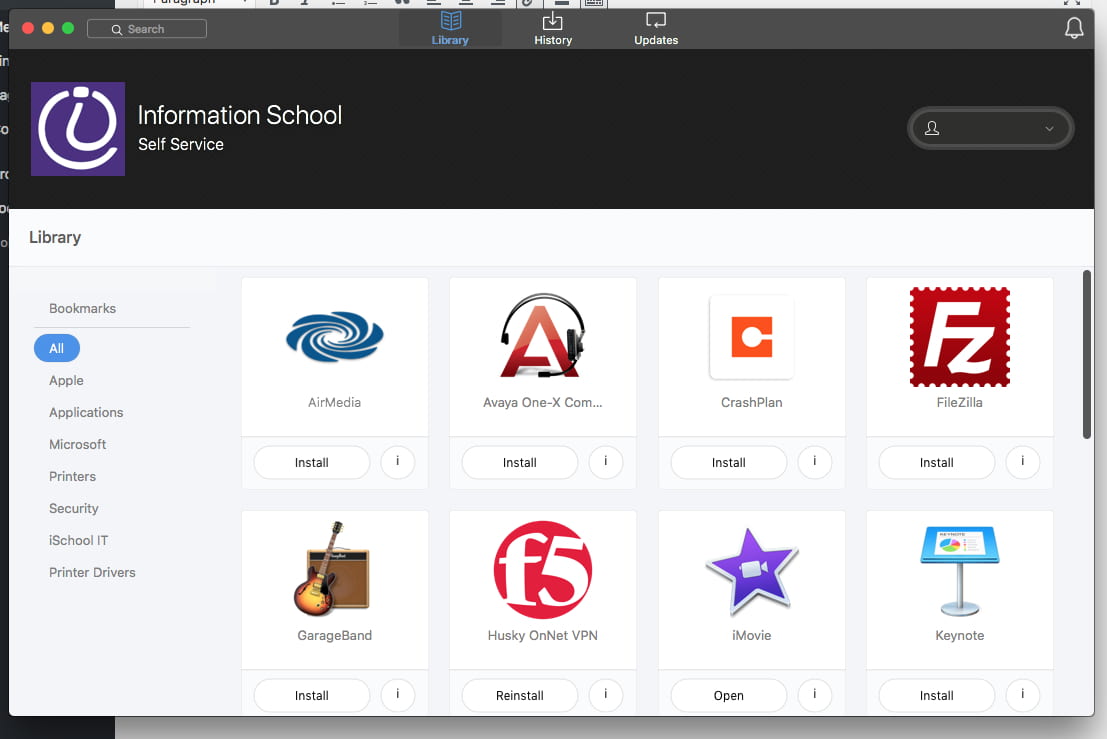
4) Self Service will present you with multiple options.

self_service

FileVault

The iSchool has FileVault configured on all Faculty, Staff, and PhD student Mac computers.  FileVault is an Apple full-disk encryption technology.  Once FileVault is turned on, after a computer is restarted or shutdown, only FileVault-unlock-enabled users or a user with the FileVault Recovery Key can access the drive.  Once FileVault is turned on, your UW NetID credentials will continue to allow you to sign into the computer; you should see no noticeable change in behavior.

If you are prompted for a FileVault Recovery Key, please contact the iSchool IT Help Desk.

More about FileVault can be found at the websites below.

https://support.apple.com/en-us/HT204837

https://en.wikipedia.org/wiki/FileVault

Connecting to (Mapping or Mounting) the iSchool N Drive

Connecting to (Mapping or Mounting) the iSchool N Drive

The iSchool provides a shared collection of network storage folders commonly referred to as the N Drive (“N” for network). The following directions are for accessing the folders on the N Drive. The directions presuppose you have the correct permissions to access the N Drive folders. If you are unsure of your permissions to access the N Drive, or specific folders within the N Drive, please contact the iSchool IT Help Desk.

If you need to map or connect to the N Drive on your computer, use the following server addresses:

Windows: \\netid.washington.edu\ischool
macOS: smb://netid.washington.edu/ischool

Fully detailed instructions are below.


The N Drive is only accessible from the UW network. If the computer you are using is physically off campus, you must first connect to the Husky OnNet before you will be able to access the N Drive.


Access the N Drive using an iSchool issued computer

Access the N Drive using a personal computer


Access the N Drive using an iSchool issued computer
Windows 10
macOS


Windows 10

If you are off campus, connect to the Husky OnNet VPN

1) click the Windows File Explorer button in the lower-left corner of the screen, click N Drive below This PC

Windows 8 N: Drive Location


macOS

Follow the “personal computer” directions for macOS


Access the N Drive using a personal computer
Windows 10
macOS


Windows 10

If you are off campus, download, install, then connect to the Husky OnNet VPN

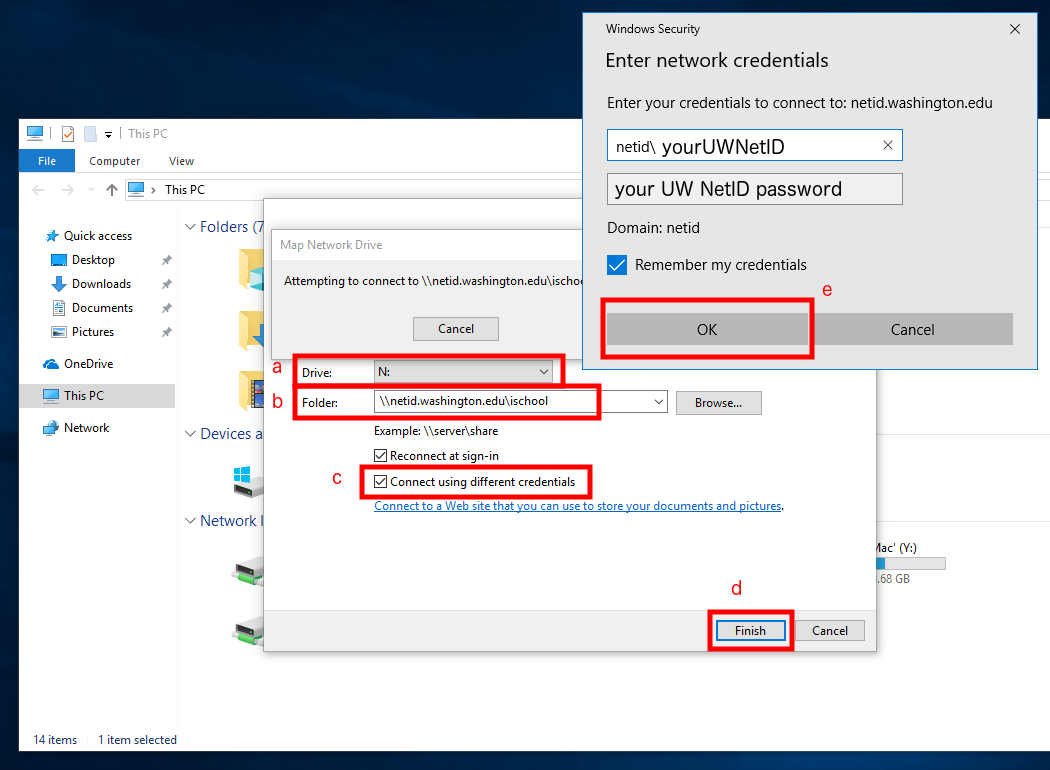
1) right-click the lower-left Windows icon, click File Explorer, click This PC, click Computer, click Map network drive

2) in the Map Network Drive window, for Drive: use N, for Folder: use \\netid.washington.edu\ischool, check Connect using different credentials, click Finish, for User name use the format netid\yourNetID, for Password use your NetID password, click OK

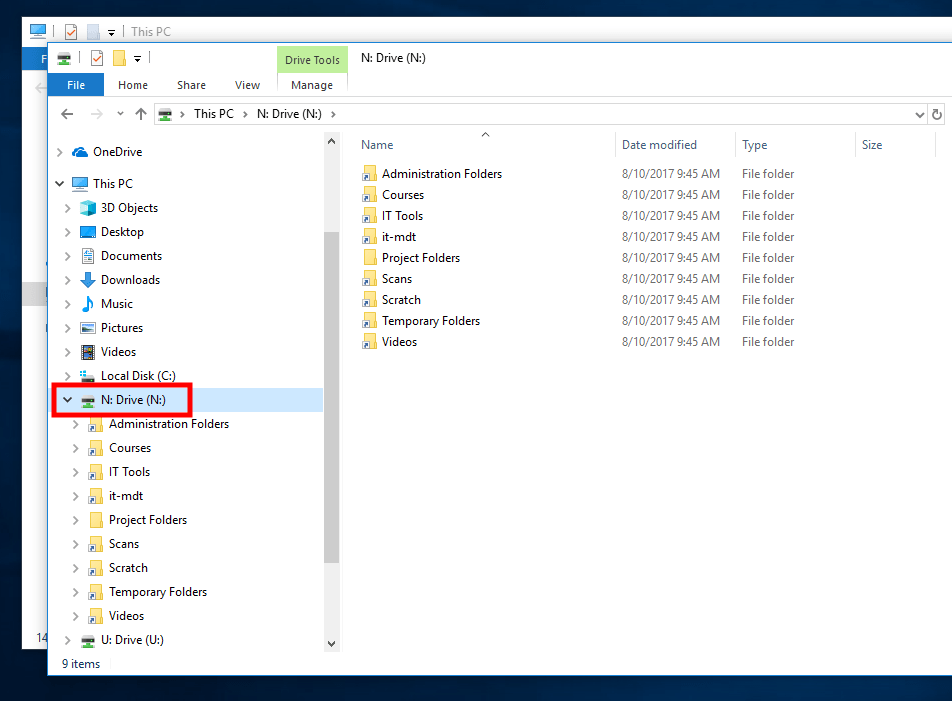
3) the N Drive and its folders will appear below This PC


macOS

If you are off campus, connect to the Husky OnNet VPN

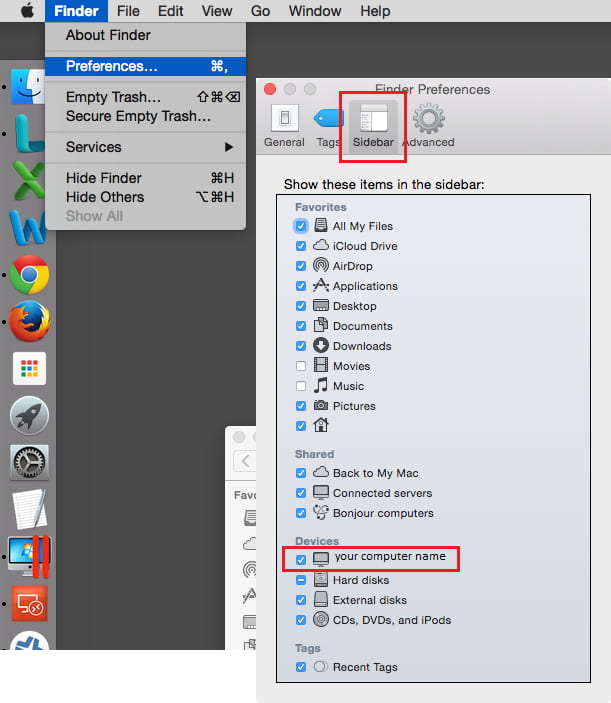
1) open Finder, click Preferences…, click Sidebar, check the box next to your computer name, close the Finder Preferences window

Finder Preferences

2) in Finder, click Go, click Connect to Server… (⌘ + K on your keyboard)

Finder -> Go -> Connect to Server...

3) for Server Address: use smb://netid.washington.edu/ischool, click the plus (+) button, click Connect, select Connect as: Registered User, for Name:, use netid\yourNetID, for Password: use your NetID password

4) Finder will open a folder titled ischool with all of the N Drive folders, you can also find the N Drive folders in Finder by clicking your computer name -> ischool