Directions for adding an iSchool printer to a personal computer:
Windows 11
macOS
Windows 11
1. Find the following information about the printer you would like to use: a) IP address – IP addresses should be labeled in plain sight on each printer b) Make and model – printer should indicate make and model in plain sight If you are unable to determine a printer’s IP address or make or model, contact the iSchool IT Help Desk.
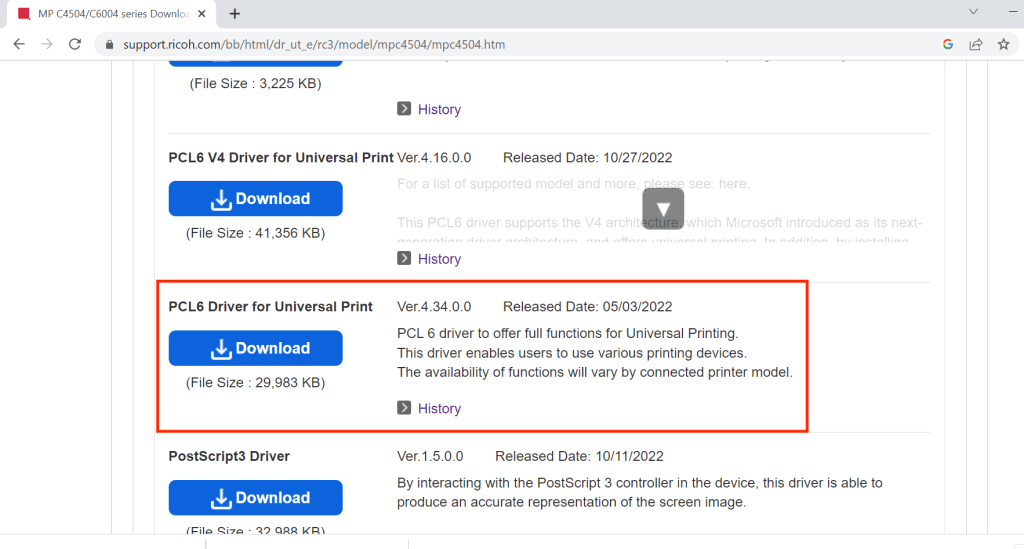
2. Download and install the latest printer driver for the make and model printer you identified in step 1. In general, you will be looking download a Ricoh printer driver: https://www.ricoh-usa.com/en/support-and-download named “PCL6 Driver for Universal Print”:
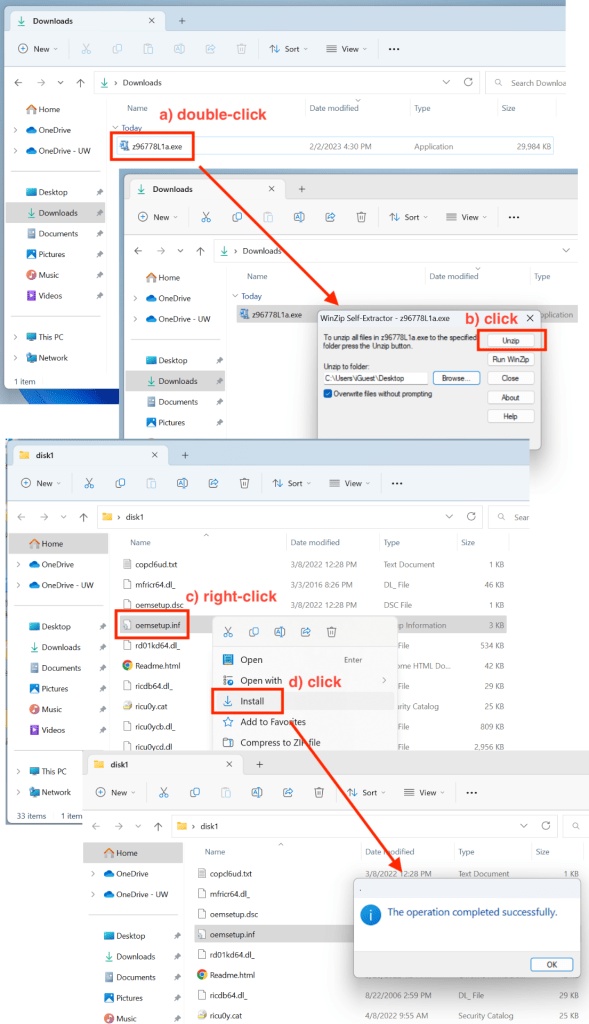
Save the file to your computer. Double-click the file (a)), click Unzip (b)), find then right-click the file named oemsetup.inf (c)), click Install (d)), click Yes. You should receive a “The operation completed successfully.” message.
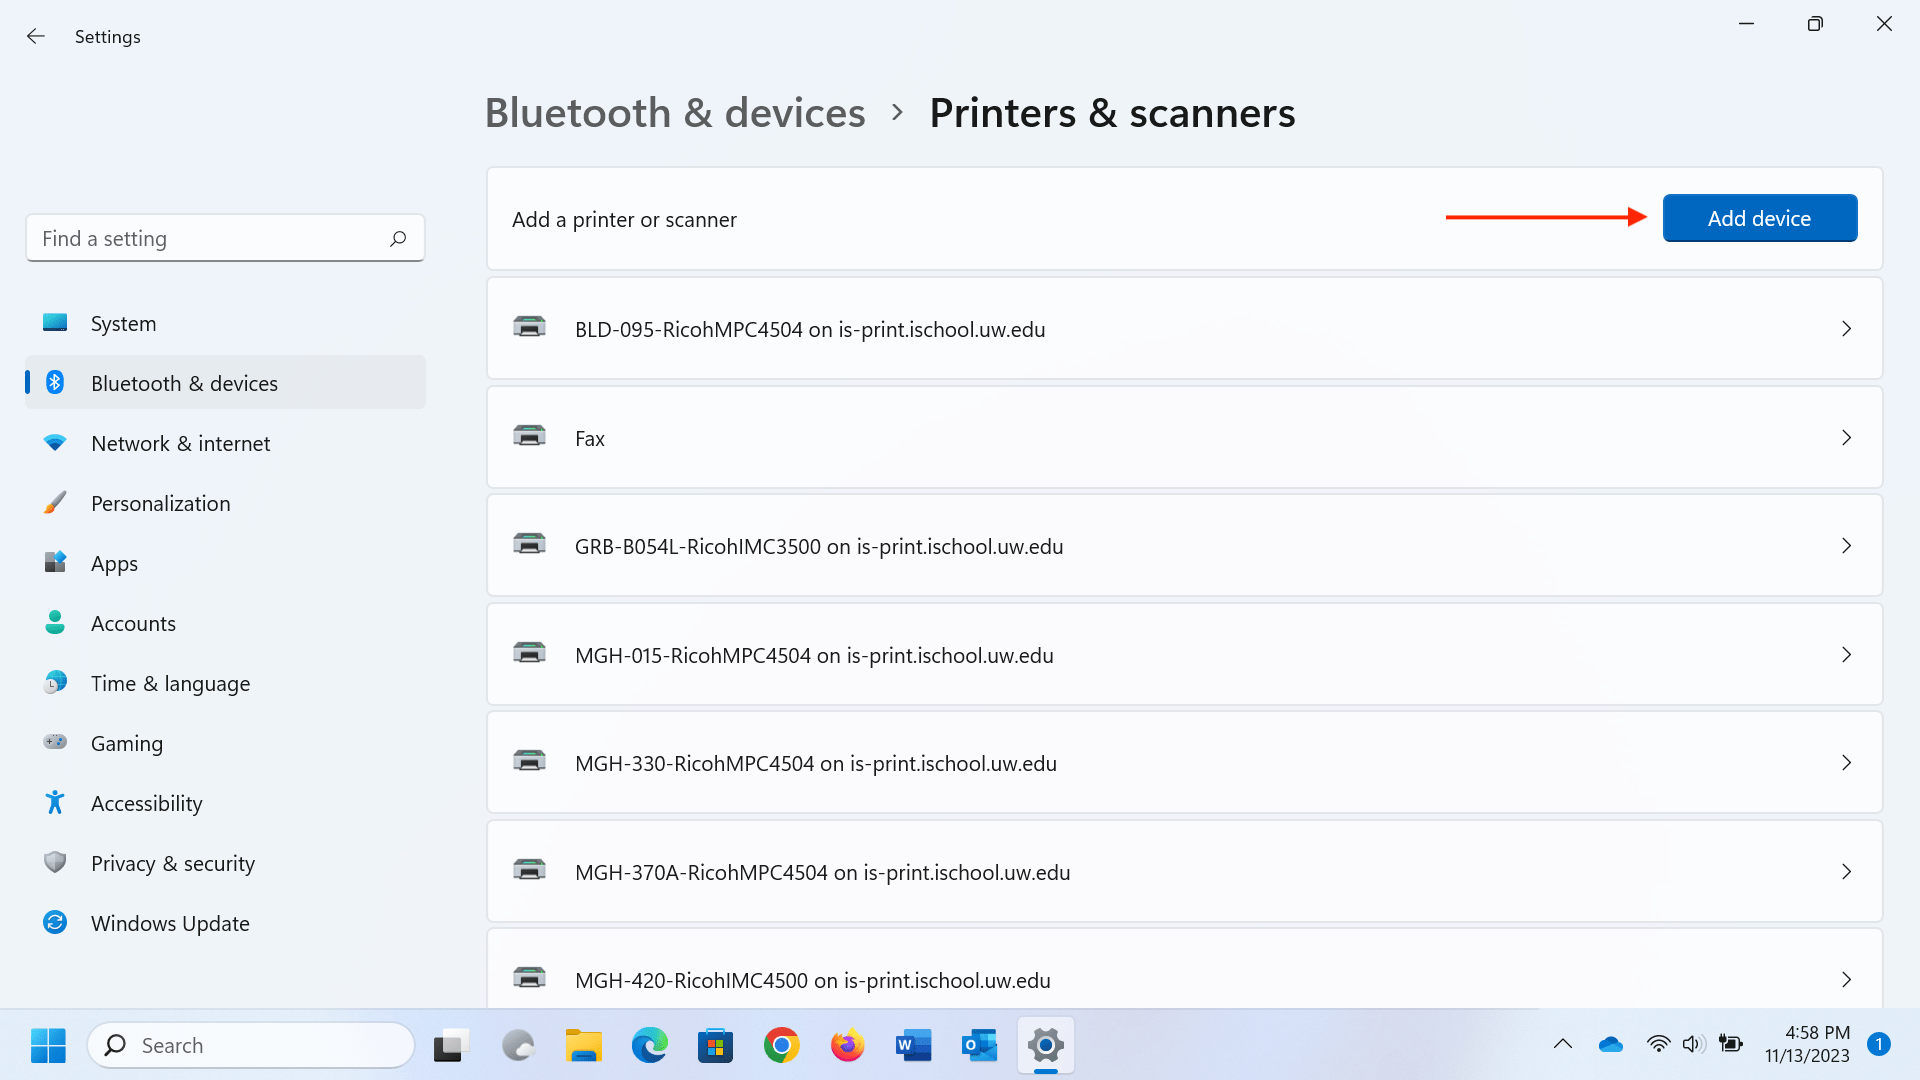
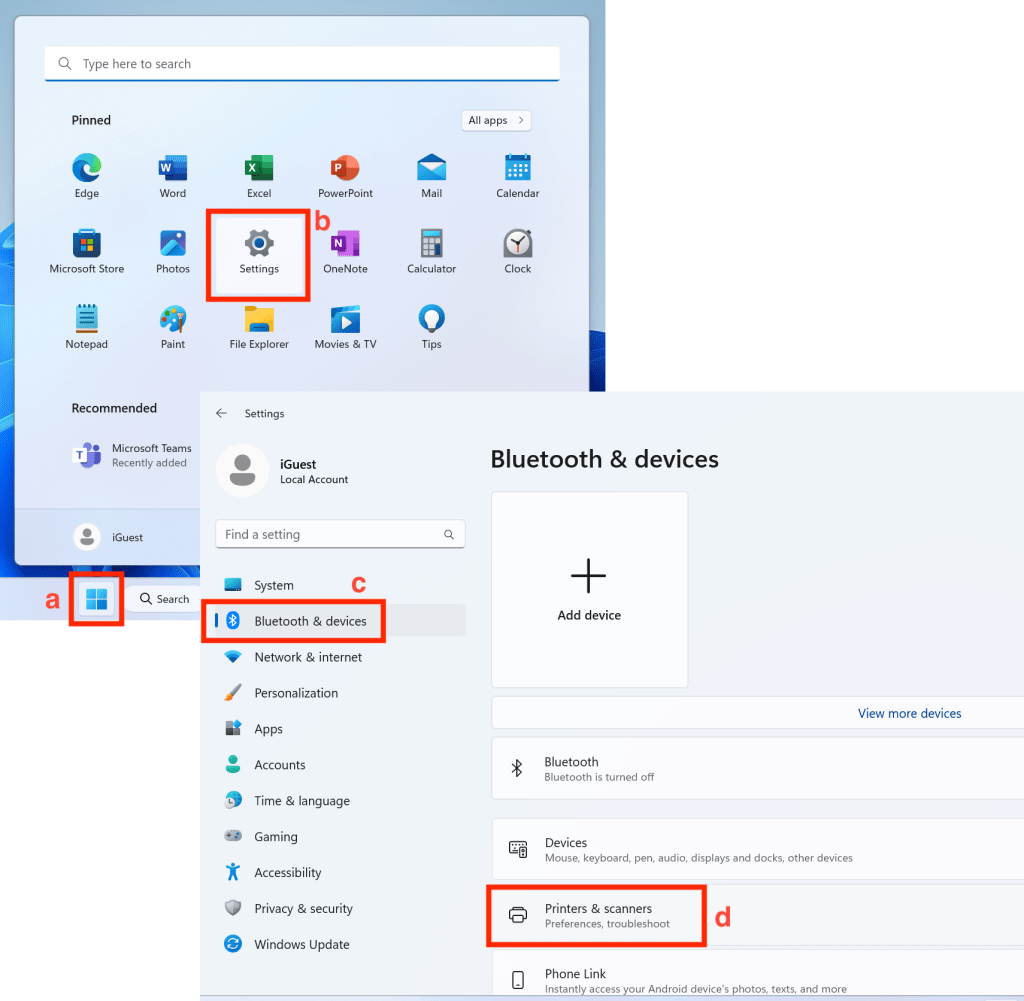
3. Click the Windows icon (a). Click Settings (b). Click Bluetooth & devices (c). Click Printers & scanners (d).
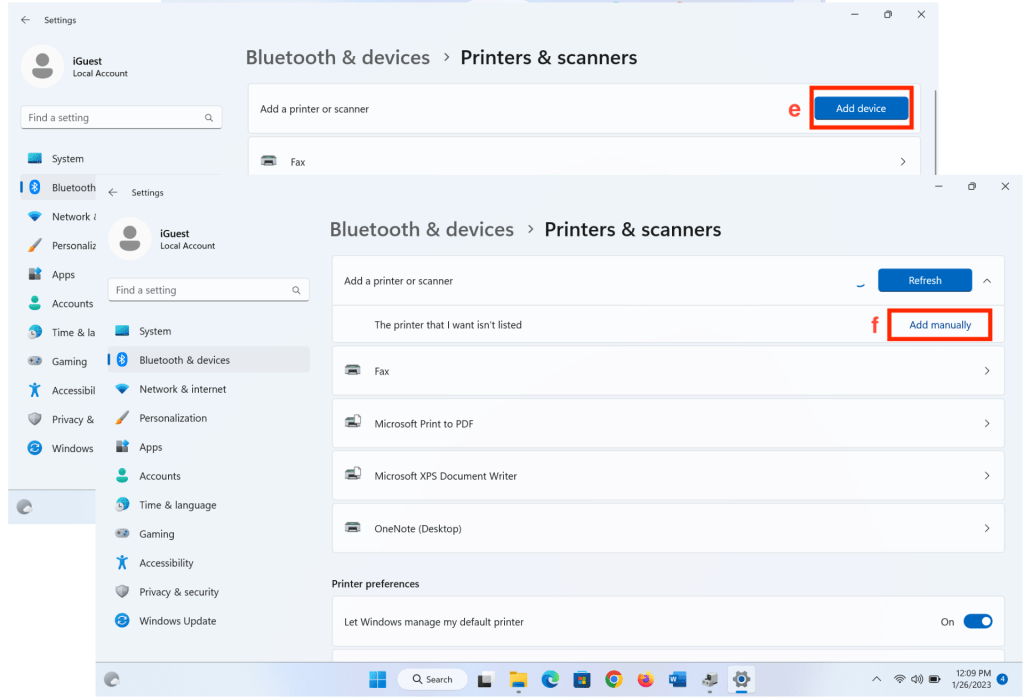
Click Add device (e). The computer will look for available printers. After a few seconds, it will likely fail to find any printers. Click the button that appears: Add manually (f).
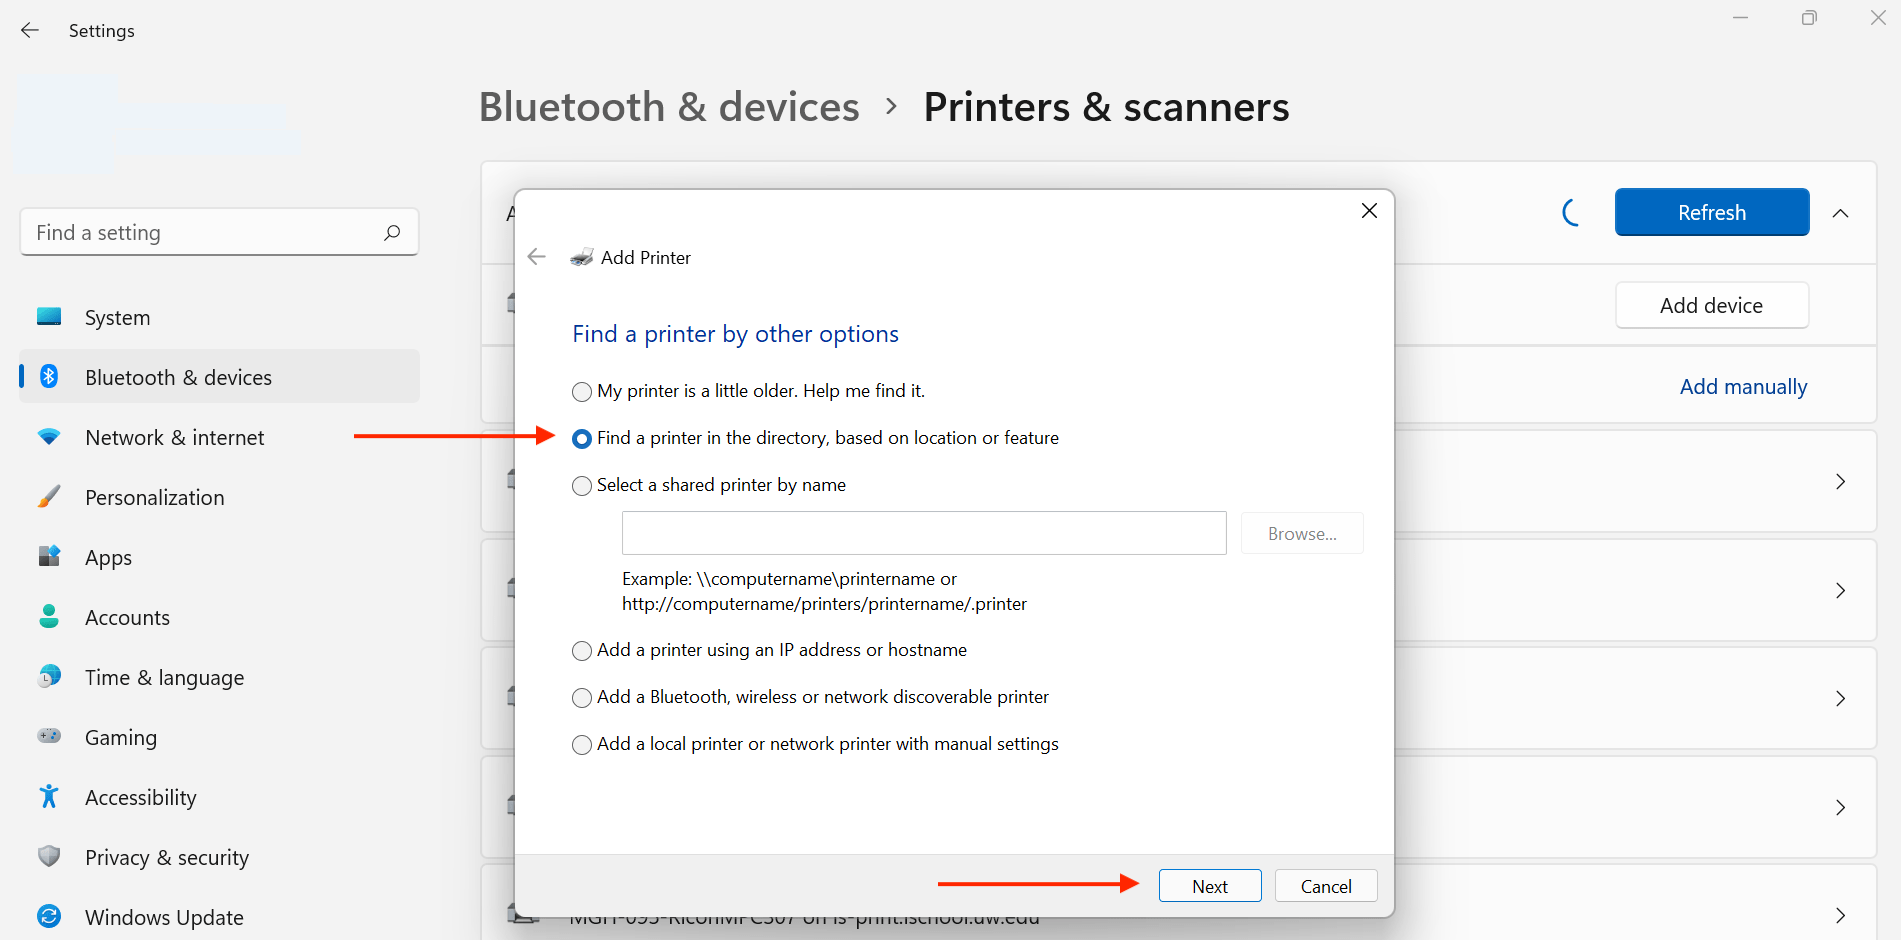
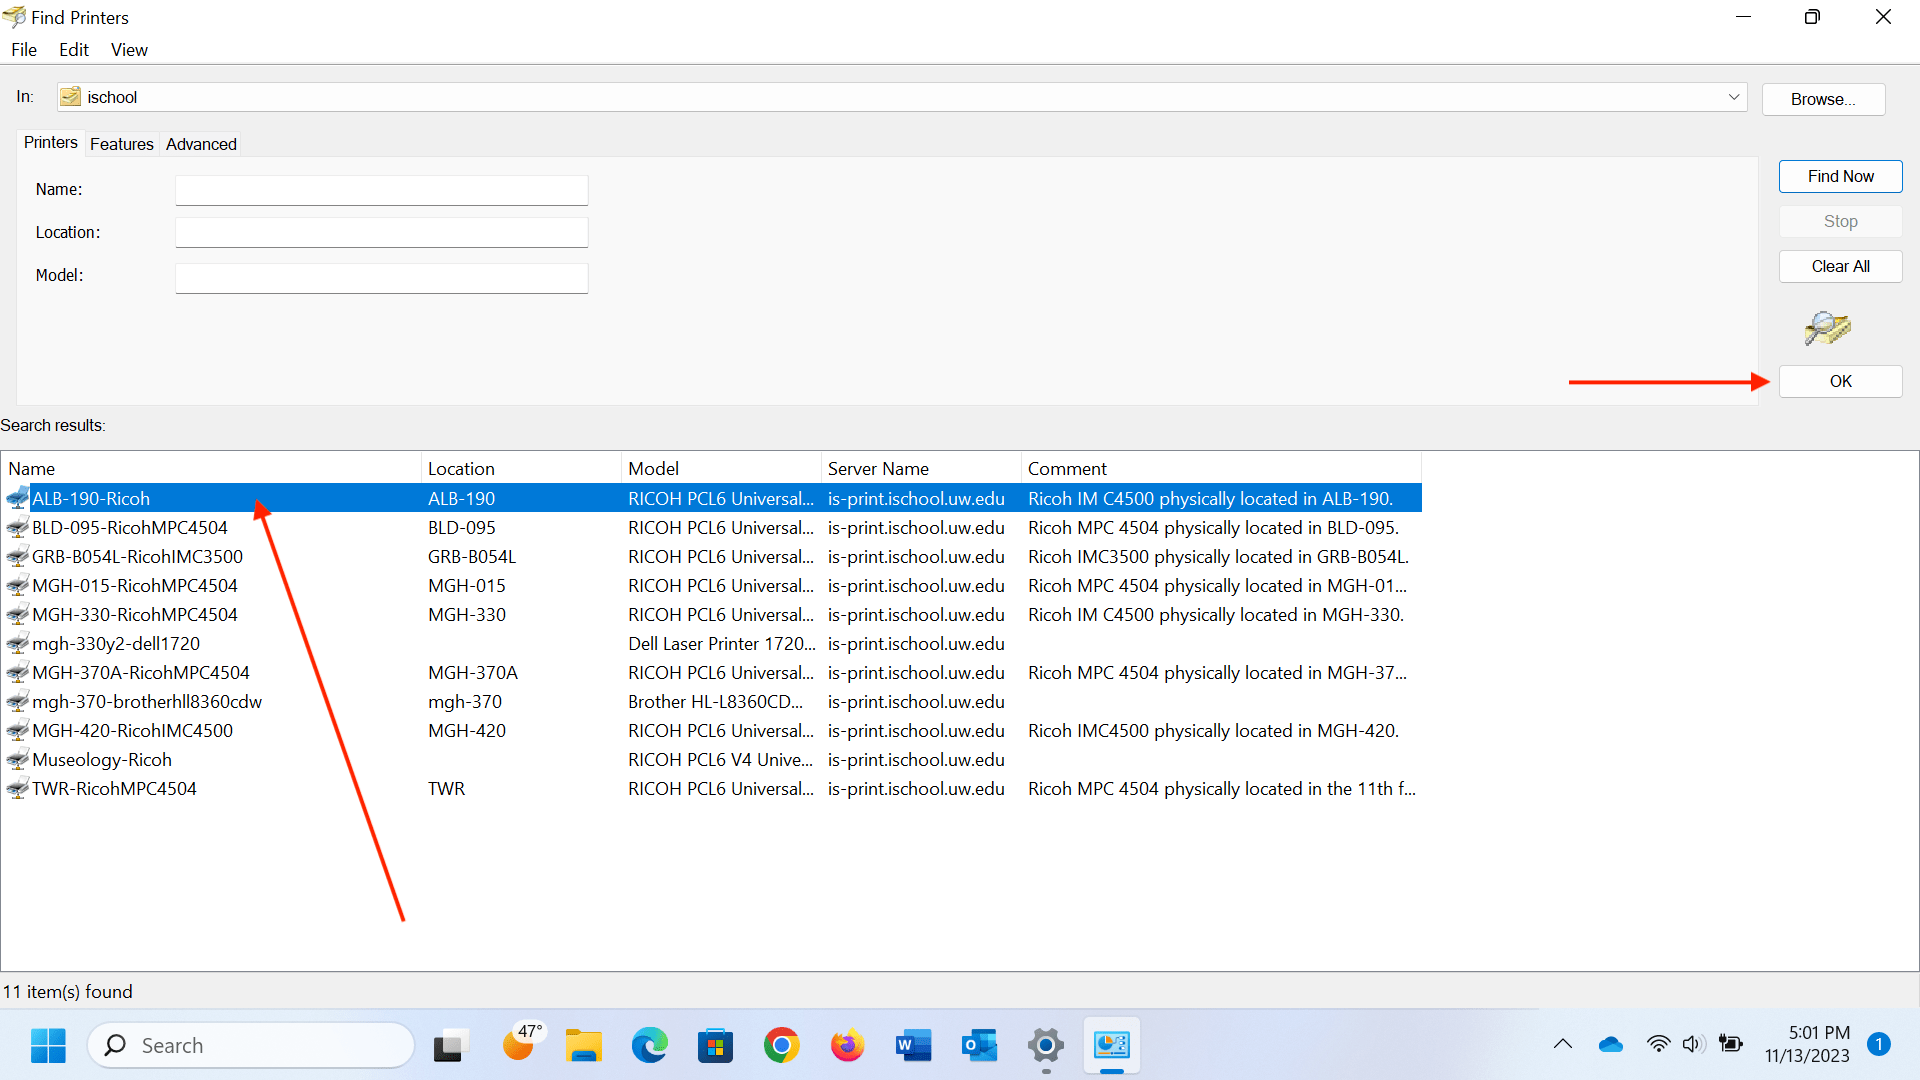
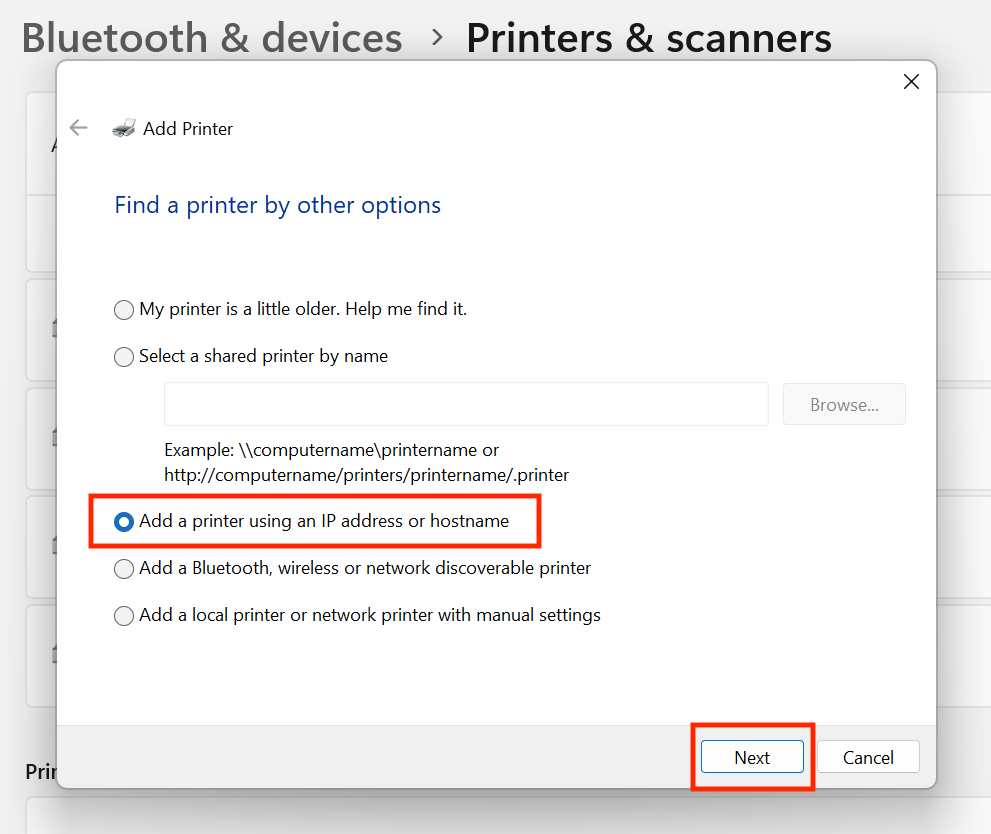
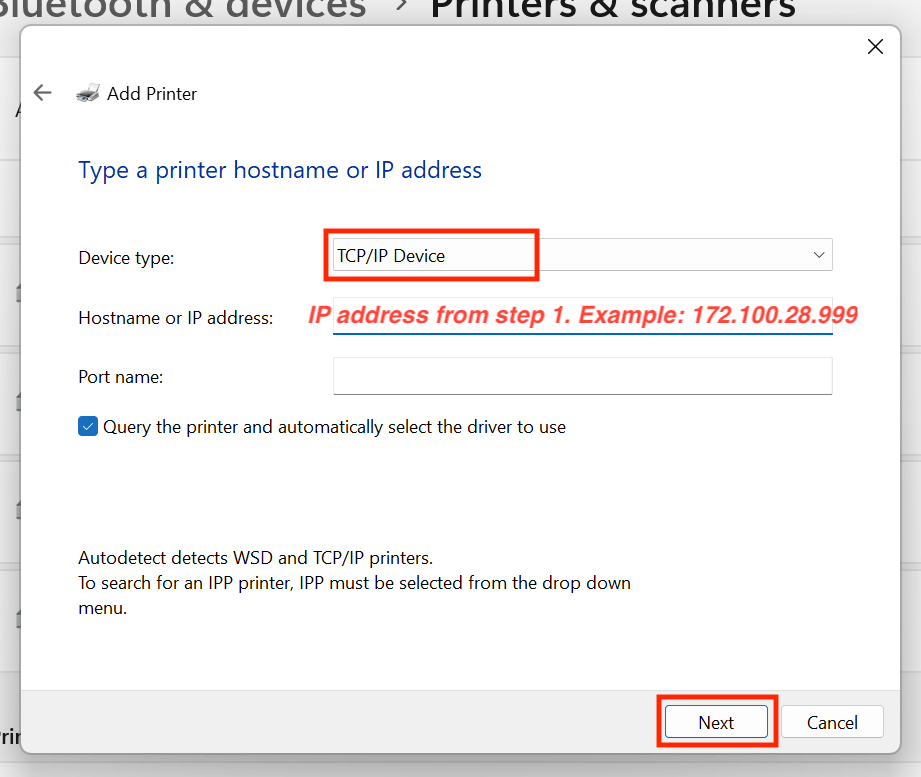
4. Select Add a printer using an IP address or hostname option. Click Next.
5. Change the Device type: to TCP/IP Device. Type in the IP address you found in step 1 into the Hostname or IP address field. Click Next.
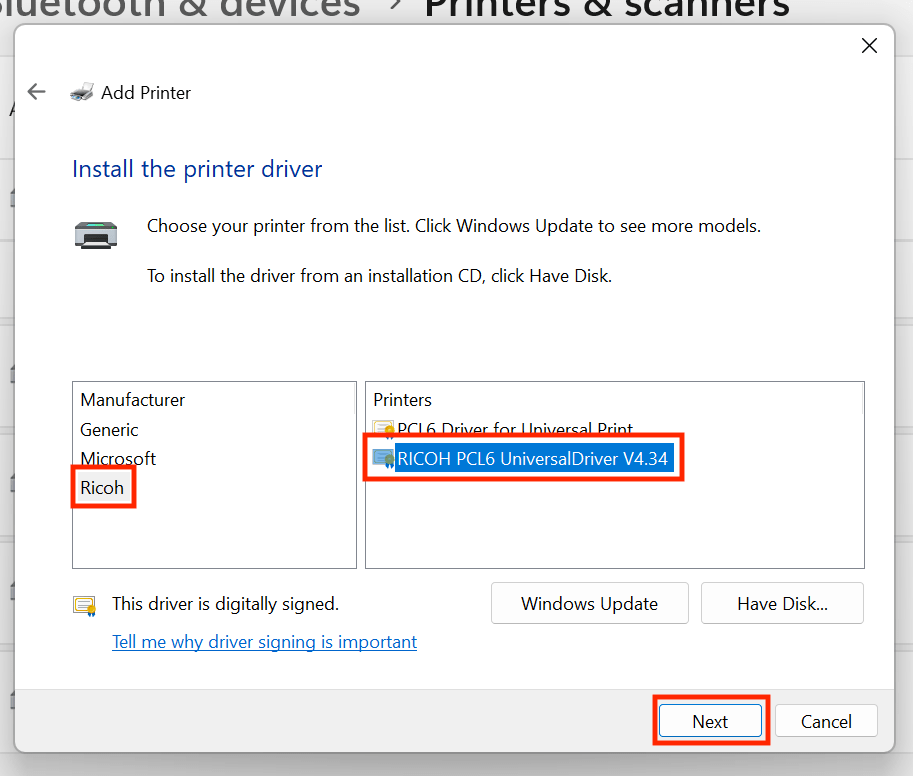
6. Select the “RICOH PCL6 UniversalDriver” printer driver. Click Next.
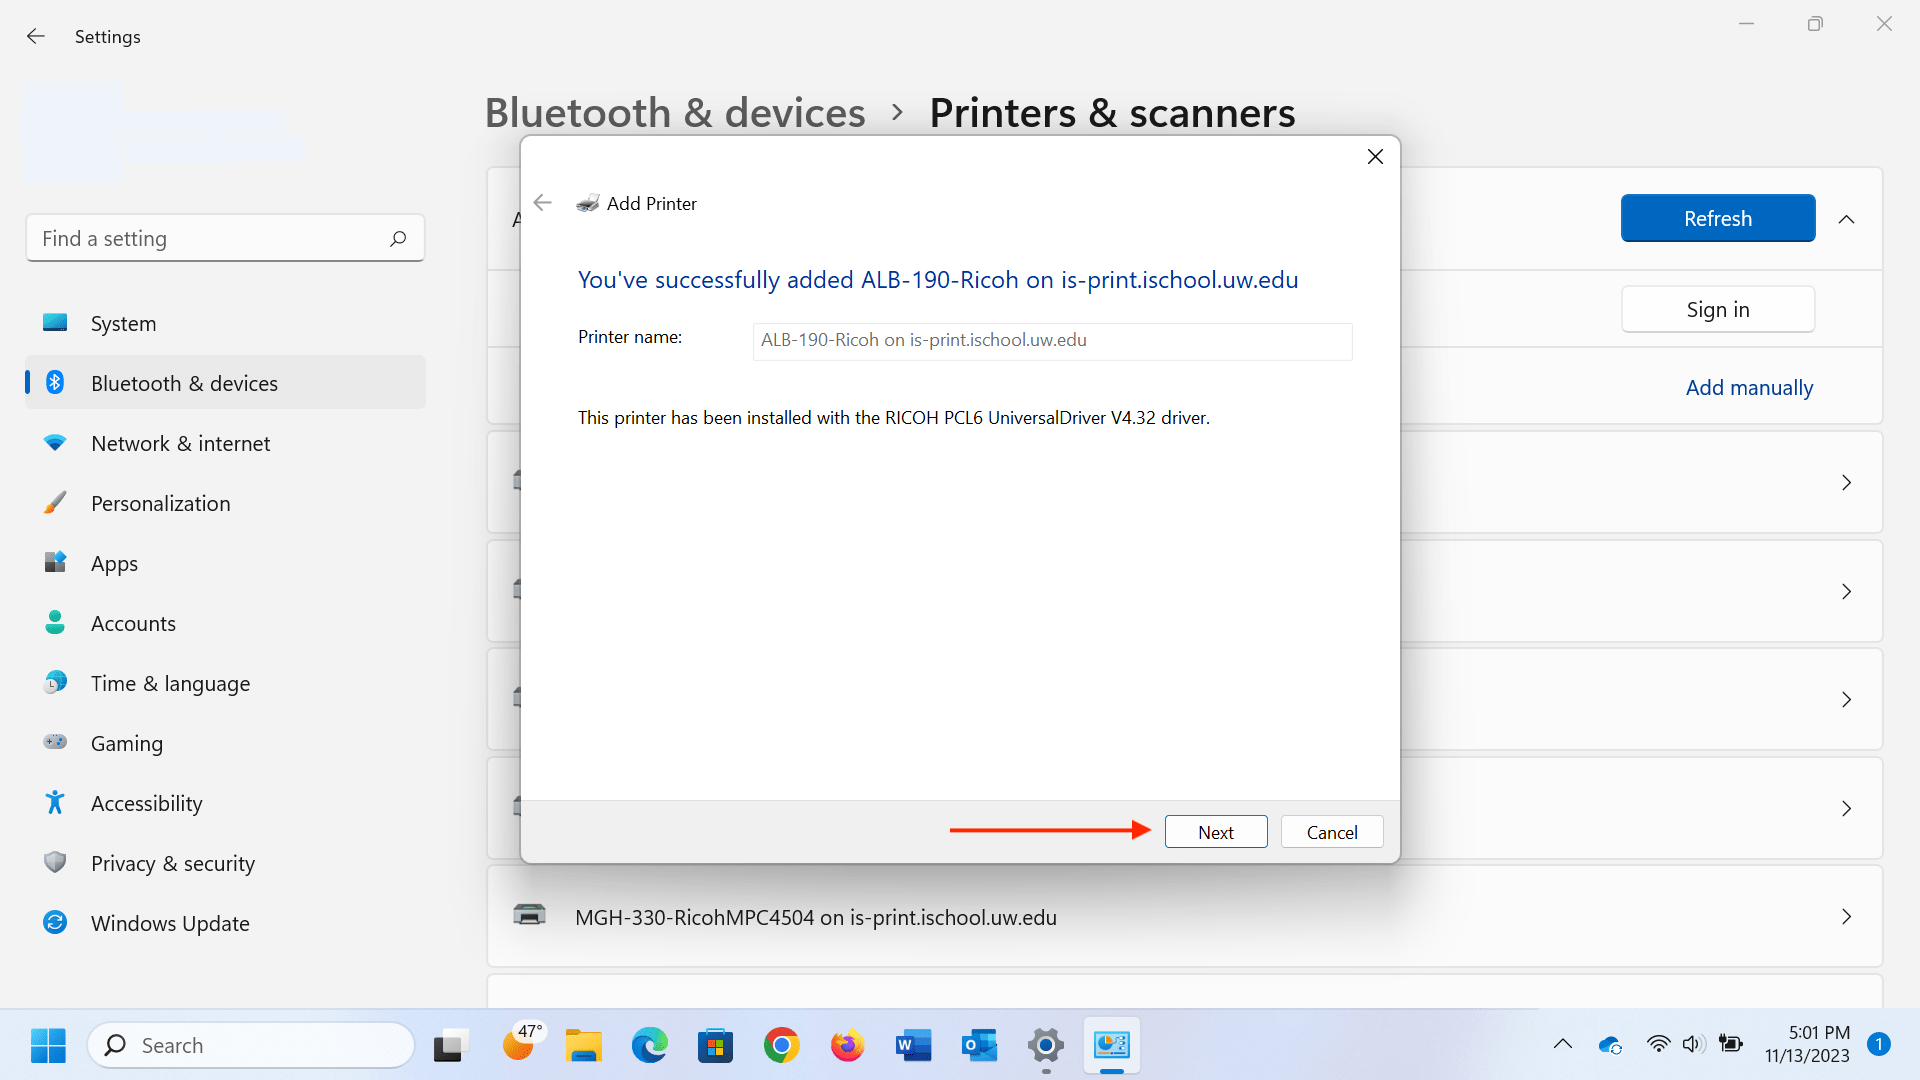
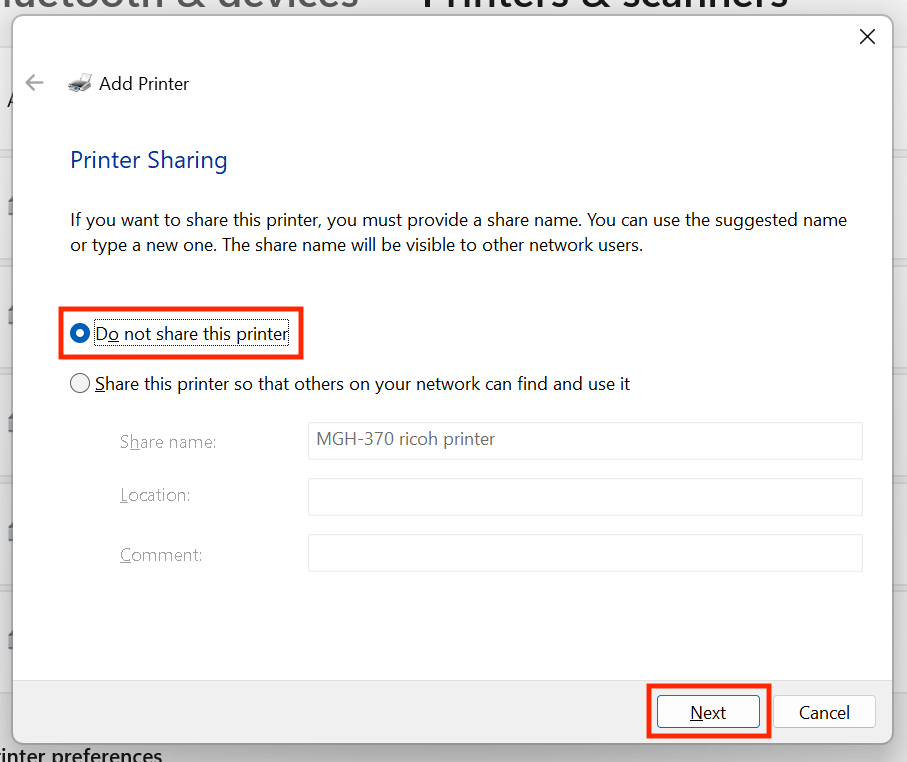
7. Type in a name for the printer. Click Next.

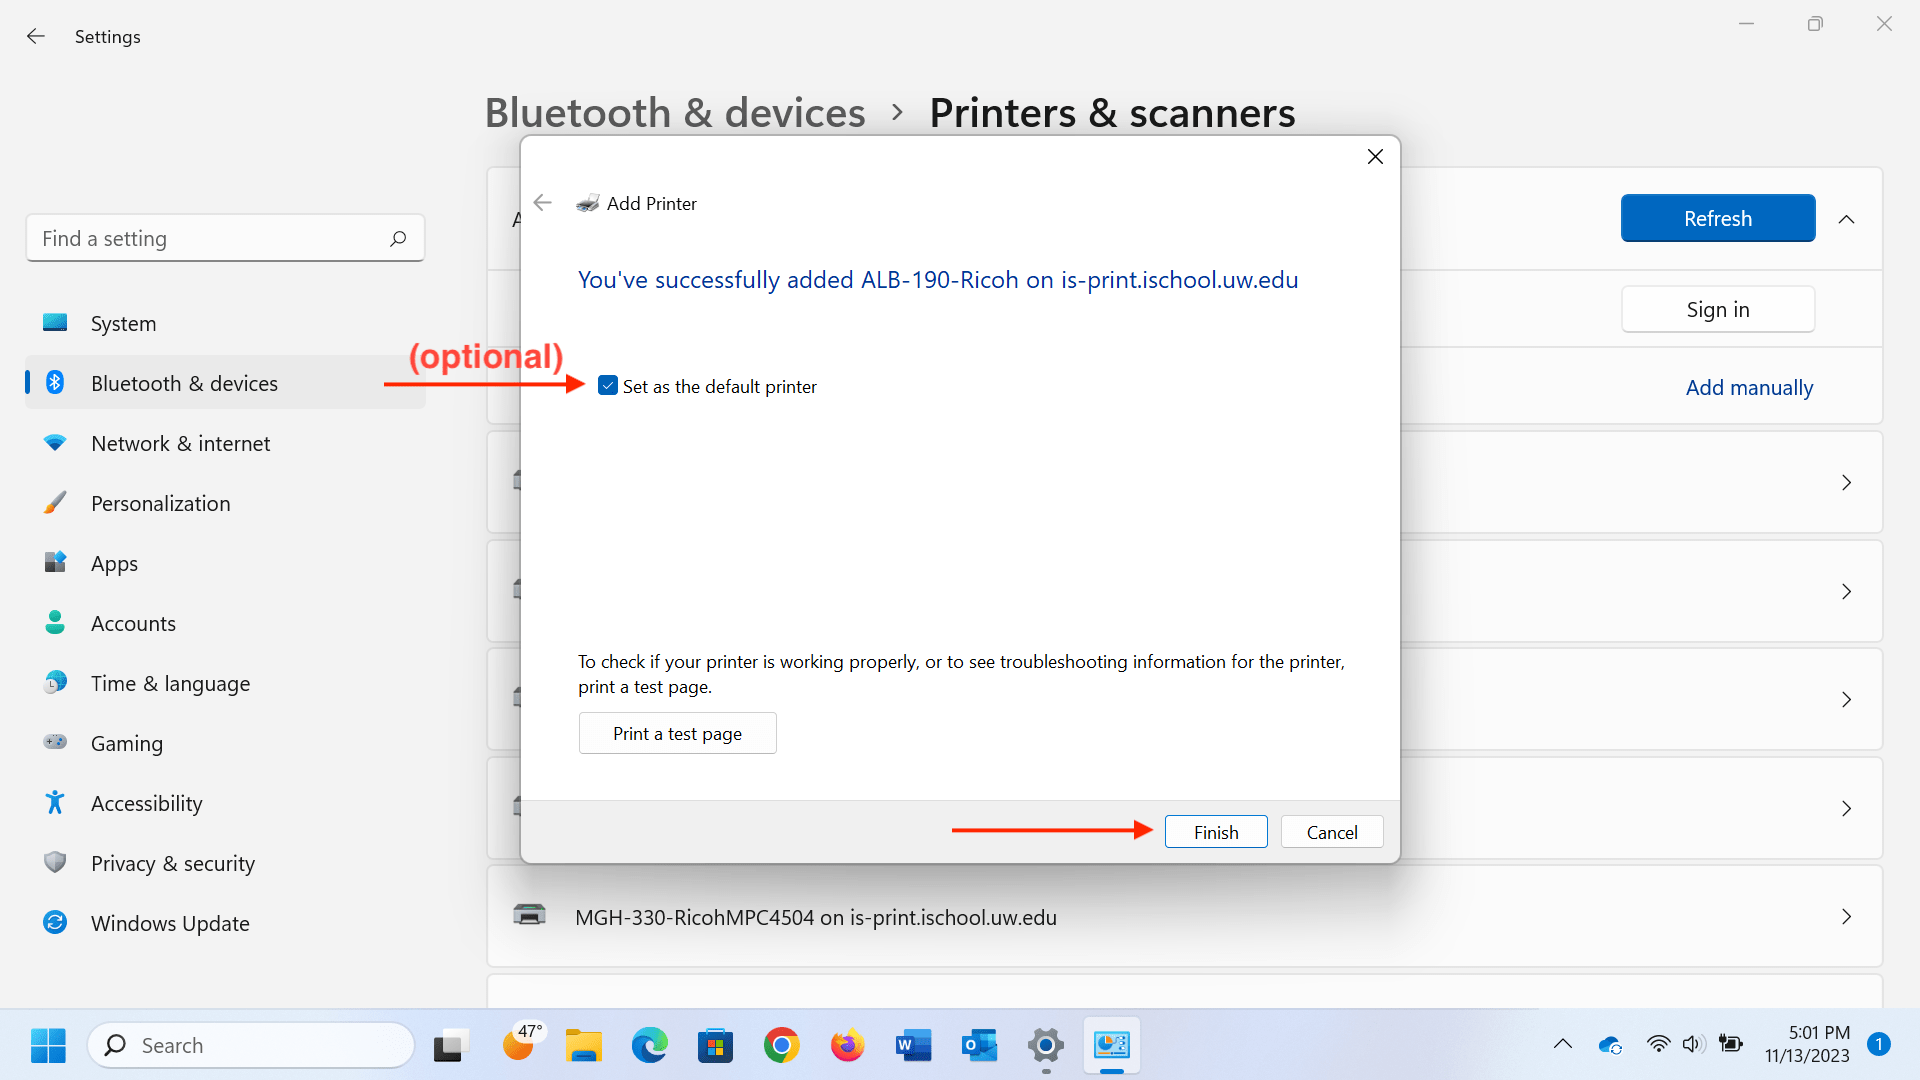
8. Select the Do not share this printer option. Click Next.
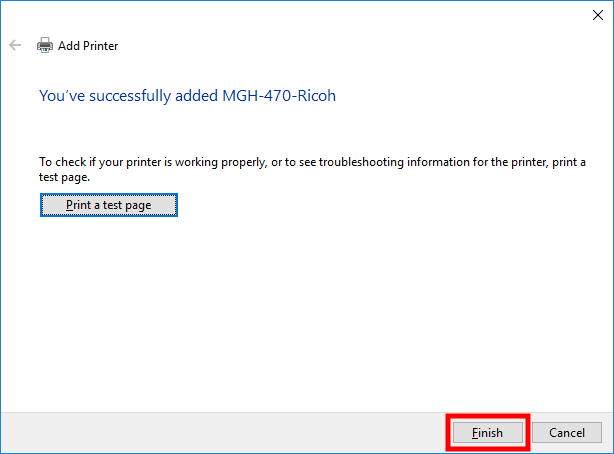
9. You should receive a “success” message. Click Finish. You should be able to print to the printer you just added.
macOS
1. Find the IP address and the make and model of the printer you would like to use. IP addresses should be labeled in plain sight on each printer. If you are unable to determine a printer’s IP address or make or model, contact the iSchool IT Help Desk.
2. Download and install the latest printer driver for the make and model printer you identified in step 1. In general, you will be looking for a Ricoh printer driver: https://www.ricoh-usa.com/en/support-and-download If you are printing to a different make or model printer, you will need to web-search for the correct printer driver to install on your computer. If you need help with this step, contact the iSchool IT Help Desk.
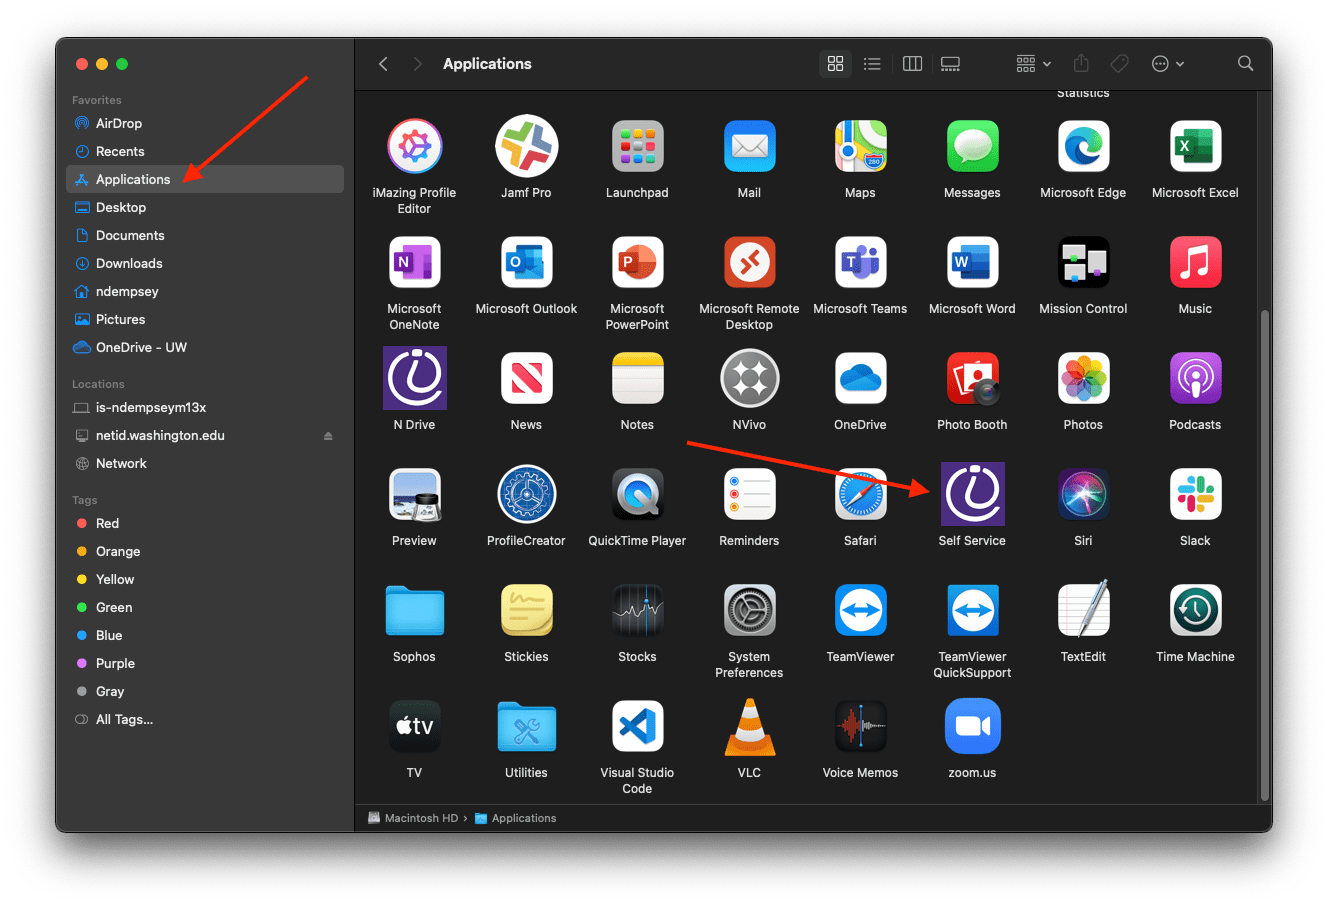
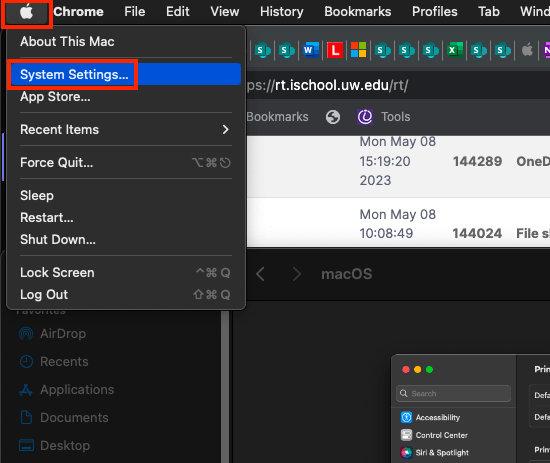
3. Click the top-left Apple icon. Click System Settings….
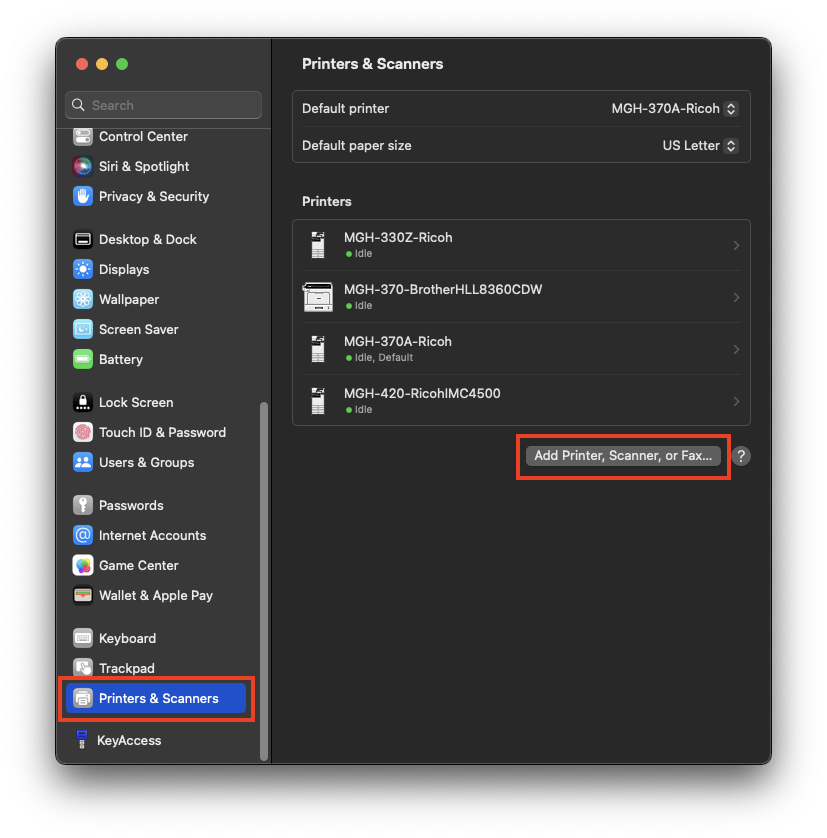
4. Click Printers & Scanners, click Add Printer, Scanner, or Fax….
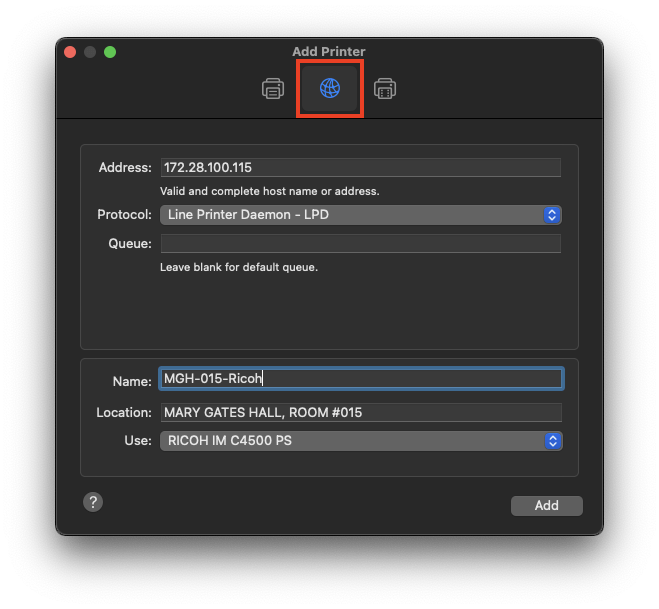
5. Click the IP button. Use the following settings:
Address: enter the IP address you found from step 1.
Protocol: Line Printer Daemon – LPD
Queue: leave blank
Name: can be anything you want, use something that makes it clear what it is
Location: gets filled in automatically
Use: *should* get selected automatically, if not, select the make and model of the printer
Click Add.
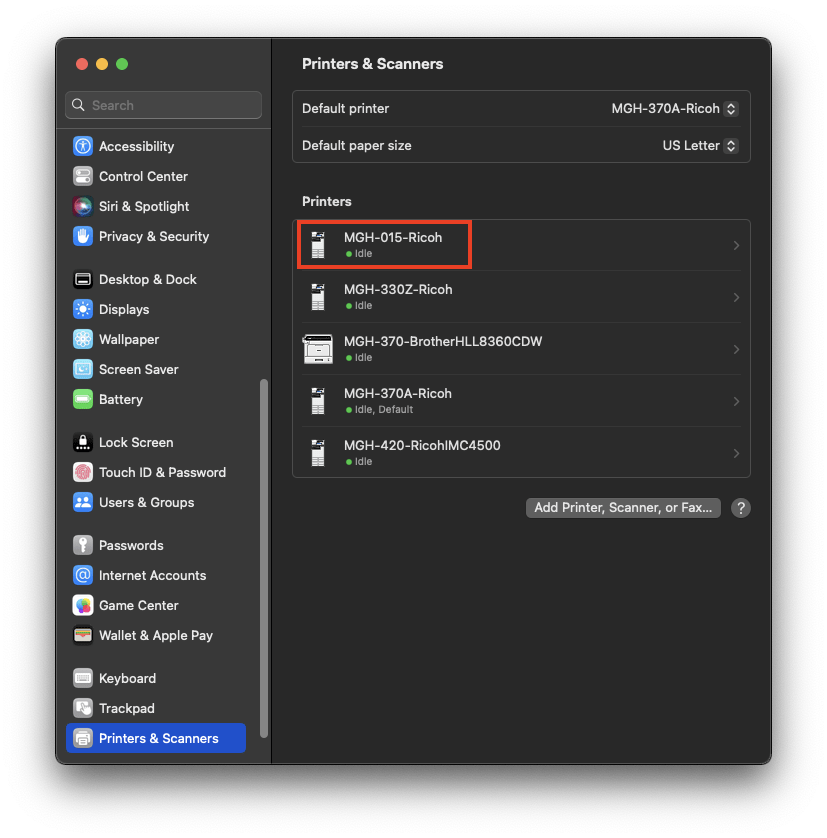
6. You should see the printer added with a green light indicating it is ready to print to.