These instructions will allow you to connect to a Microsoft SQL Server using Windows Authentication (your UW NetID and password) from a personal computer, with SQL Server Management Studio (SSMS).
If you need to connect to a SQL Server from an iSchool-provided faculty, staff, or lab computer follow the instructions on this page instead.
You might need these instructions if you are taking, teaching, or TAing a course that requires you to connect to a SQL Server and you want to connect from your personal computer.
SSMS is available as a free download, from this website: SQL Server Management Studio (SSMS)
If you are connecting to a SQL Server that is not on the public network, please connect to the Husky OnNet VPN.
How to connect to a SQL Server, using your UW NetID credentials, from a personal computer:
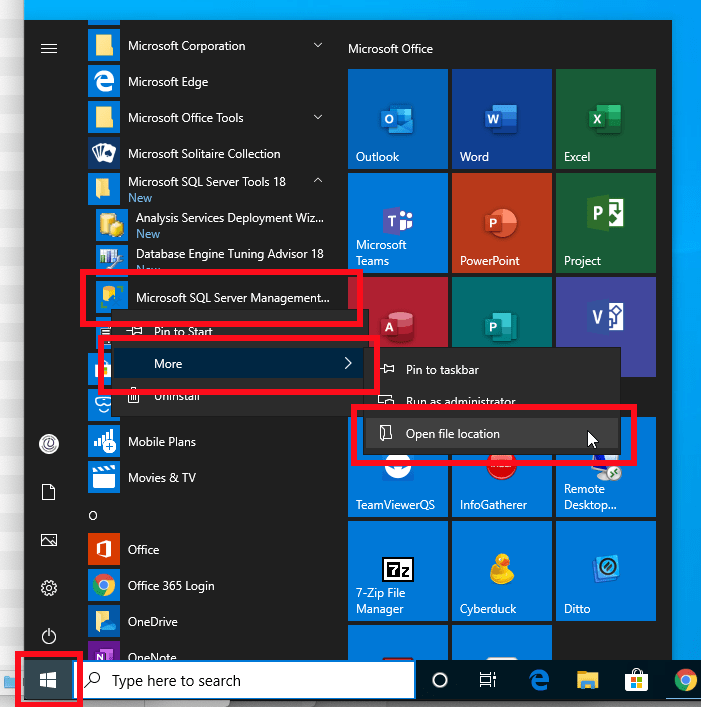
1) Click the lower-left Windows icon, under Microsoft SQL Server Tools, right-click Microsoft SQL Server Management, mouse over More, click Open file location
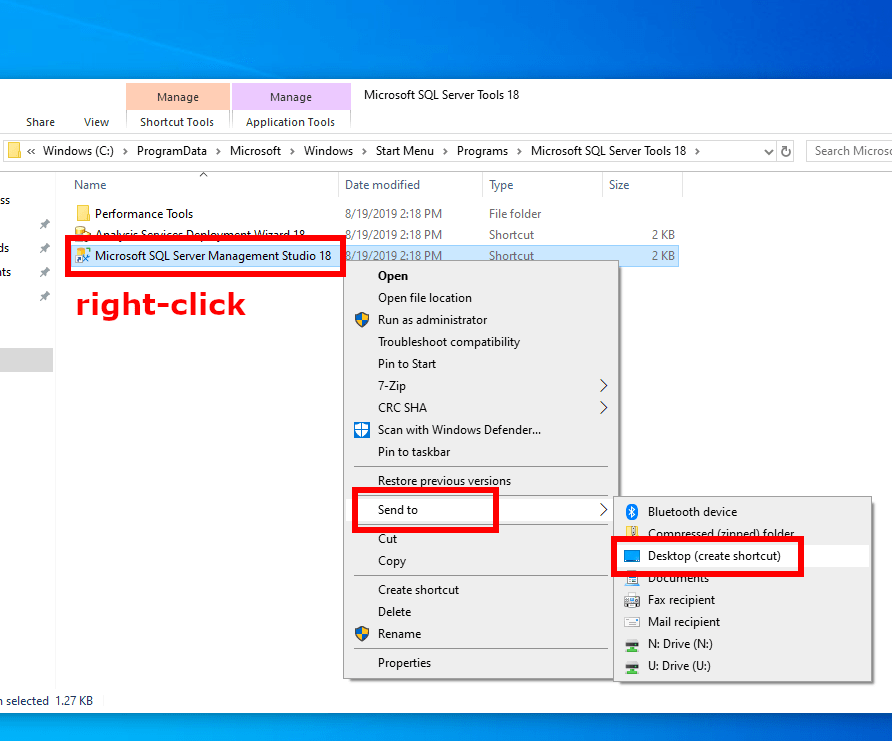
2) A new File Explorer window will open, right-click SQL Server Management Studio, mouse over Send to, click Desktop (create shortcut)
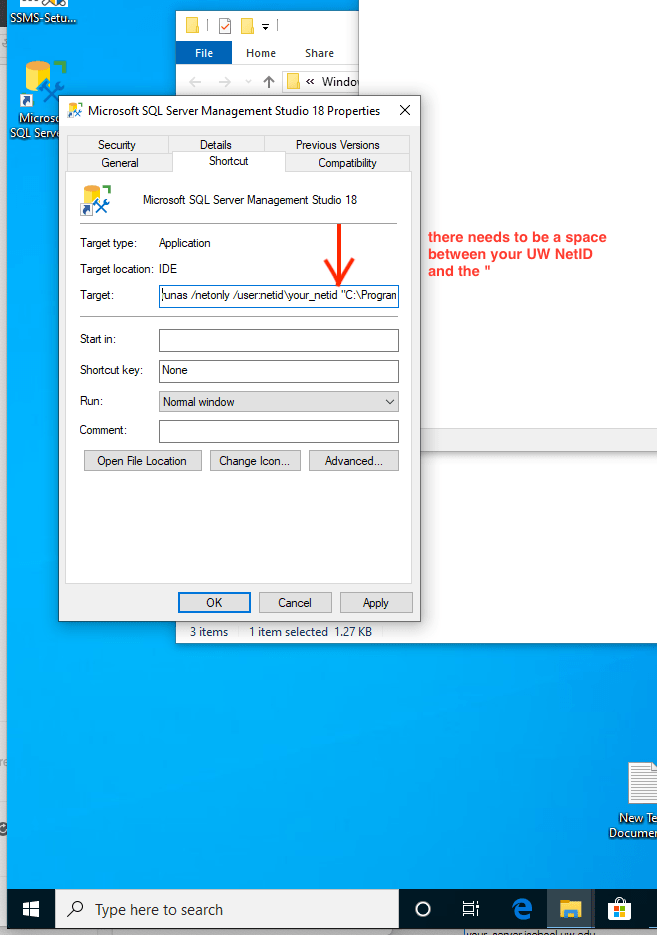
3) On your desktop, right-click the SSMS shortcut, click Properties
4) In the “Target” box, add the following to the beginning of what is already there:
runas /netonly /user:netid\your_UW_NetID
Note well: There needs to be a space between your UW NetID and the “.
Click OK
5) The icon of the shortcut on the desktop will change. This is expected.
Steps 1 – 5 are initial setup that only need to happen once.
6) Double-click the shortcut, a command window will open and ask for your UW NetID password, type it, then hit Enter or Return
SSMS should open with a “Connect to server” window. The “User name:” field will display your computer’s name and username, but you can safely ignore that. You will be connecting to the server, with the UW NetID credentials used when creating the shortcut above.
7) Enter the server address you want to connect to (your instructor needs to give you this information), click Connect


