

Adding a Shared NetID email account to Outlook
This page includes detailed directions to add a supplemental, Shared NetID email account to Outlook.
These instructions are for shared mailboxes you have been provided access to. A shared mailbox means the owner of the other mailbox has granted you access and you will use your own credentials to access the shared mailbox. You will not need the remote account’s password to access the mailbox. This is how most shared mailboxes are setup in the iSchool.
The following directions assume you have been granted permissions to access a Shared NetID’s email account. If these instructions dont work, or if you need permissions to access a Shared NetID’s email account contact the iSchool IT Help Desk.
Windows – Old Outlook Instructions
Windows – New Outlook Instructions
Old Outlook Instructions
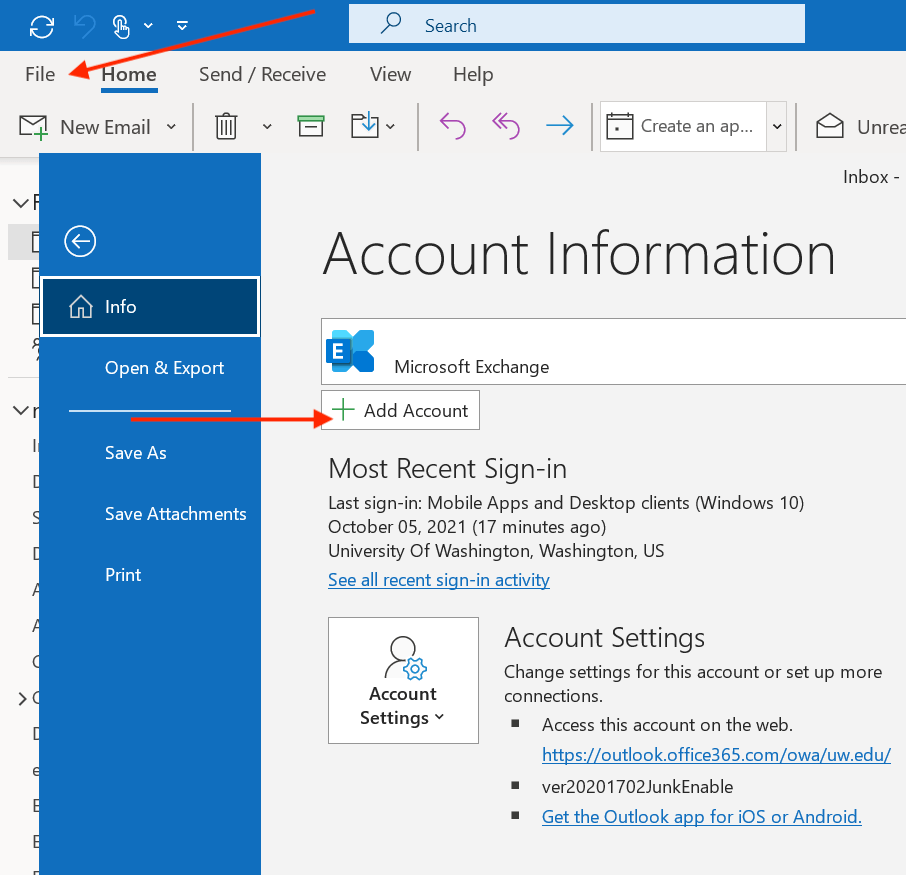
1. In the Outlook application, click File, click Add Account
2. Type in the Shared NetID email address (ihelp@uw.edu is used as an example), click Connect

3. Click Sign in with another account, enter your personal @uw.edu email address, click Next.

4. Use your UWNetID@uw.edu credentials at the “Sign in” prompt.
5. You should receive a “successful” message. Quit Outlook, wait a few seconds, start Outlook.
6. The Shared NetID email account will be added to Outlook. You should receive emails to the Shared NetID email account. You should be able to send emails from the Shared NetID email account.
New Outlook Instructions
- Make sure your mailboxes are visible in Outlook, if not click on the three vertical bars on the upper right to display your list of mailboxes. Then expand your loign@uw.edu account by clicking on the arrow next to your account.

2. Next Scroll down the folder list to the “Shared with me” folder.
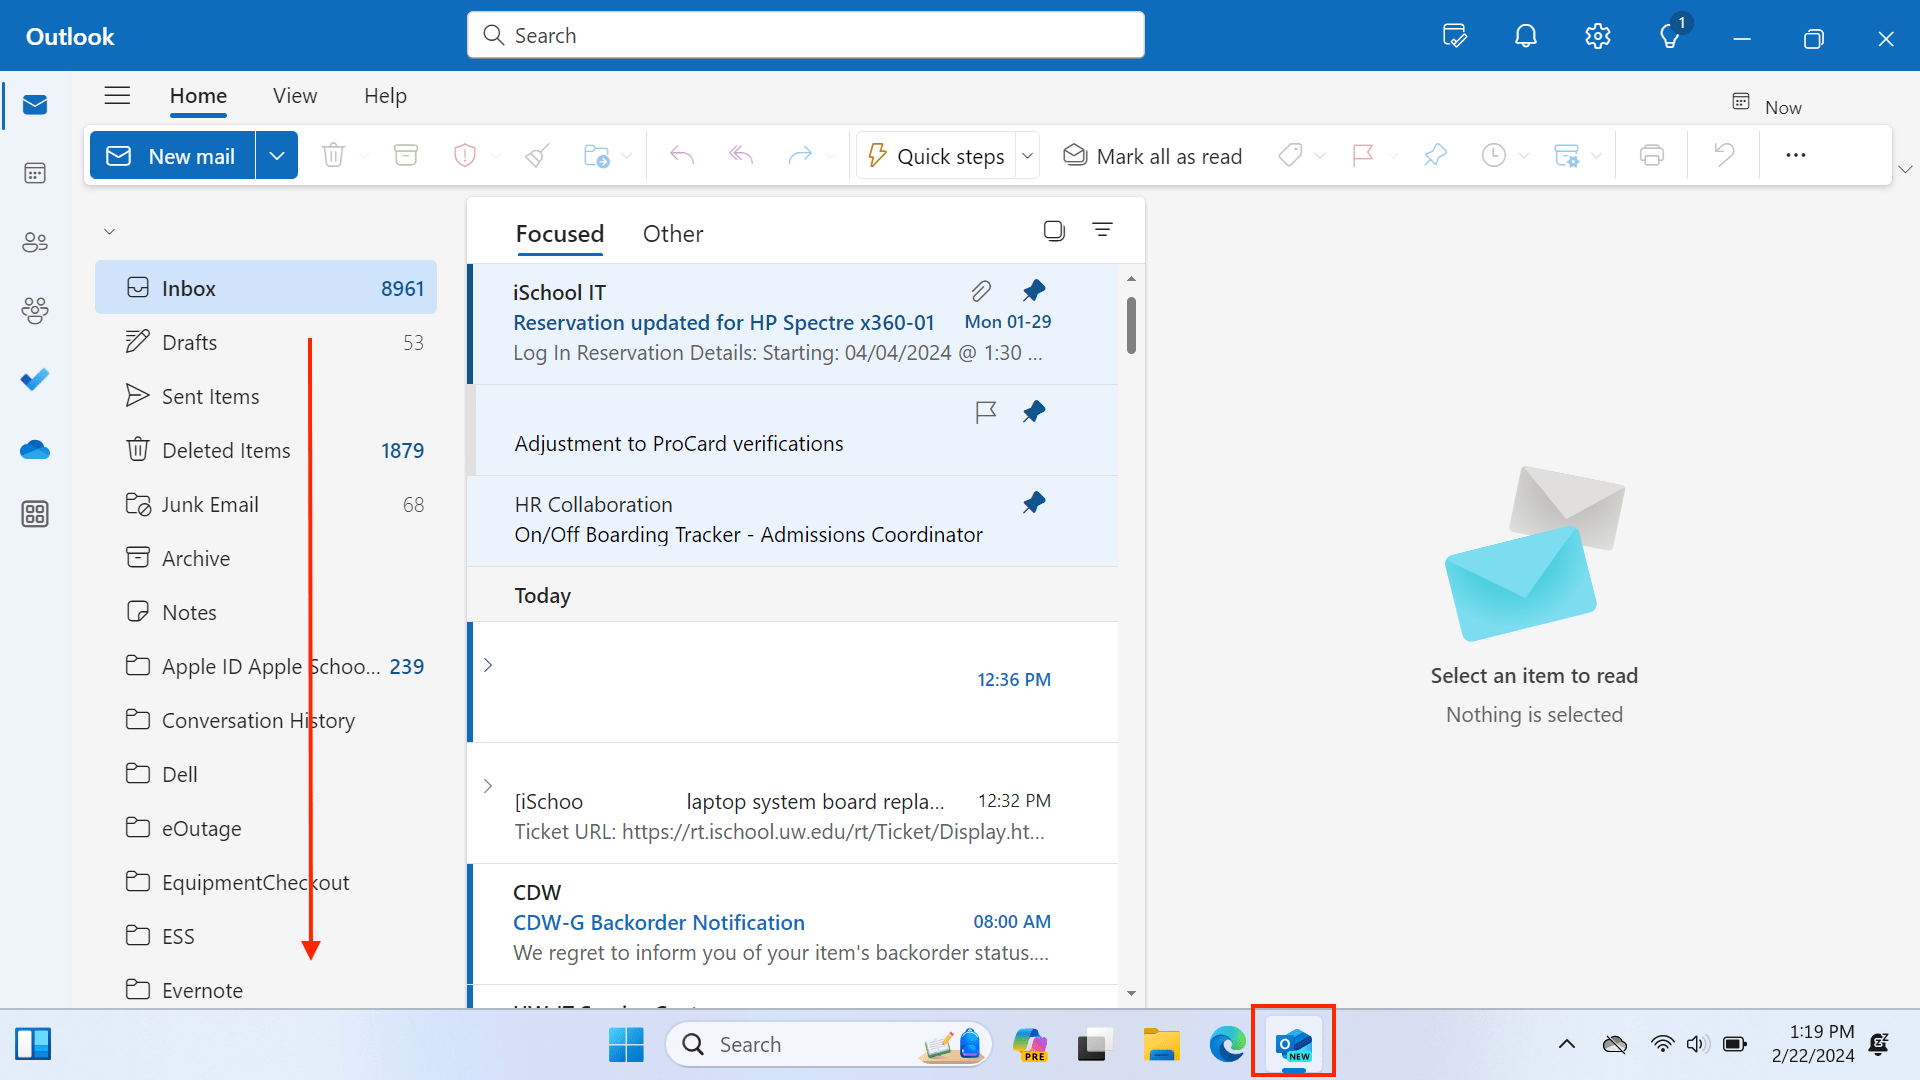
3. “Expand” the Shared with me folder to see if the shared mailbox is listed here.

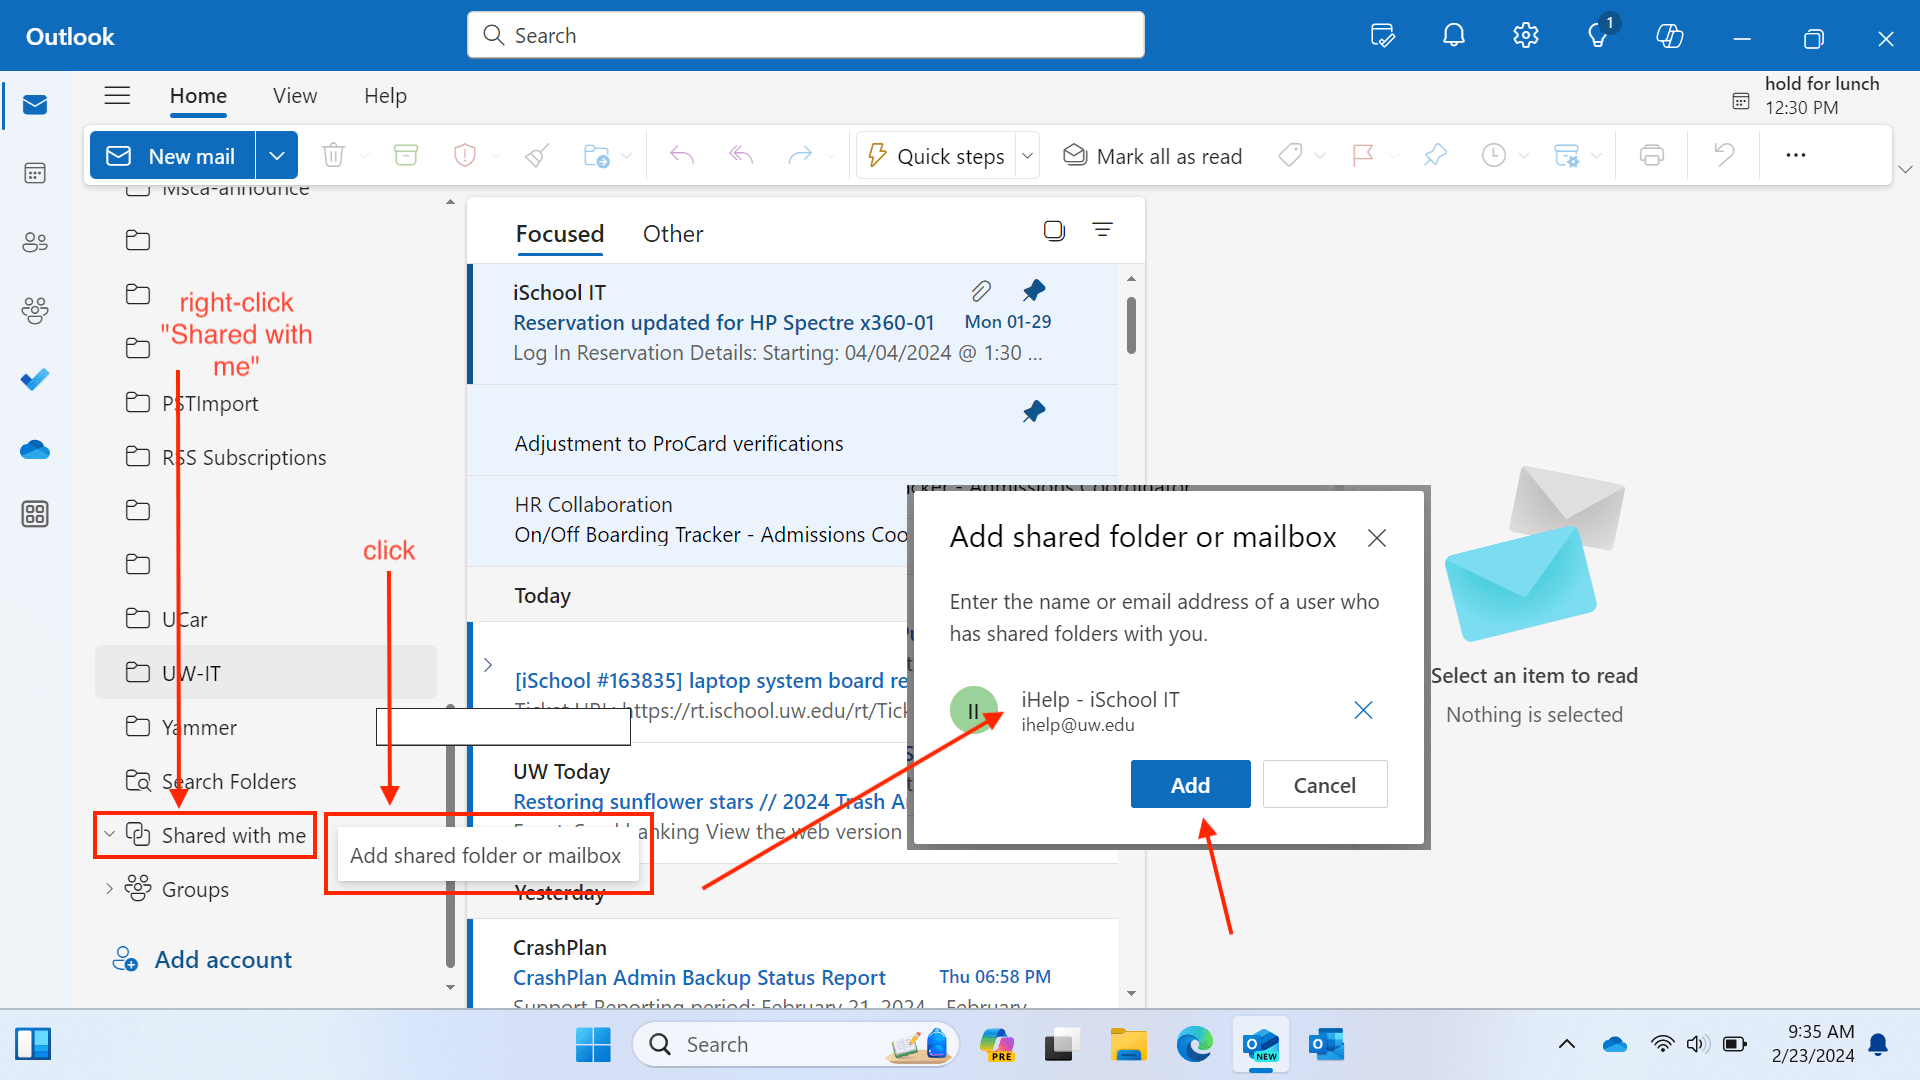
4. If you do not see any shared email accounts here, right-click the Shared with me folder. Click Add shared folder or mailbox. Type in the Shared NetID email address (ihelp@uw.edu is used as an example). Click Add.
Note: If you don’t have a “Shared with me” in your list of folders, right-click on the ellipses next to your <email>@uw.edu at the top of the folder list. You will find a “Add Shared folder of mailbox” as an option there as well and follow the same instructions.
macOS Instructions
1. In the Outlook application, click File, mouse-over Open, click Shared Mailbox….

2. Type in the Shared NetID email address (ihelp@uw.edu is used as an example). Click Add.

3. After a few seconds the Shared NetID email account should appear in Outlook. You should receive emails to the Shared NetID email account. You should be able to send emails from the Shared NetID email account.

Outlook on the web
There are two ways to add a shared mailbox. The first opens the mailbox within your account, preserving your personal settings. This has the other mailbox appear in your account.
The other will open the mailbox in a new window and keep and its specific settings (categories/tags). This is better suited if you are interacting with a high volume shared mailbox. In a sense, this drops you into the other account.
To open a mailbox in your account, preserving your personal settings:
In this view, the other mailbox and calendar appear under your account, when you send an email or make a calendar reservation, you will need to select the appropriate from address or calendar.
1. Sign into Outlook on the web.
2. Right-click the word Folders, click Add shared folder or mailbox.

3. Search for the Shared NetID email address (ihelp@uw.edu is used as an example), click Open.

4. The Shared NetID mailbox will be available on the left as a new account as in the image below. You should receive emails to the Shared NetID email account. You should be able to send emails from the Shared NetID email account.

To open another mailbox in a new window, preserving its specific settings:
This is ideal for users interactive with high volume shared mailboxes where there is not ambiguity wich mailbox is being read, which account the mail is being sent from and under which account an event is being reserved.
1. Sign into Outlook on the web (this is going to open a new window)
2. Once you have logged in your account, click on you account in the top right of the page and select “Open another mailbox”

3. Search for a mailbox and click “Open”. This will open a new tab for this mailbox.
