Lenovo System Update

Lenovo System Update

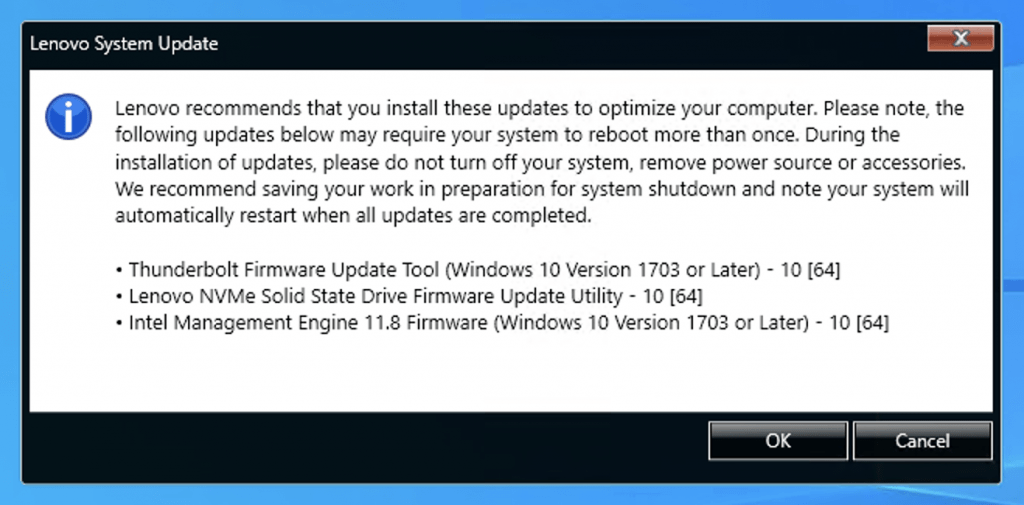
iSchool-issued Lenovo brand laptops come with an application named “Lenovo System Update” installed.

The Lenovo System Update application regularly runs in the background to install driver updates.

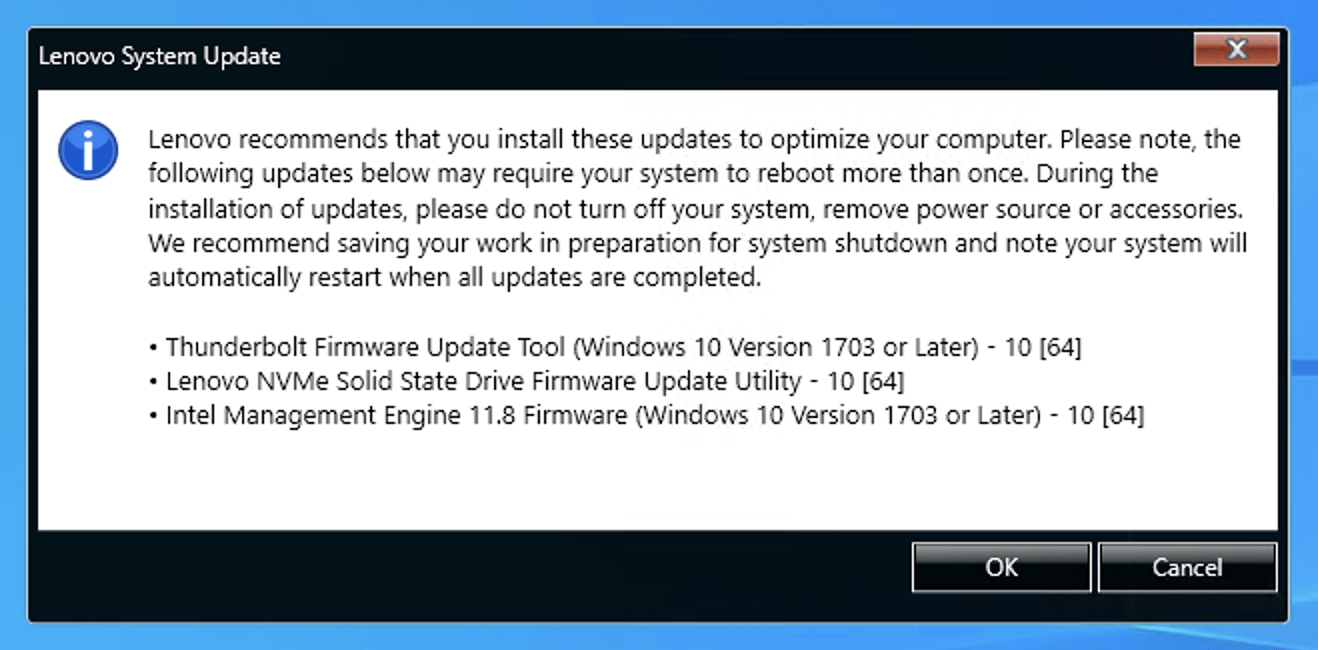
Every once in a while, you may be faced with a notification telling you updates that require a computer restart are available. See example message below.


If you see the message, follow the instructions to apply the updates. In general, you should apply the updates as soon as you are able. While you have the option of clicking “Cancel”, you will need to install the updates sooner or later.

While the Lenovo System Update application does run on a regular schedule, you have the option to run it on demand, to look for driver, BIOS, and firmware updates by following the instructions on this page:

Lenovo System Update driver, BIOS, and firmware updates search

Saramonic Blink500ProX | TX + TX + RXUC Wireless Mic – User Guide

The Saramonic Blink500 ProX | TX + TX + RXUC is an ultra-compact, lightweight, dual-channel wireless microphone system. The system includes two transmitters (TX) with built-in omnidirectional microphones, support for external lavalier mics, and a USB-C receiver (RXUC) connecting directly to compatible devices/a charging block. With a 328 ft (100m) operating range, 10-hour battery life per TX, and real-time monitoring, the Blink500 ProX is ideal for content creators, journalists, and professionals seeking high-quality, portable wireless audio system.


Powering On/Off

  • Manual Power:
    • Transmitter (TX): Press and hold the power button for 2 seconds to turn on/off.
    • Receiver (RX): The receiver requires a constant power source and must be plugged into a USB-C device to function.

LED Indicators

Charging:

  • Solid Red (TX Indicator): Charging in progress inside the case.
    • The Transmitter (TX) charges when placed in its designated charging slot inside the case.
  • Solid Blue (Front of Case): Indicates the remaining battery level of the charging case.
  • Blinking Blue Slowly (RX Indicator): Unpaired.
  • Blinking Blue Quickly (RX Indicator): Pairing in progress.
  • Static Blue (RX Indicator): Successfully paired.

The Receiver (RX) must remain connected to a USB-C device to function, as it has no internal battery.

Case Battery Detection Button:

  • A short press activates the power capacity indicator, displaying the remaining battery level.
  • When the case is closed, a short press will light up the indicator for 3 seconds before turning off.
  • The charging case can be charged via the USB-C port located at the back of the case.

Wi-Fi Pairing Status:

  • Paired Successfully: The Transmitter (TX) displays a Wi-Fi symbol when paired.
  • Unpaired/Disconnected: The Wi-Fi symbol disappears if the Transmitter (TX) is out of range or unpaired.

*Important: Ensure the Receiver (RX) is connected to a power source before pairing. The microphones will not establish a Wi-Fi connection if the receiver is not powered.*


Connecting to Devices

  1. The device can be used as a hands-free lapel microphone given its built-in mic or with the provided external lavalier mic for more focused audio capture.
  2. Ensure the transmitter (TX) is powered on and paired.
  3. Set Blink500 ProX as the audio input source in system settings.

Pairing Devices

The Blink500 ProX system comes pre-paired, but if manual pairing is required, follow these steps:

On the Transmitter(s) (TX):

  1. Press and hold SET to access the menu.
  2. Use the “+” or “–” buttons to navigate to Pair Setting.
  3. Long press SET, select Yes, and confirm.

On the Receiver (RXUC):

  1. Connect the receiver to an Android smartphone, tablet, computer, or any other USB-C device.
  2. Choose the output mode:
    • Mono (M): Both transmitters’ audio is recorded in one channel.
    • Stereo (S): Each transmitter’s audio is recorded separately in left and right channels.
  3. Insert the included pairing pin into the small pinhole on the receiver and hold for 3 seconds.

Pairing will complete within 10 seconds, and the receiver’s LED indicator will turn solid blue, confirming a successful connection.


Noise Cancellation

The Blink500 ProX does not have a dedicated noise cancellation mode, but users can improve audio quality by:

  • Adjusting Gain Levels:
    • Use the “+” or “-” buttons to set the TX input gain between 0 to 6.
    • Reducing the gain can help minimize background noise.
    • If all volume indicators turn off, the microphone is muted.
  • Using an External Lavalier Microphone:
    • Plugging a lavalier mic into the TX helps focus audio capture and reduces background noise.

Battery Life

  • Built-in Battery Life (Transmitter – TX): Approx. 10 hours
  • Receiver (RX): Requires continuous power to function.

Additional Features

  • Microphone Options:
    • TX units have built-in omnidirectional microphones.
    • Supports external lavalier microphones (3.5mm input, included).
  • Operating Range:
    • Up to 328 ft (100m) in open space.

For detailed setup and troubleshooting, refer to the official Saramonic Blink500 ProX User Manual.

Set up iSchool issued macOS computer

Set up iSchool issued macOS computer

The following steps need to be done to set up an iSchool-issued macOS computer. Please contact the iSchool IT Help Desk, 206-616-3086 or ihelp@uw.edu, if there are any questions or issues during this setup process.

This process could take around 30-45 minutes or more to complete.

(The following screenshots are a reference based on the time of writing. The actual screens and options you see and click through are subject to change at any time per Apple macOS updates.)

1) Plug in the power adapter if the computer is a laptop. Turn on the computer.

2) Select language, click the forward-arrow.

3) Select your country or region, click Continue.

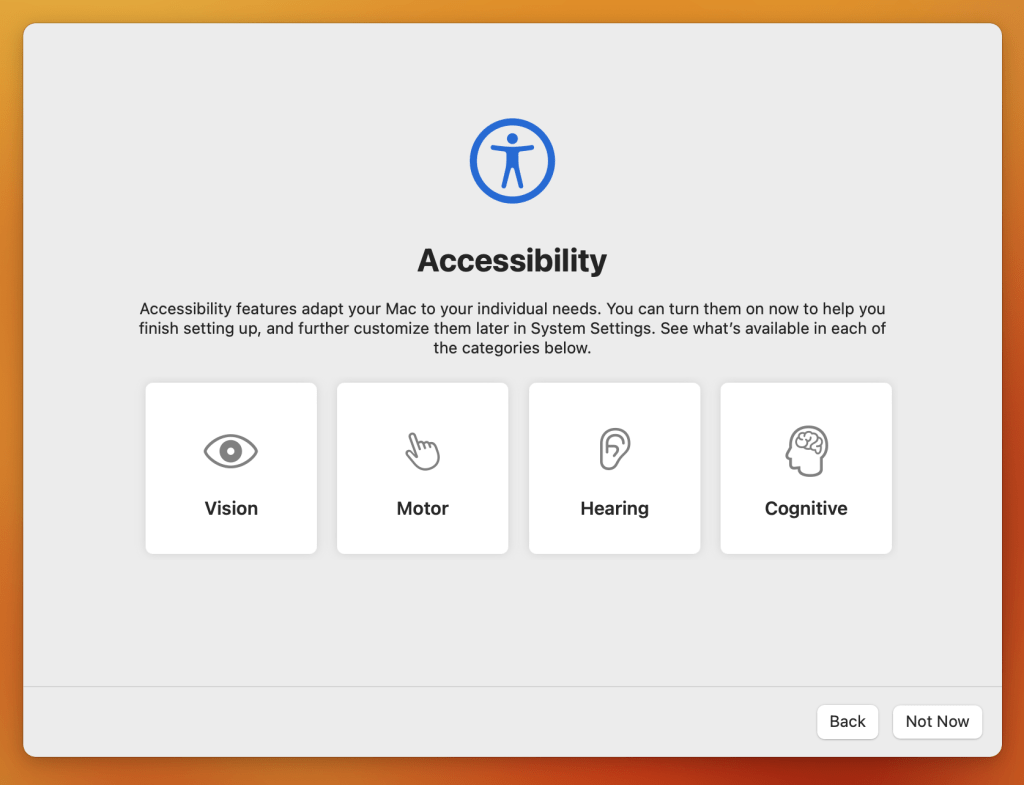
4) Select and adjust any or all accessibility features or click Not Now to set up later.
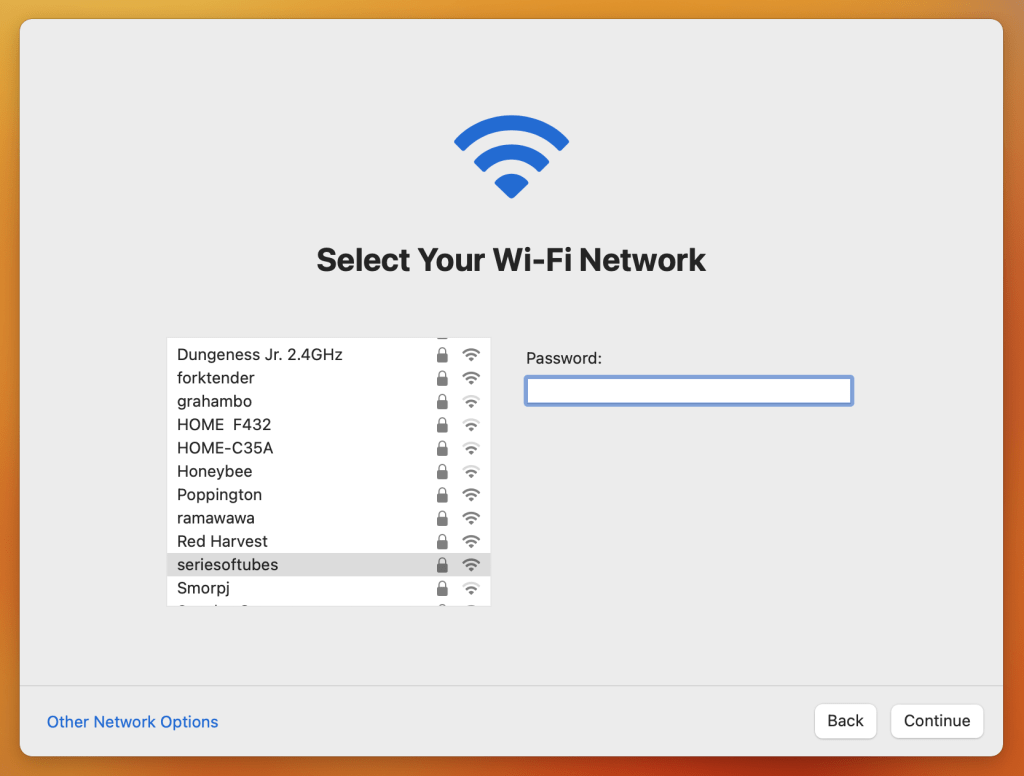
5) Connect to any available Internet network. If you and the computer are on the UW campus, the “University of Washington” Wi-Fi is the only network to use at this step.
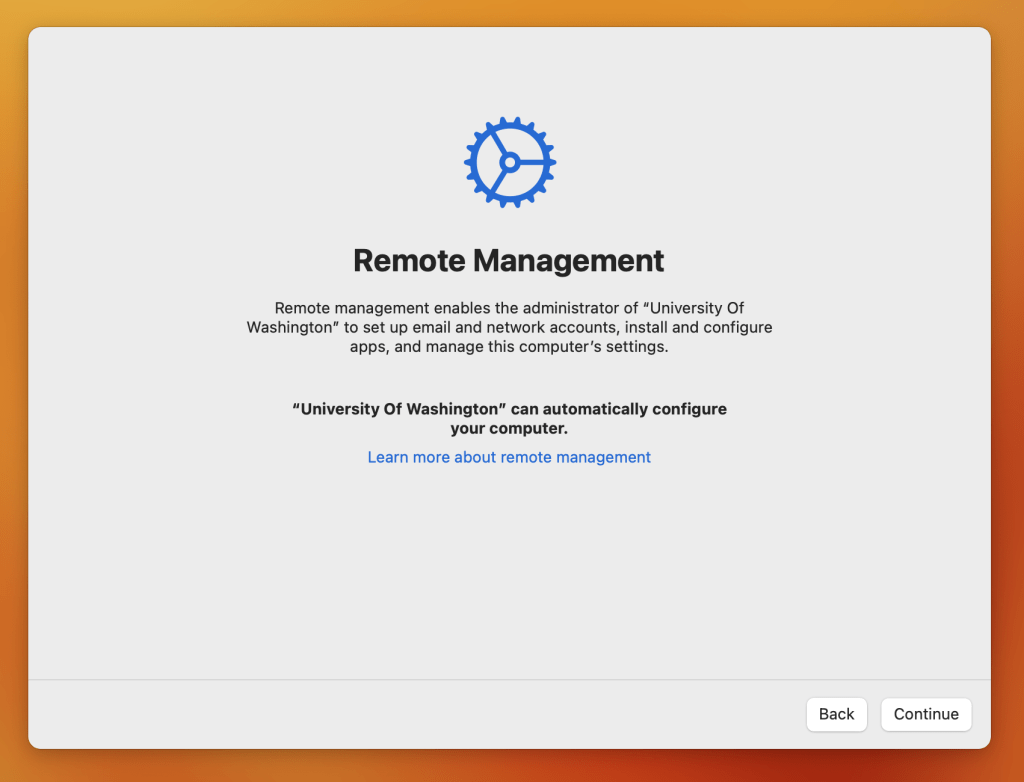
6) Click Continue or Enroll at the University of Washington Remote Management screen.
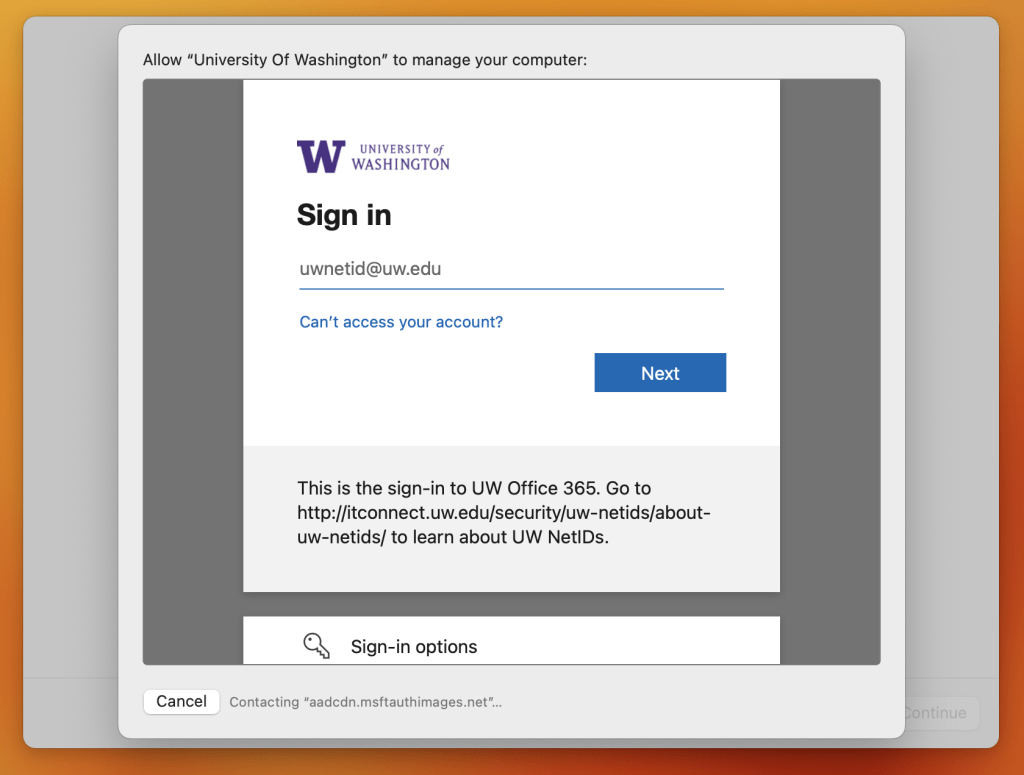
7) Authenticate with your UWNetID@uw.edu credentials.
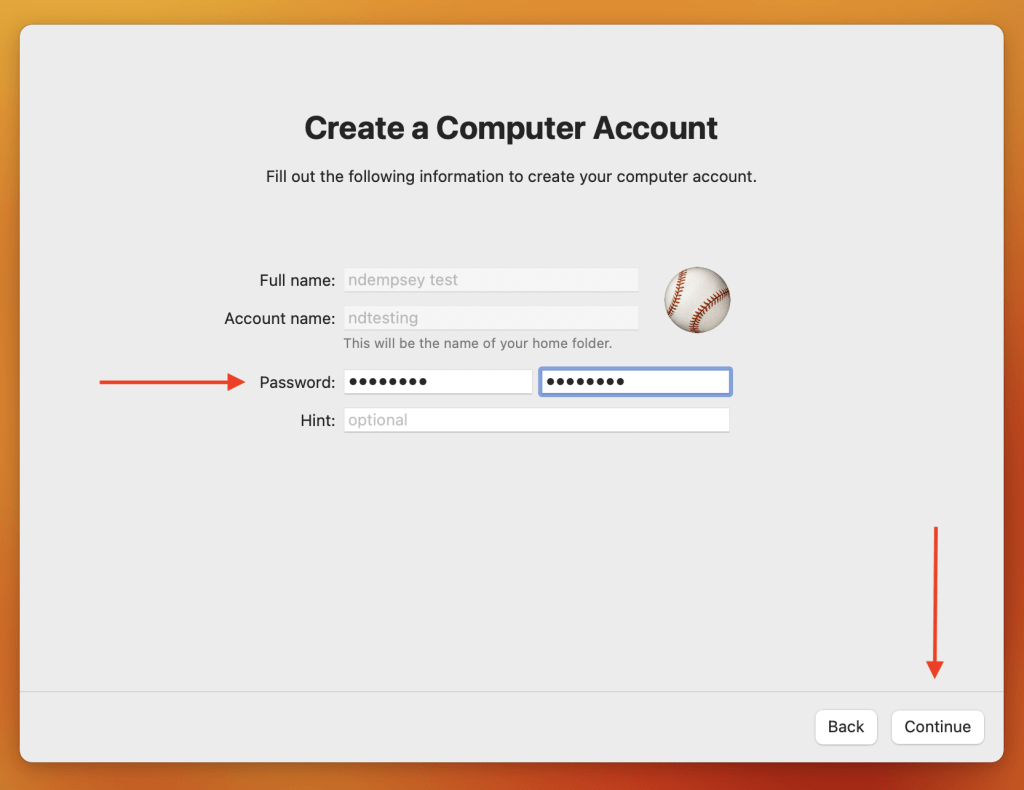
8) The “Full name:” and “Account name:” should be filled-in with your UW NetID information. Enter your UW NetID password twice, edit the icon to your liking, click Continue.
9) At the FileVault Disk Encryption screen click Continue.

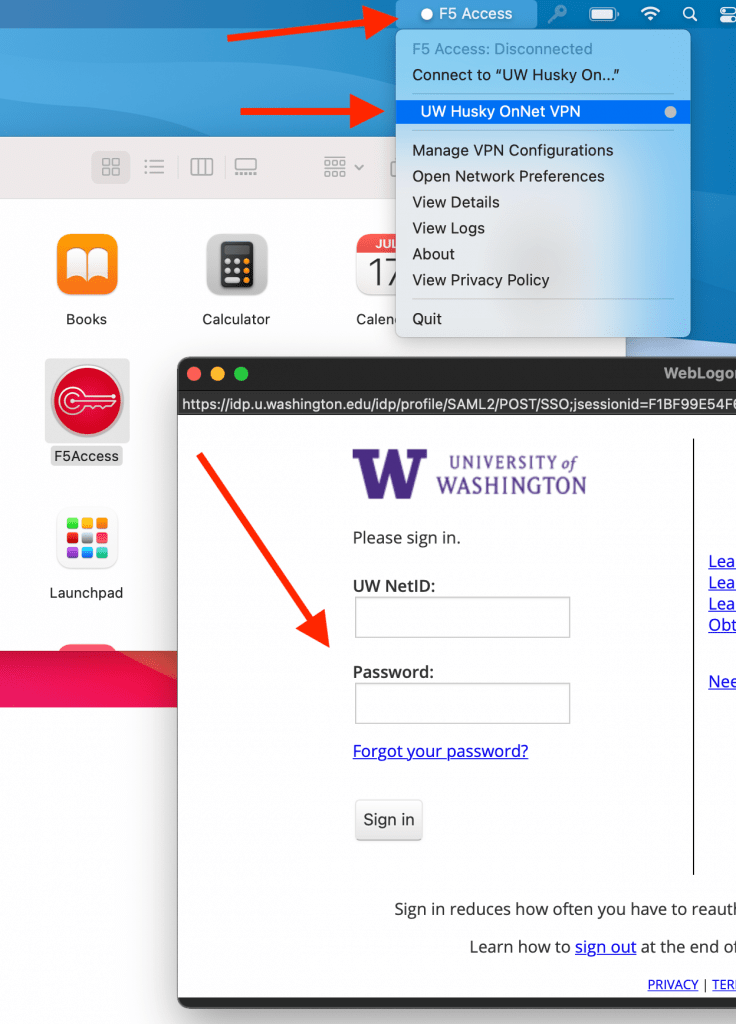
10) If you and the computer are on the University of Washington campus, skip to step 12. Open a Finder window, go to the Applications folder, start the “F5Access” application. (The “F5Access” application should appear within a few minutes if it is not already in the Applications folder).
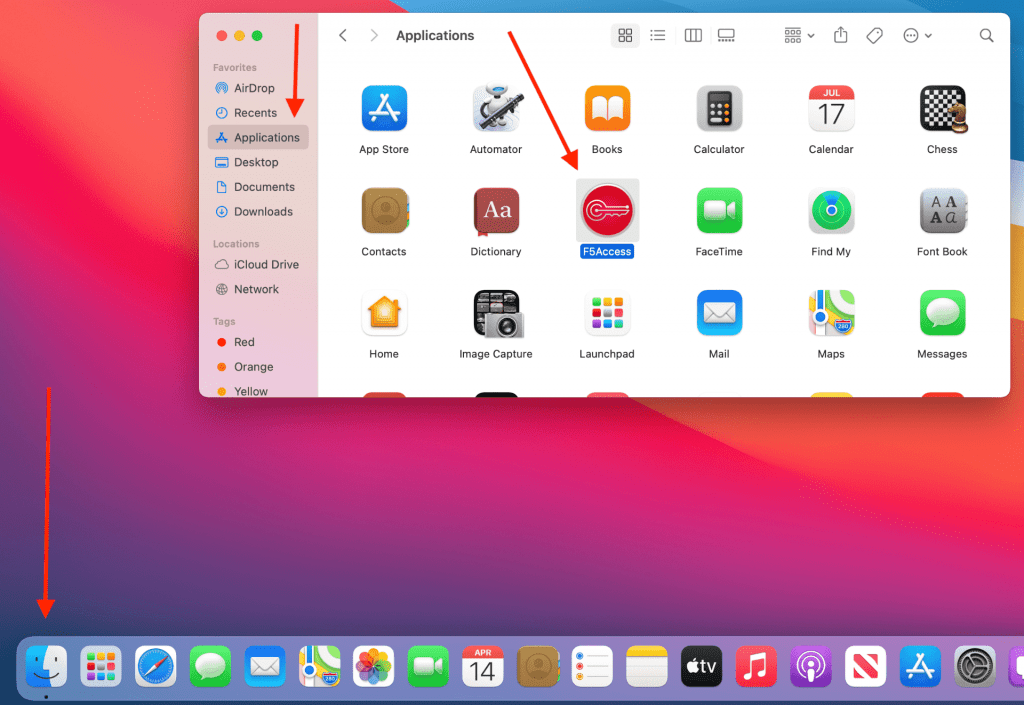
11) Click “F5 Access” in the top-right menu bar, click “UW Husky OnNet VPN”, authenticate using UW NetID credentials in the University of Washington WebLogon screen. (This action is connecting you to the UW network via Virtual Private Network (VPN) to make the next few steps possible).
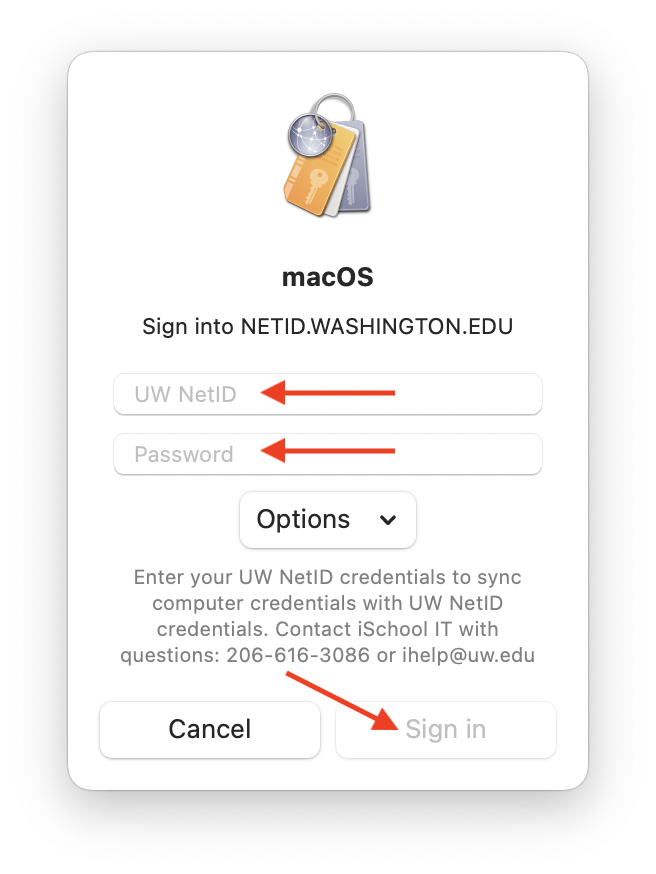
12) Enter your UW NetID credentials in the “Sign into NETID.WASHINGTON.EDU…” box, click Sign in. Note well: You may only see this window after the first computer restart.
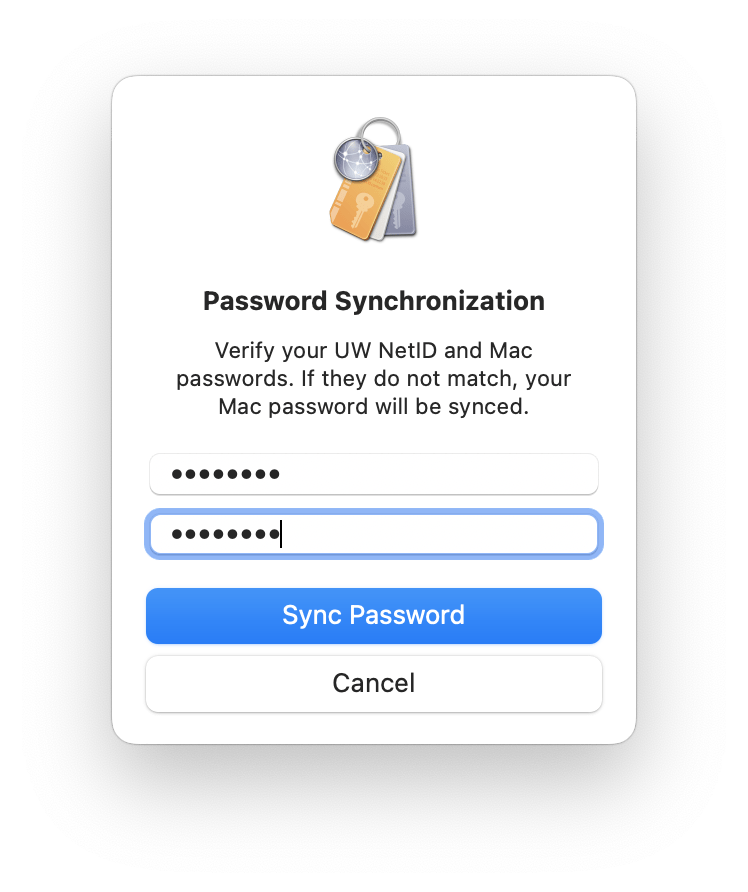
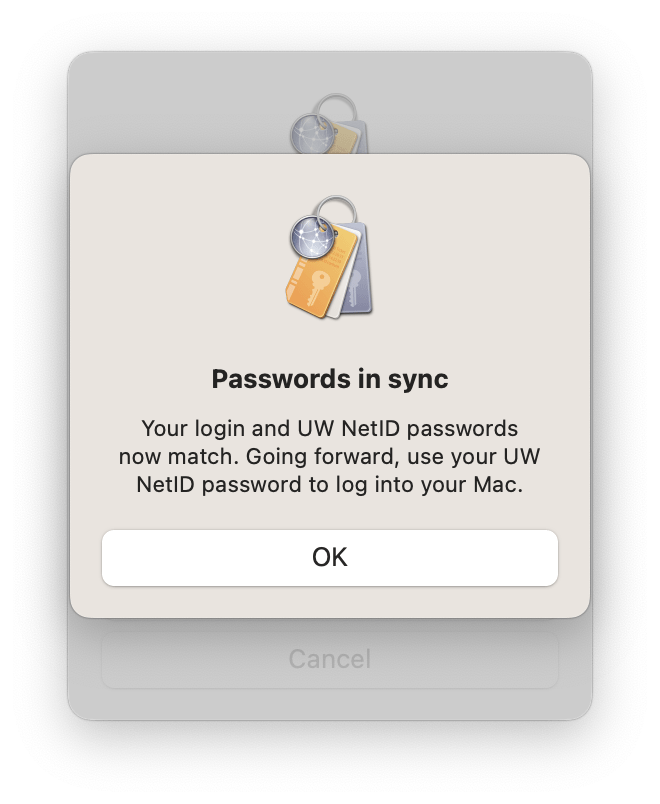
13) In the “Password Synchronization” box enter your UW NetID password in both fields, click Sync Password. Note the “Passwords in sync” message. Click OK. You will be using your UW NetID credentials for the username/password combination for your macOS device.
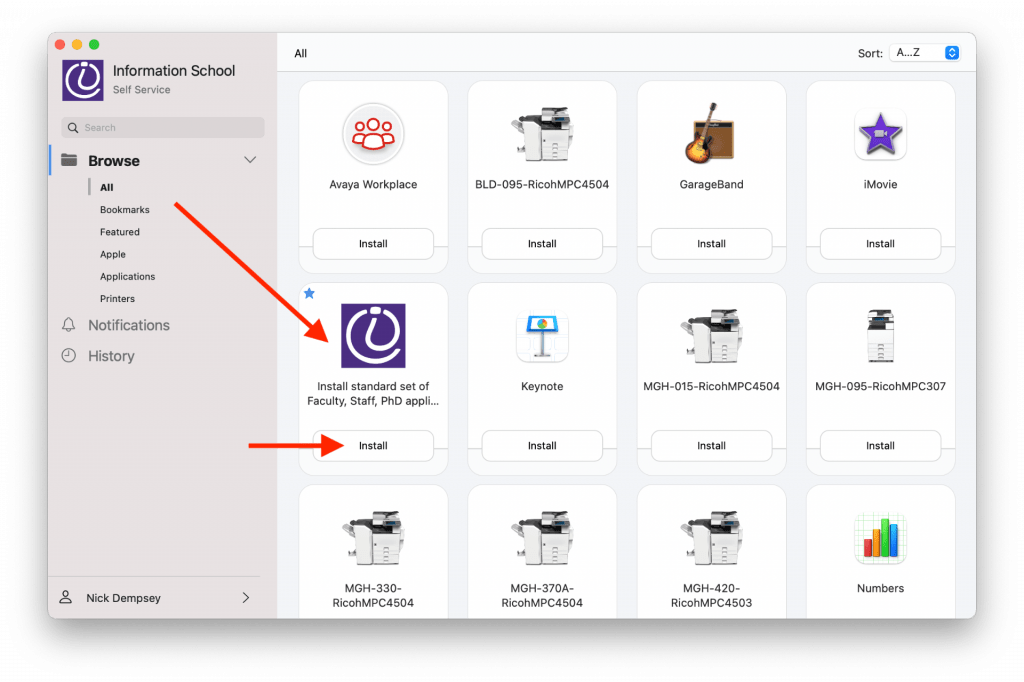
14) Open a Finder window, go to the Applications folder, start the Self Service application, sign in with UW NetID credentials if prompted.

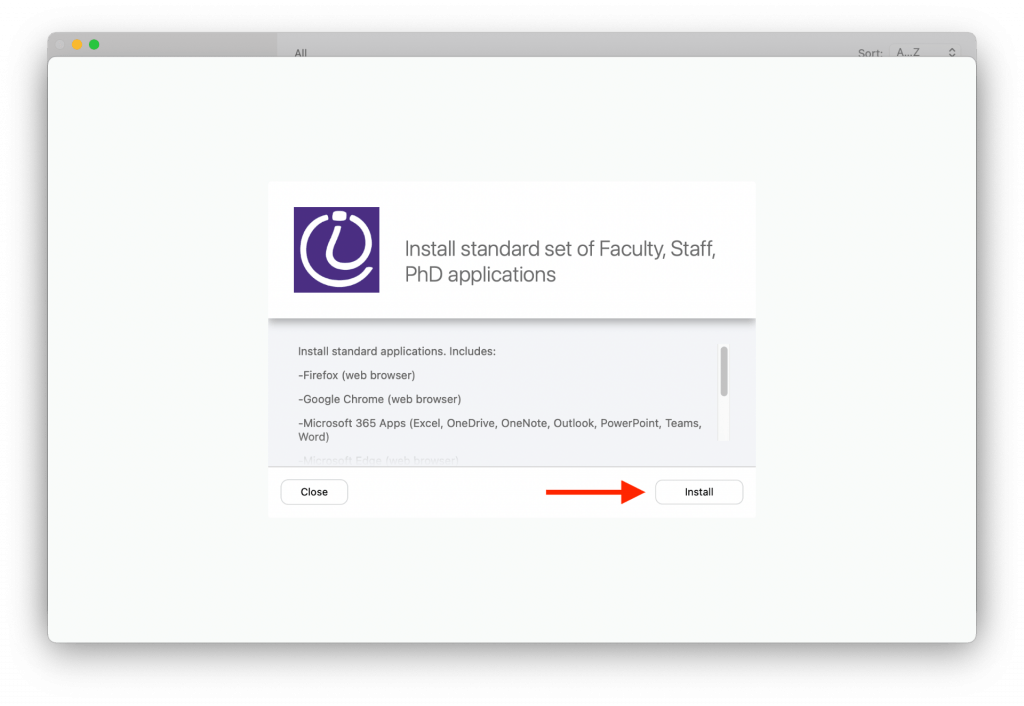
15) Look for the item named “Install standard Faculty, Staff, PhD applications.” Click any install window that appears.

Note well: The total installation time could take ~30 minutes or more depending on your network connection. “Self Service” will give you the messages “Executing” and “Installing” and “Running” while installation is happening. “Done!” will appear briefly when installation is complete. If you do not see any glaring “failure” messages, the installation happened correctly. The Applications folder will be populated with the software titles mentioned in Self Service. There are other miscellaneous applications and printers you may install if you wish before exiting the Self Service application.
16) Install the Code42/CrashPlan file backup software by following the steps on this web page: Install the CrashPlan file backup software.

Use the Code42/CrashPlan software to restore files from a previous computer if necessary. Detailed directions are on this web page: How to restore files using the Code42/CrashPlan application.

Restoring files via Code42/CrashPlan is not necessarily a trivial step. Please contact the iSchool IT Help Desk if there are any questions about restoring files via Code42/CrashPlan.

17) Complete the “Eduroam” WiFi network onboarding steps as described on this web page: Eduroam Onboarding Guides


At this point, your iSchool macOS computer has completed the necessary one-time-setup-steps and is ready to use but may not have all of the customizations you need. Some examples of further actions you may need to take:

If you need to change your default web browser: how to change default web browser

If Microsoft Outlook is your email application of choice, find and start the Microsoft Outlook application. Follow the instructions provided by Outlook to add your @uw.edu email address.

If you have access to a shared @uw.edu email account and need to add the account to Outlook: https://www.kb.ischool.uw.edu/how-to-add-shared-netid-email-account-to-outlook/.

If you need to install SecureCRT (to access The UW Student Data Base): https://itconnect.uw.edu/uware/securecrt/.

You may need or want to sign in to your web browser of choice to sync bookmarks:

Google Chrome sync directions

Firefox sync directions

Microsoft Edge sync directions

Please contact the iSchool IT Help Desk, 206-616-3086 or ihelp@uw.edu, if there are any questions or issues during this setup process.
Set up iSchool issued Windows computer

Set up iSchool issued Windows computer

The following initial, one-time-setup-steps need to be done to set up an iSchool-issued Windows computer. Please contact the iSchool IT Help Desk, 206-616-3086 or ihelp@uw.edu, if there are any questions or issues during this set up process.
This process could take around 30-45 minutes or more to complete.

(The following screen shots are a reference based on the time of writing. The actual screens, icons, and options you see and click through are subject to change at any time per Microsoft Windows updates and changes.)

1) Plug in the power adapter if the computer is a laptop. Turn on the computer.

2) If you and the computer are on campus: connect the computer to the wired campus network or the University of Washington WiFi network, sign in with your UW NetID credentials, then skip to step 8.

If you and the computer are off campus: connect the computer to any available Internet network:

3) Click the “Network sign-in” button:

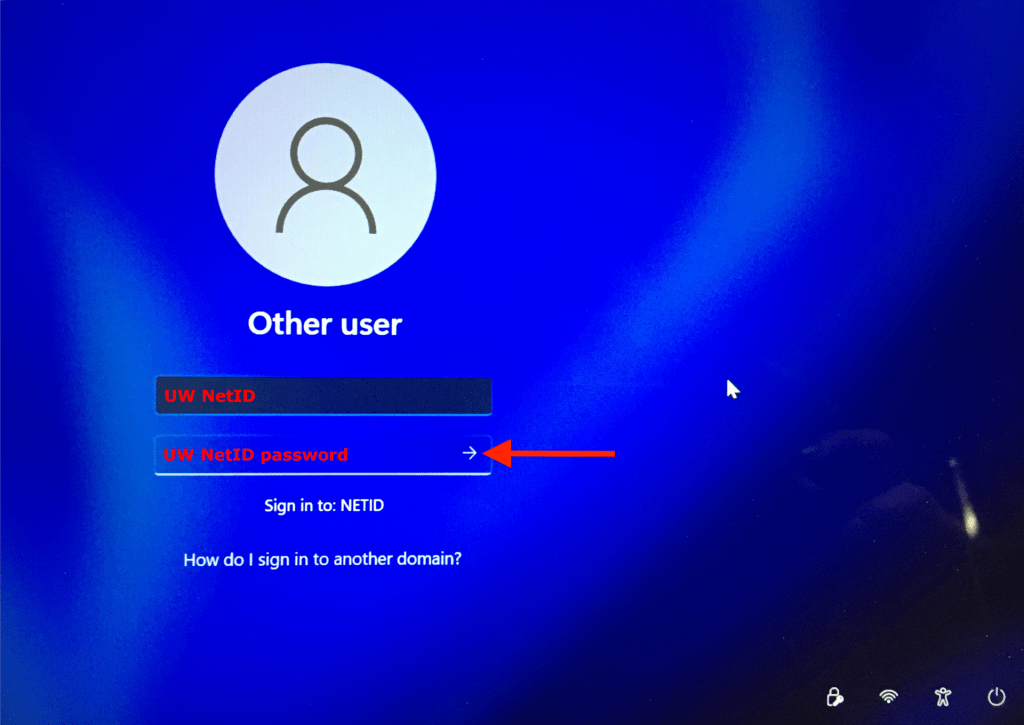
4) On the “Network sign-in” screen, enter your UW NetID credentials, click the forward/enter arrow:

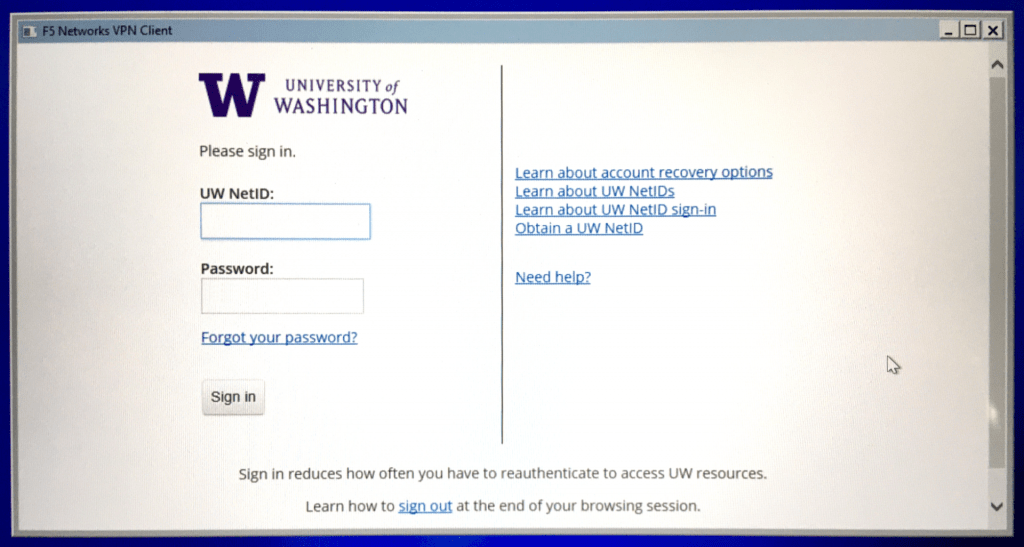
5) At the F5 Networks VPN Client window, sign in with UW NetID credentials, authenticate at the Duo two-factor authentication screen:

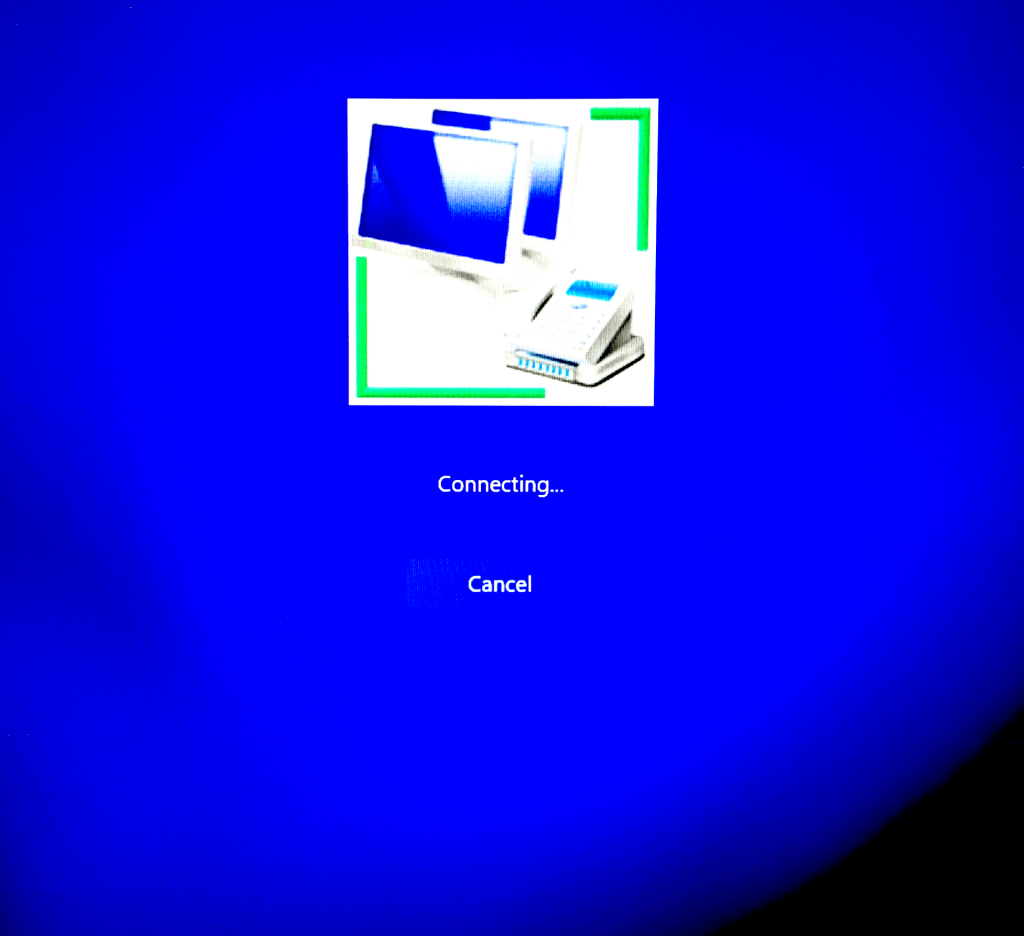
6) You should see a screen indicating “Connecting…” is happening:

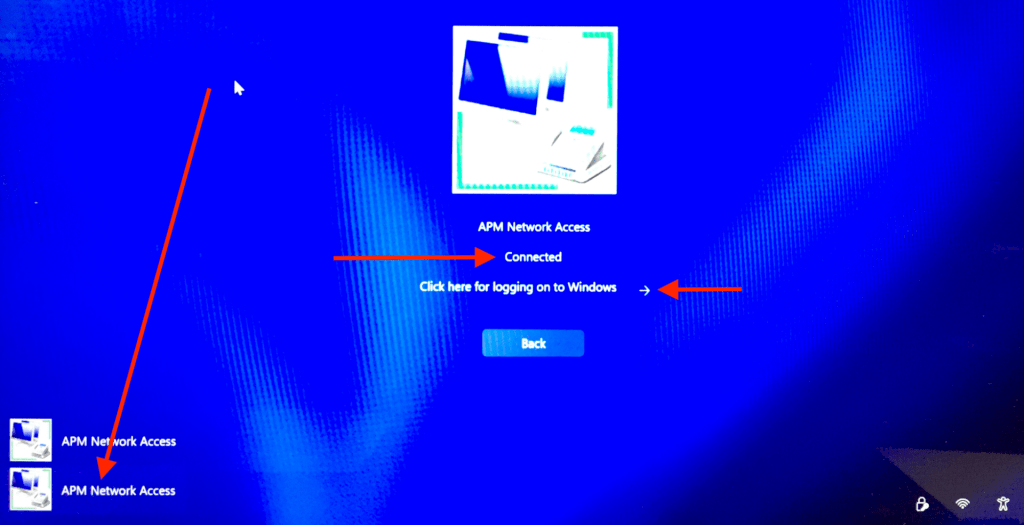
Wait. After a handful of seconds, you may see a screen indicating the time. Click a mouse button or trackpad button or press a keyboard key, click the lower/second APM Network Access button, you should see the word “Connected“. Click the forward/enter arrow next to “Click here for logging on to Windows“:

7) Sign in with your UW NetID credentials:

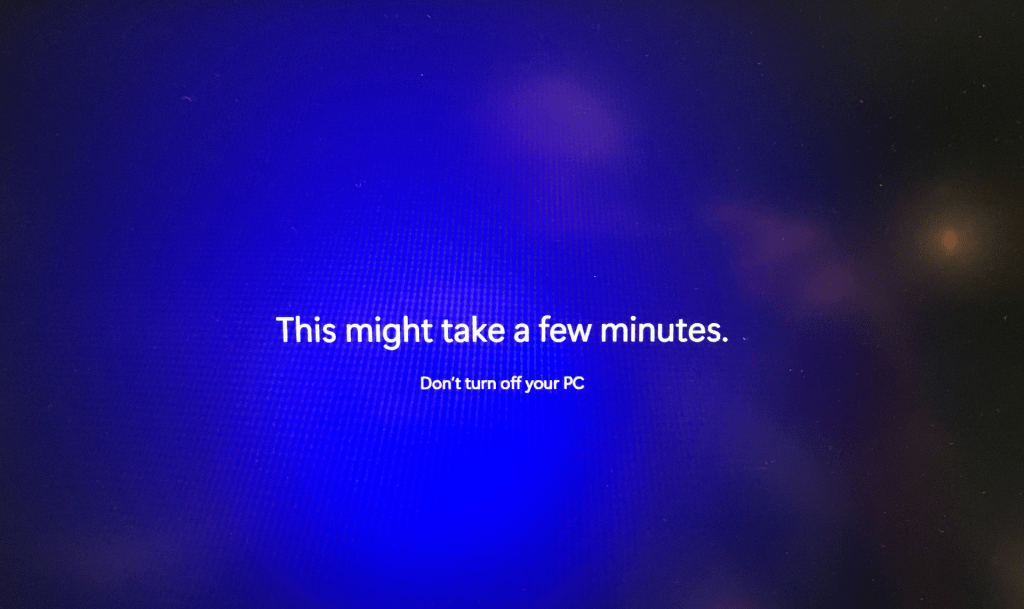
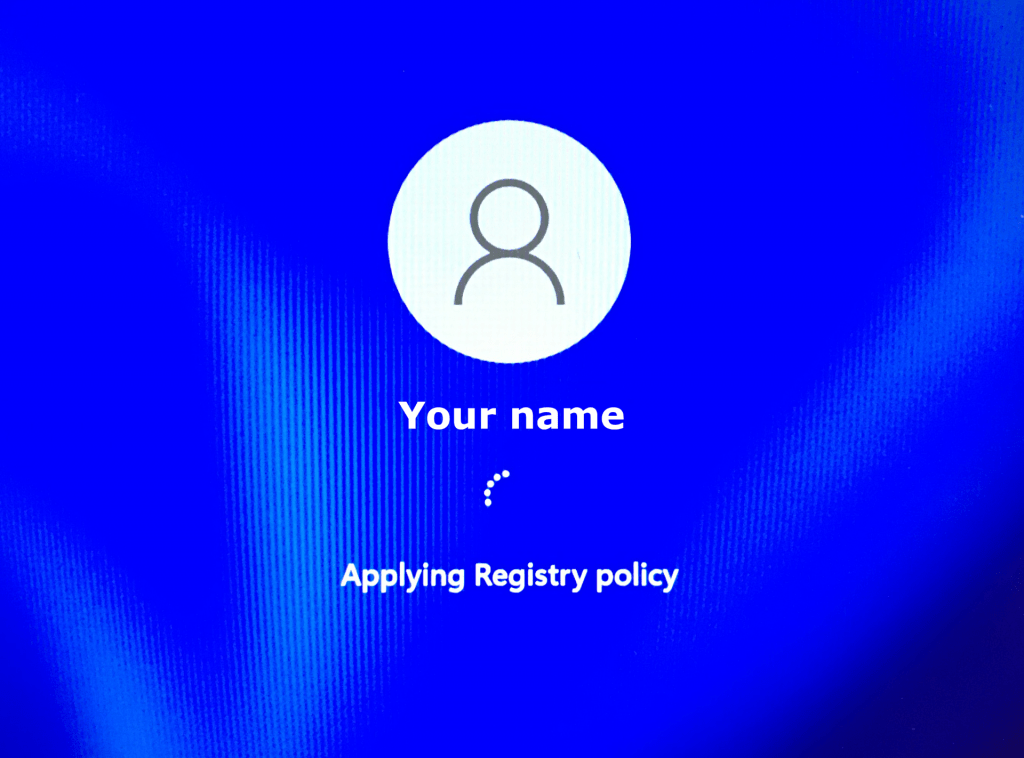
8) You should see a series of information screens indicating the sign-in was successful and things are happening. Wait until you eventually reach the desktop.

9) Install the Code42/CrashPlan file backup software by following the steps on this web page: Install the CrashPlan file backup software

Use the Code42/CrashPlan software to restore files from a previous computer if necessary. Detailed directions are on this web page:

How to restore files using the Code42/CrashPlan application

Restoring files via Code42/CrashPlan is not necessarily a trivial step. Please contact the iSchool IT Help Desk if there are any questions about restoring files via Code42/CrashPlan.

10) If the Windows device is a laptop, complete the “Eduroam” WiFi network onboarding steps as described on this web page: Eduroam Onboarding Guides

At this point, your iSchool Windows computer has completed the necessary one-time-setup-steps and is ready to use but may not have all of the customizations you need. Some examples of further actions you may need to take:

If Microsoft Outlook is your email application of choice, find and start the Microsoft Outlook application. Follow the instructions provided by Outlook to add your @uw.edu email address.

If you have access to a shared @uw.edu email account and need to add the account to Outlook follow the steps on this web page: https://www.kb.ischool.uw.edu/how-to-add-shared-netid-email-account-to-outlook/

If you need to install Zoom: https://zoom.us/download

If you need to install SecureCRT (to access The UW Student Data Base): https://itconnect.uw.edu/uware/securecrt/

You may need or want to sign in to your web browser of choice to sync/retrieve bookmarks:

Google Chrome sync directions

Firefox sync directions

Microsoft Edge sync directions