Set up iSchool issued Windows computer

Set up iSchool issued Windows computer

The following initial, one-time-setup-steps need to be done to set up an iSchool-issued Windows computer. Please contact the iSchool IT Help Desk, 206-616-3086 or ihelp@uw.edu, if there are any questions or issues during this set up process.

This process could take around 30-45 minutes or more to complete.

(The following screen shots are a reference based on the time of writing. The actual screens, icons, and options you see and click through are subject to change at any time per Microsoft Windows updates and changes.)

1) Plug in the power adapter if the computer is a laptop. Turn on the computer.

2) If you and the computer are on campus: connect the computer to the wired campus network or the University of Washington WiFi network, sign in with your UW NetID credentials, then skip to step 8.

If you and the computer are off campus: connect the computer to any available Internet network:

3) Click the “Network sign-in” button:

4) On the “Network sign-in” screen, enter your UW NetID credentials, click the forward/enter arrow:

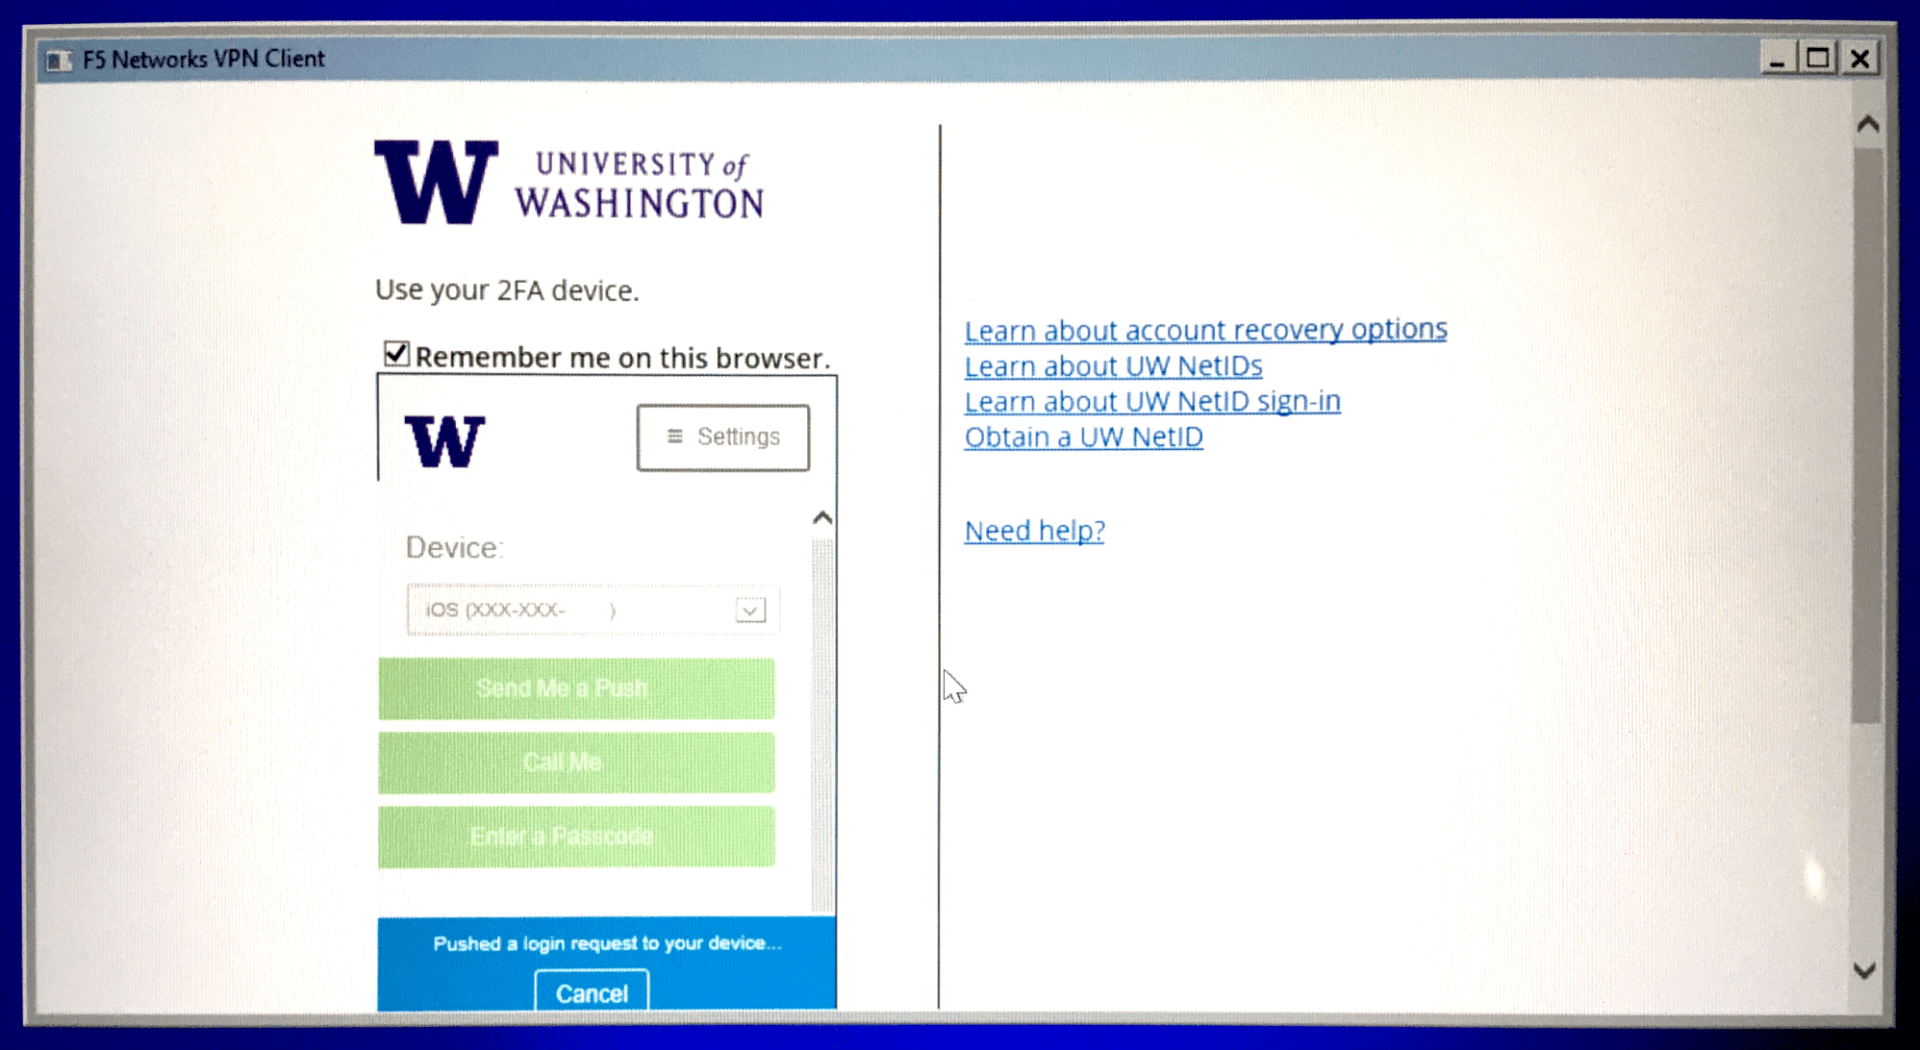
5) At the F5 Networks VPN Client window, sign in with UW NetID credentials, authenticate at the Duo two-factor authentication screen:

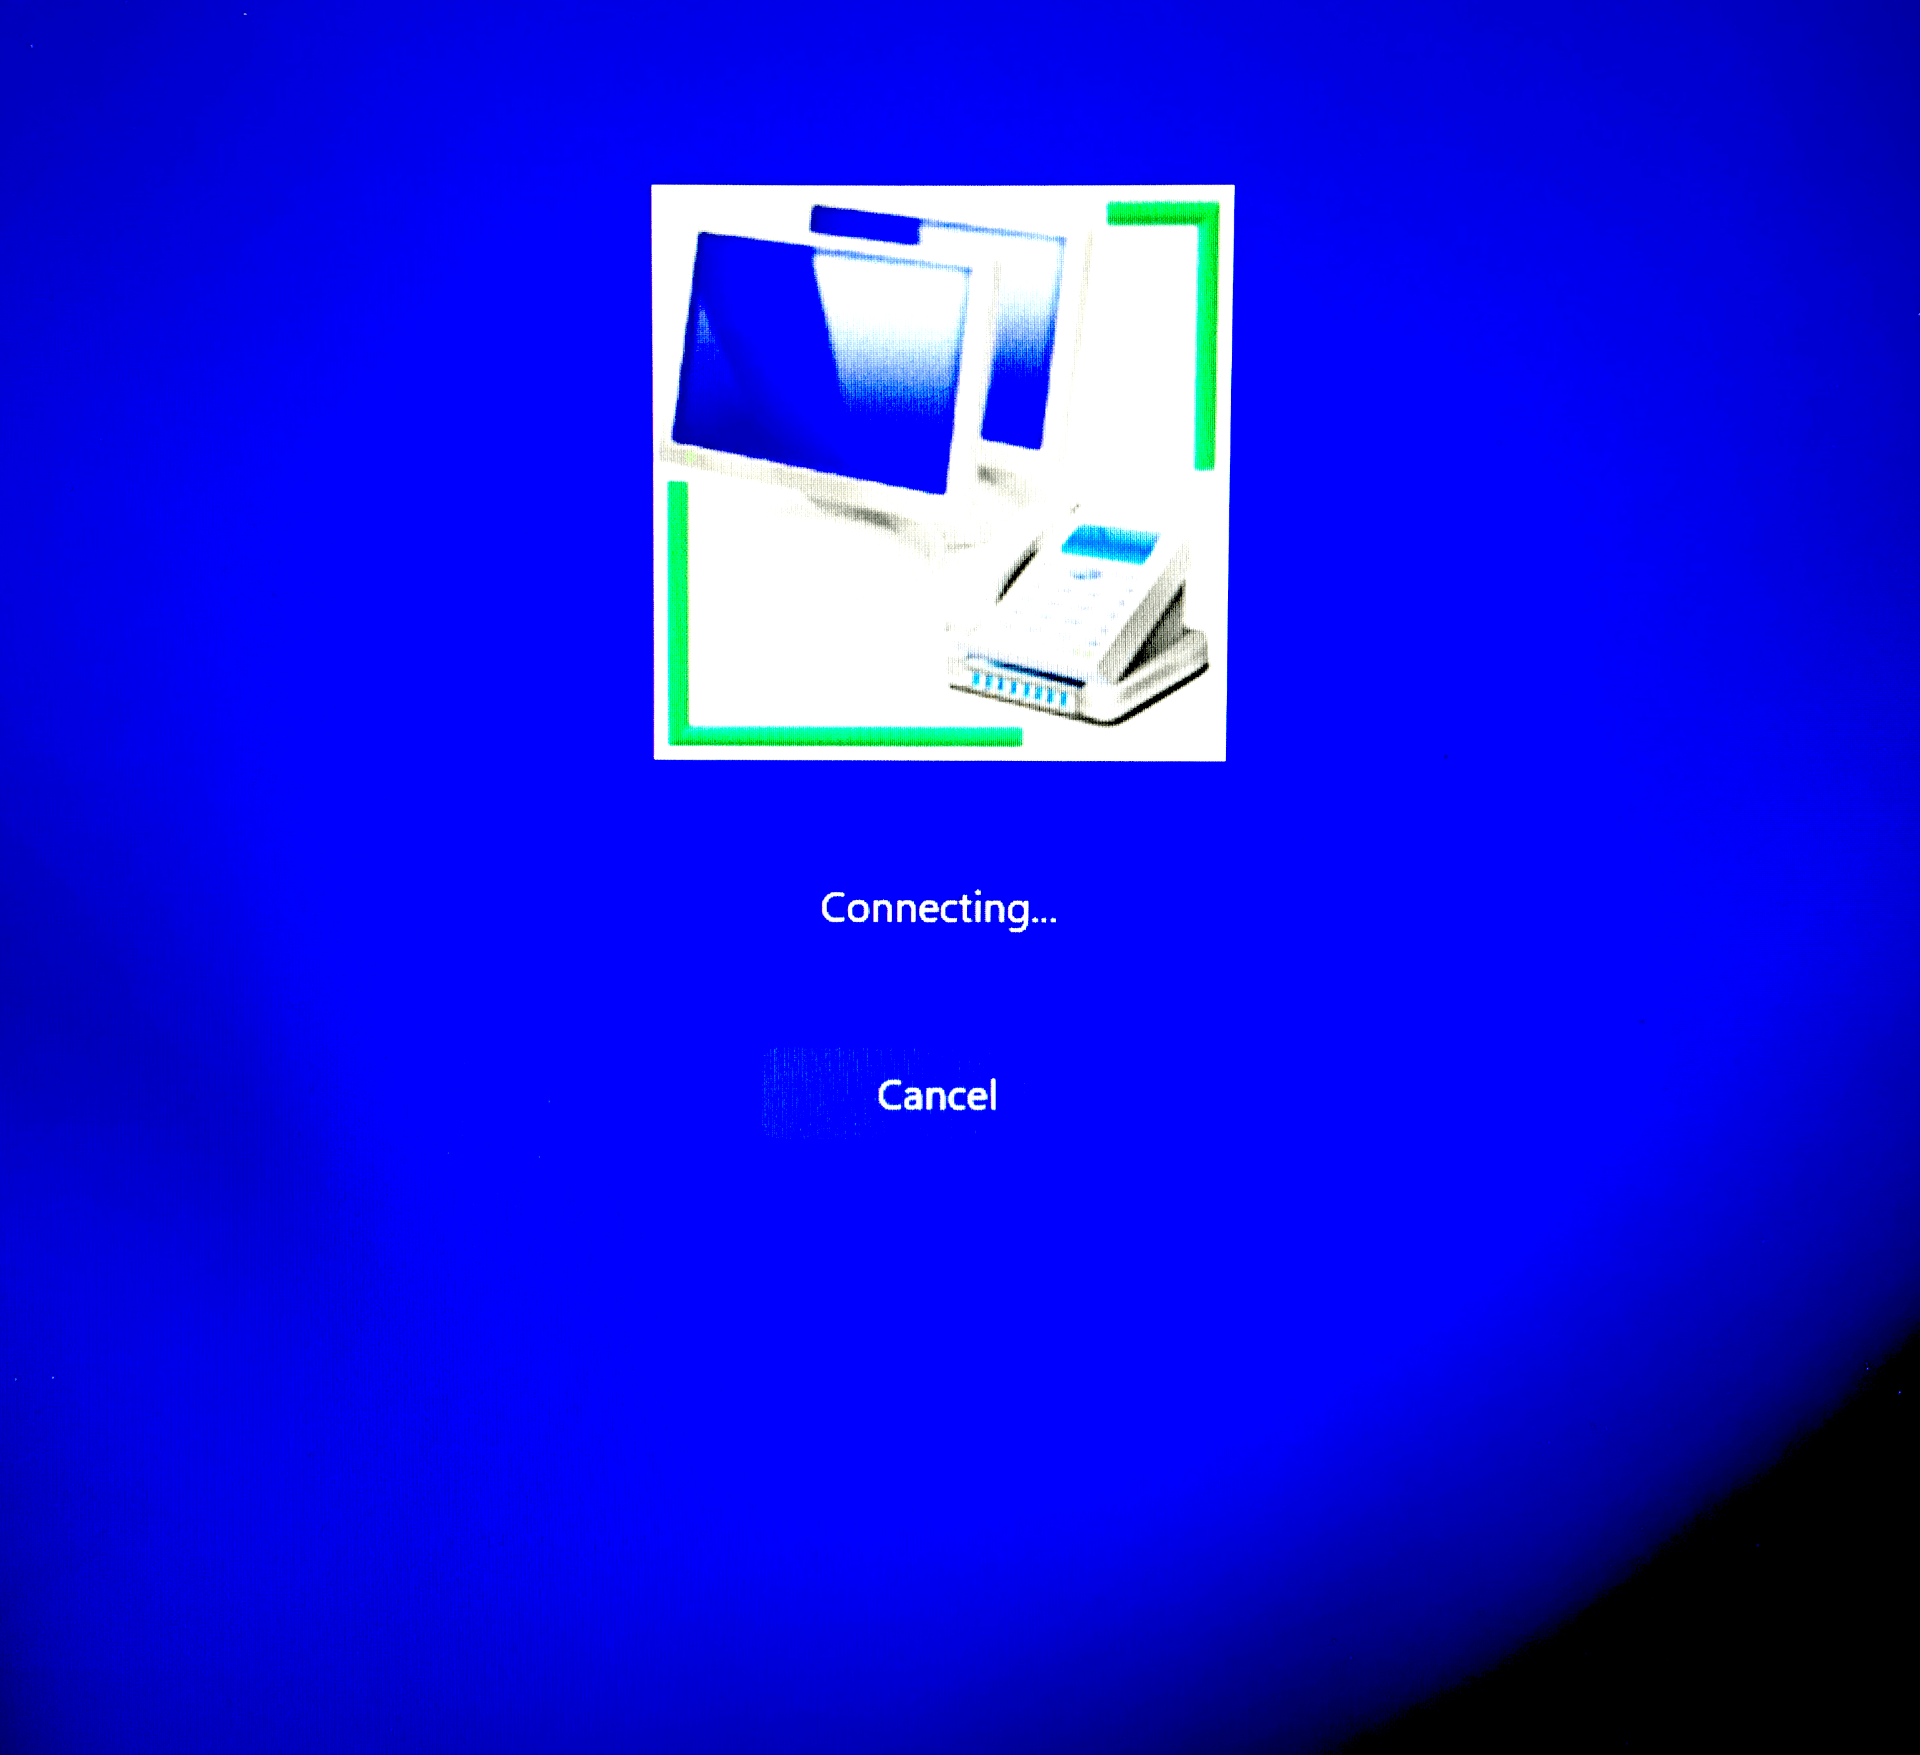
6) You should see a screen indicating “Connecting…” is happening:

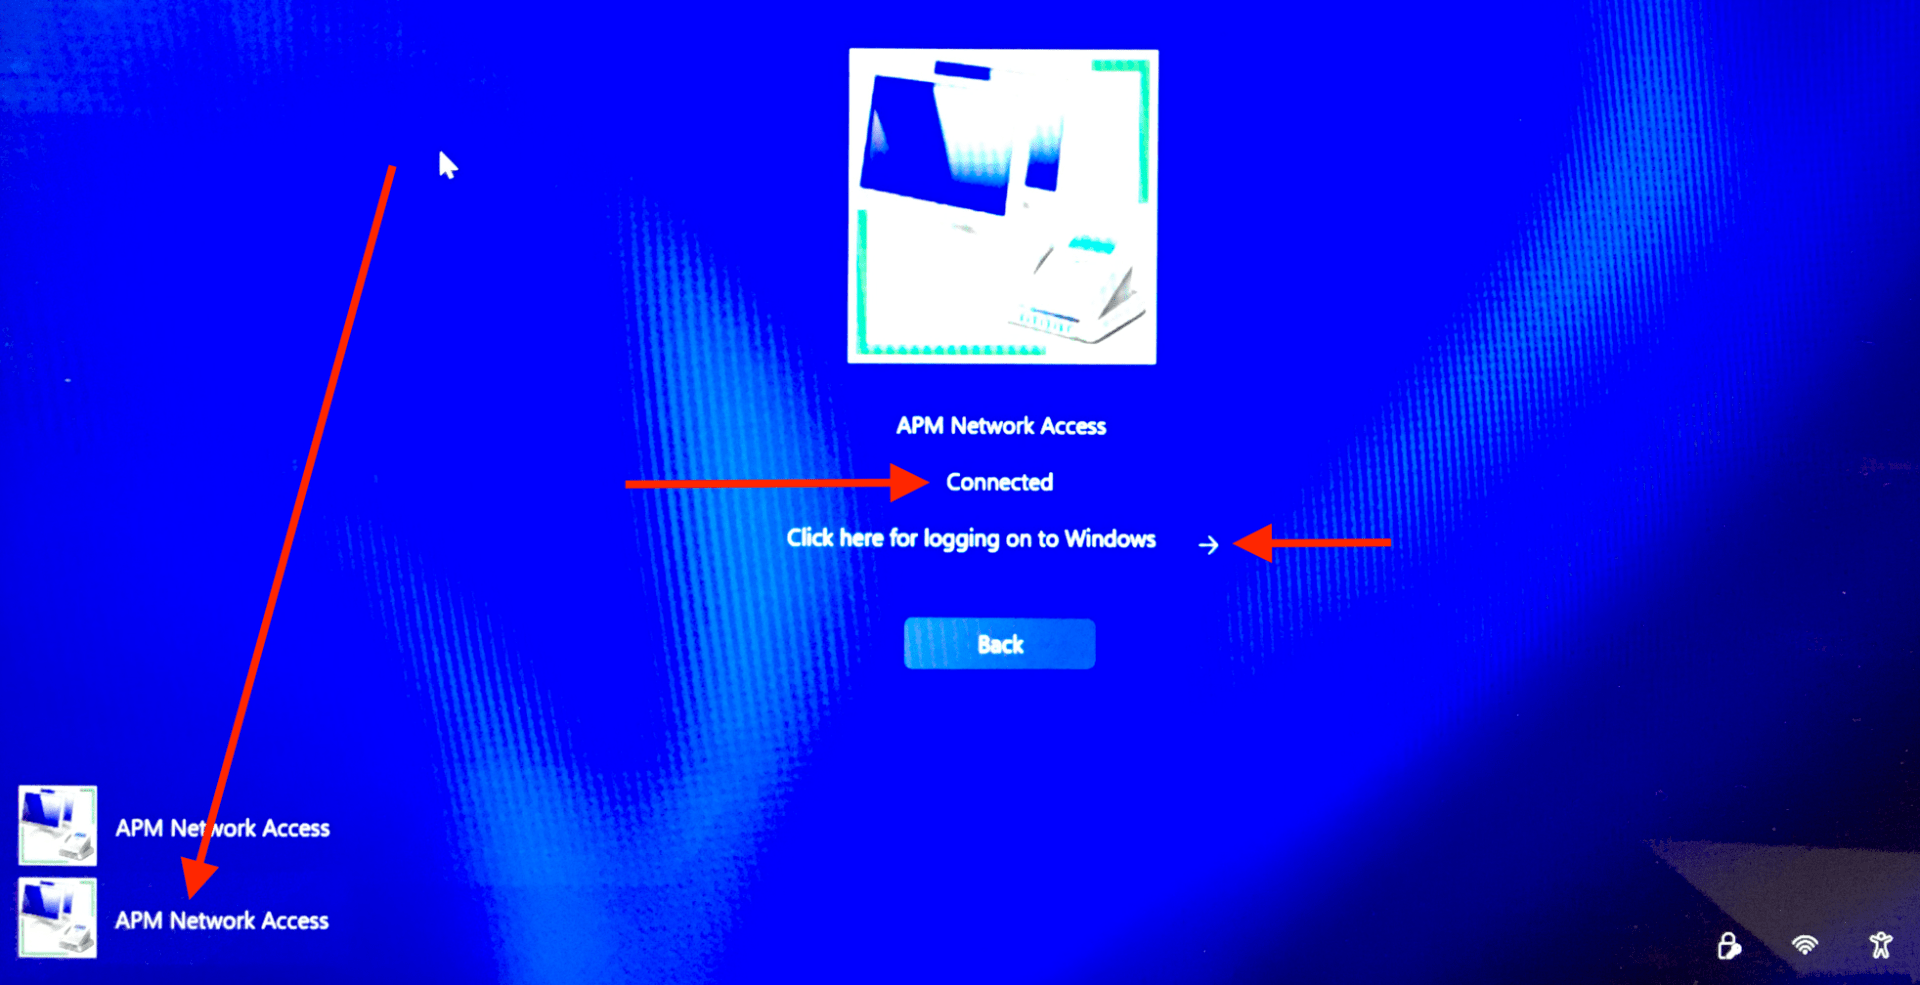
Wait. After a handful of seconds, you may see a screen indicating the time. Click a mouse button or trackpad button or press a keyboard key, click the lower/second APM Network Access button, you should see the word “Connected“. Click the forward/enter arrow next to “Click here for logging on to Windows“:

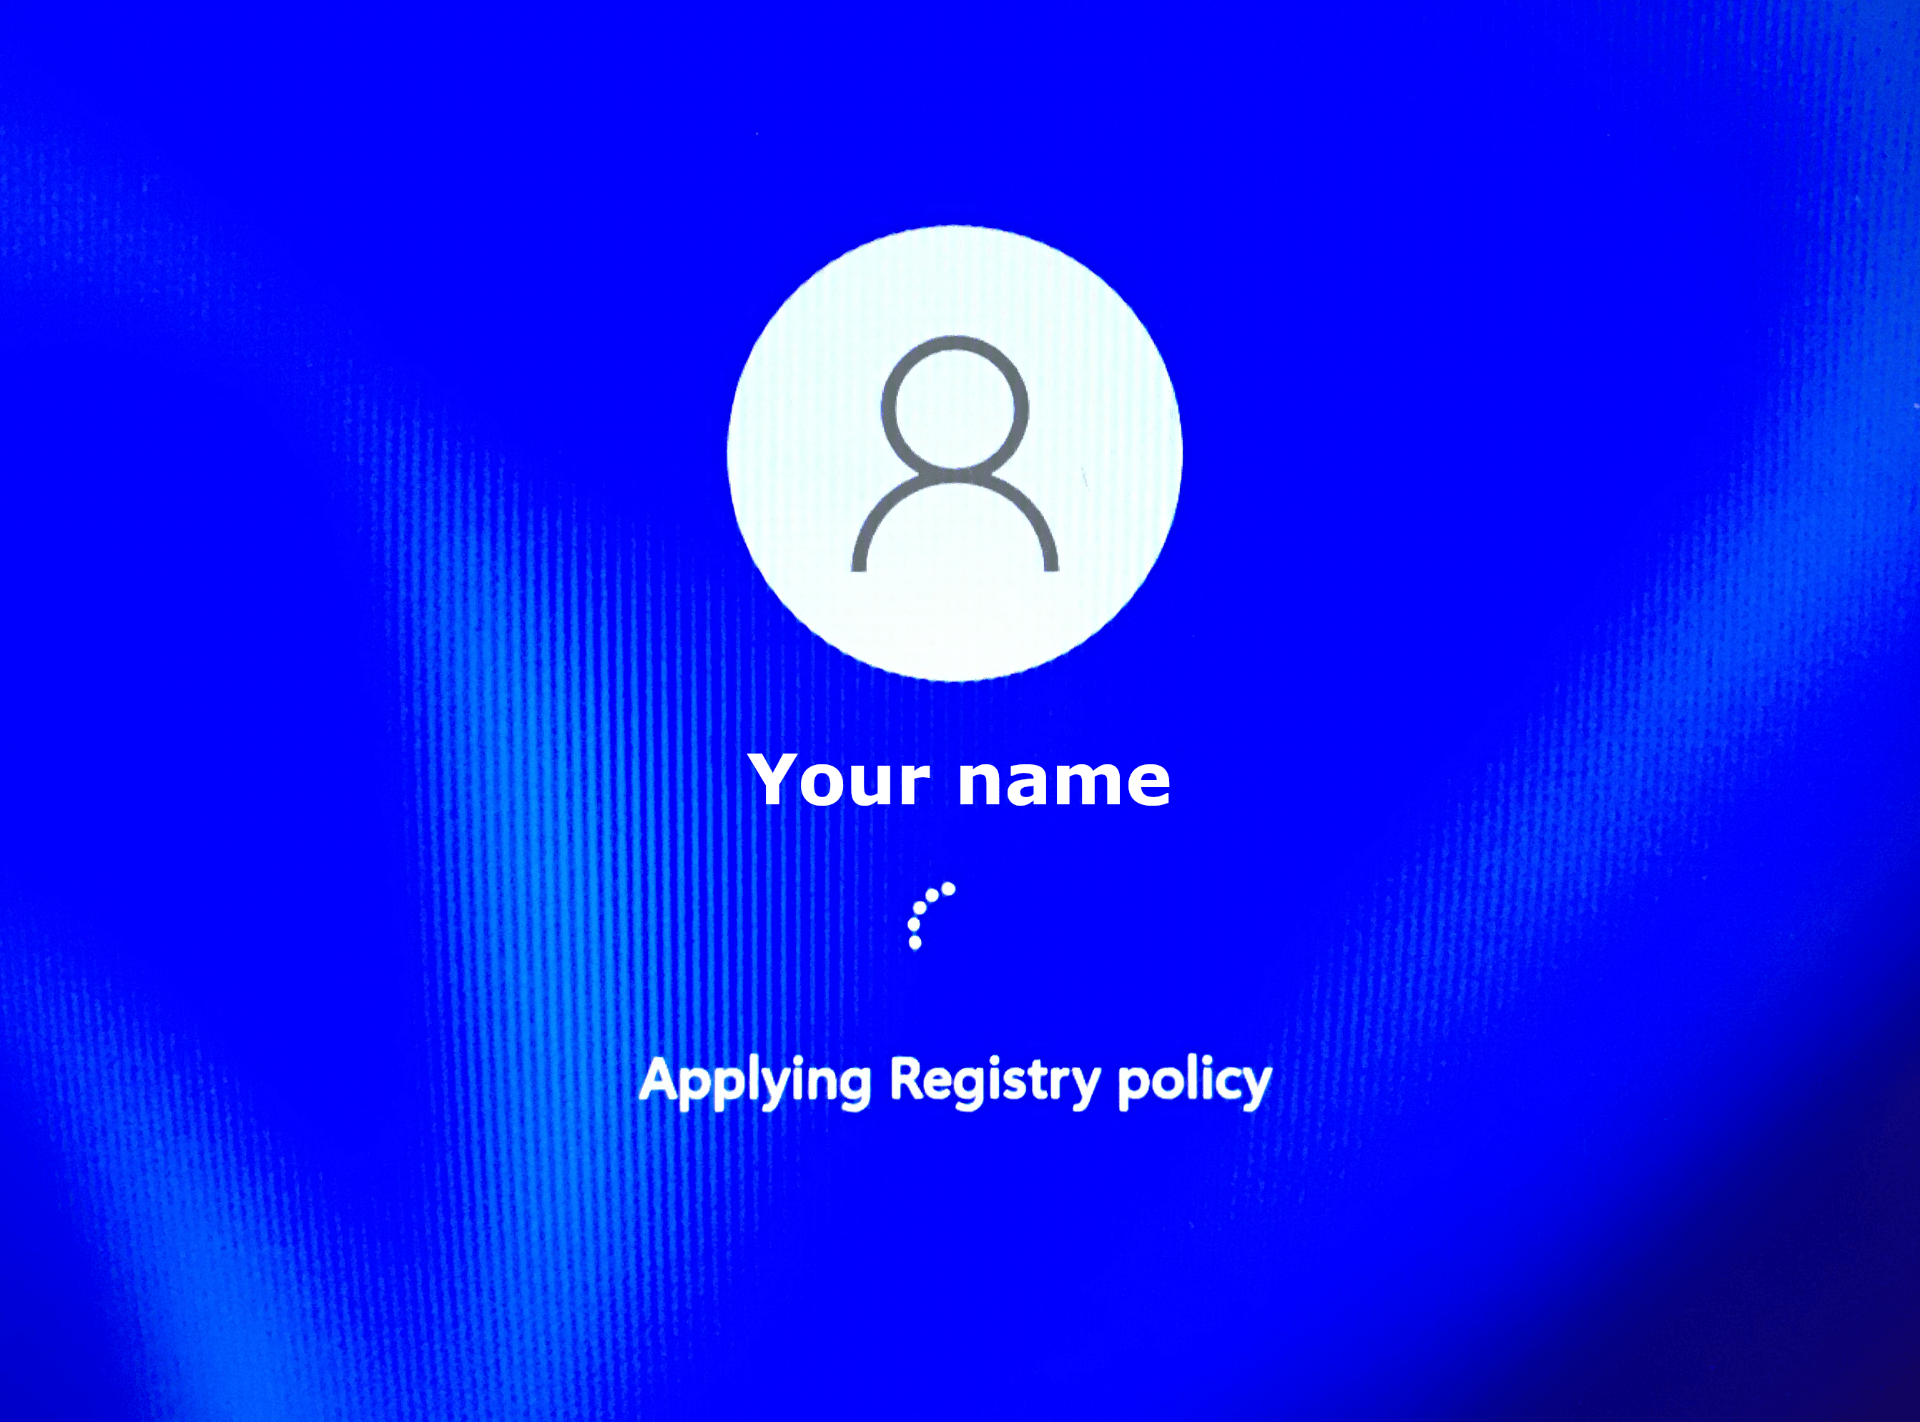
7) Sign in with your UW NetID credentials:

8) You should see a series of information screens indicating the sign-in was successful and things are happening. Wait until you eventually reach the desktop.

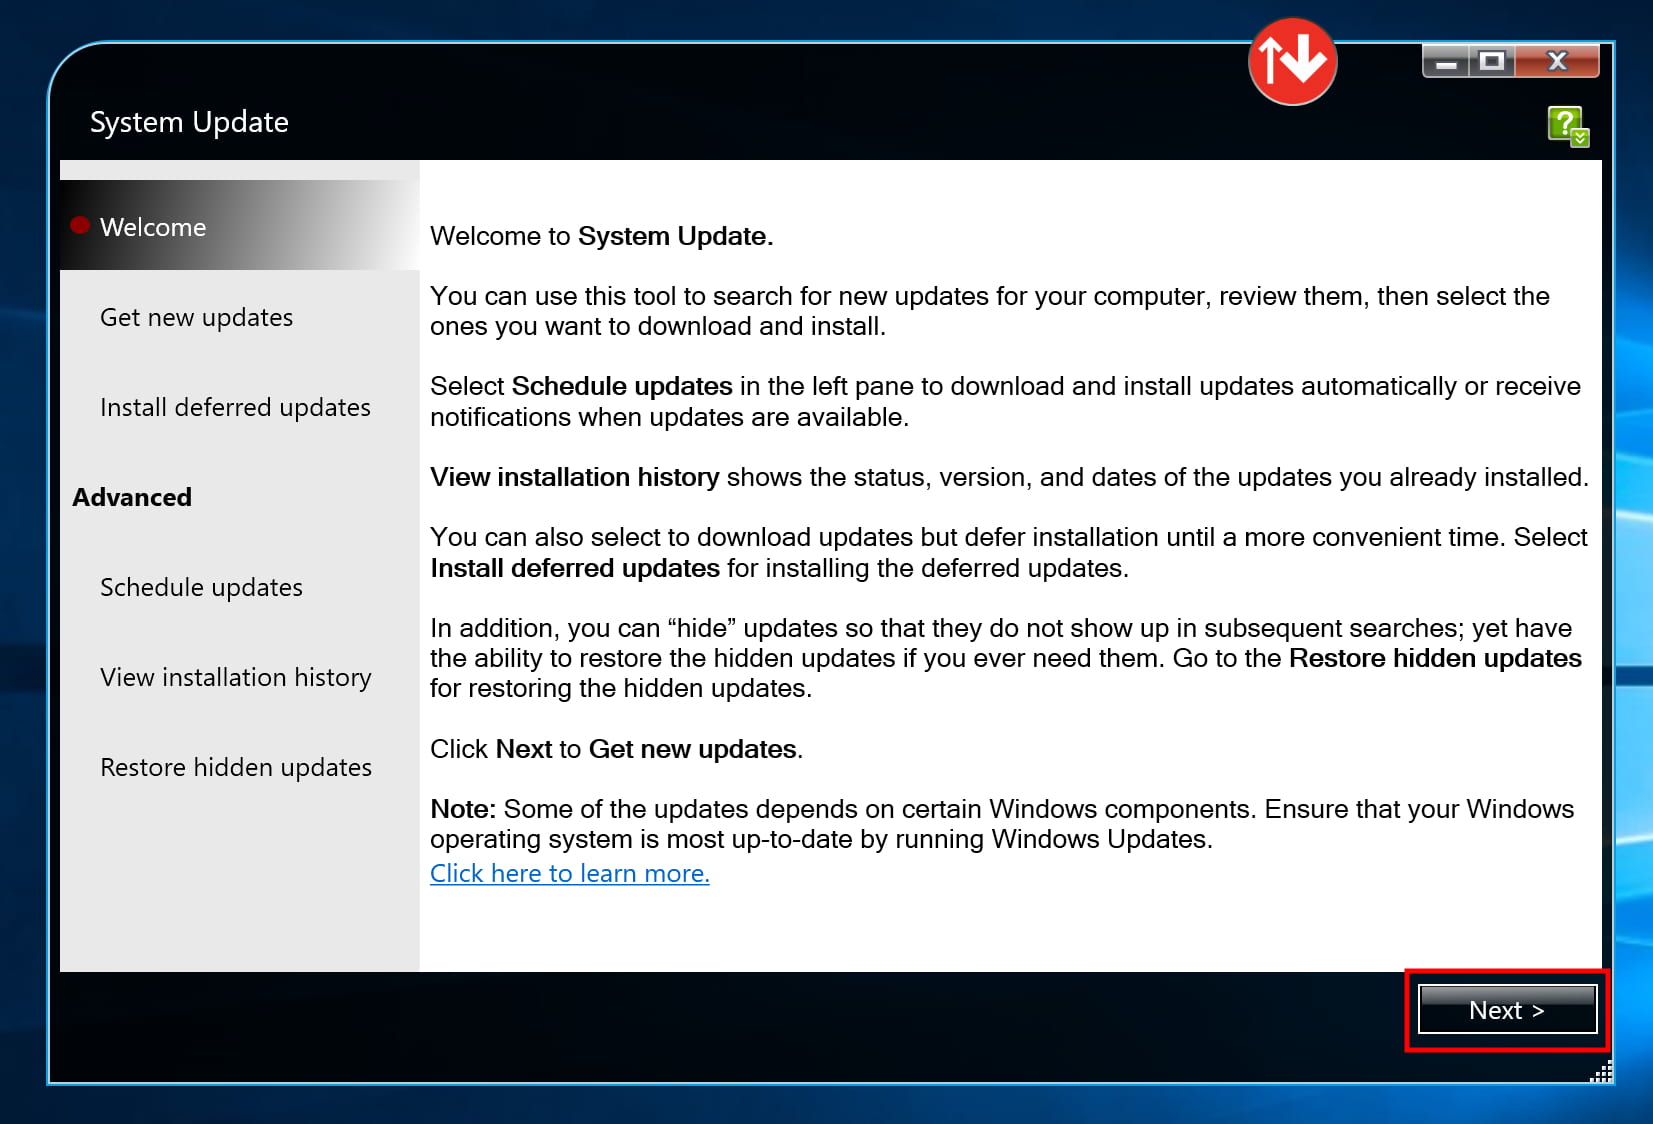
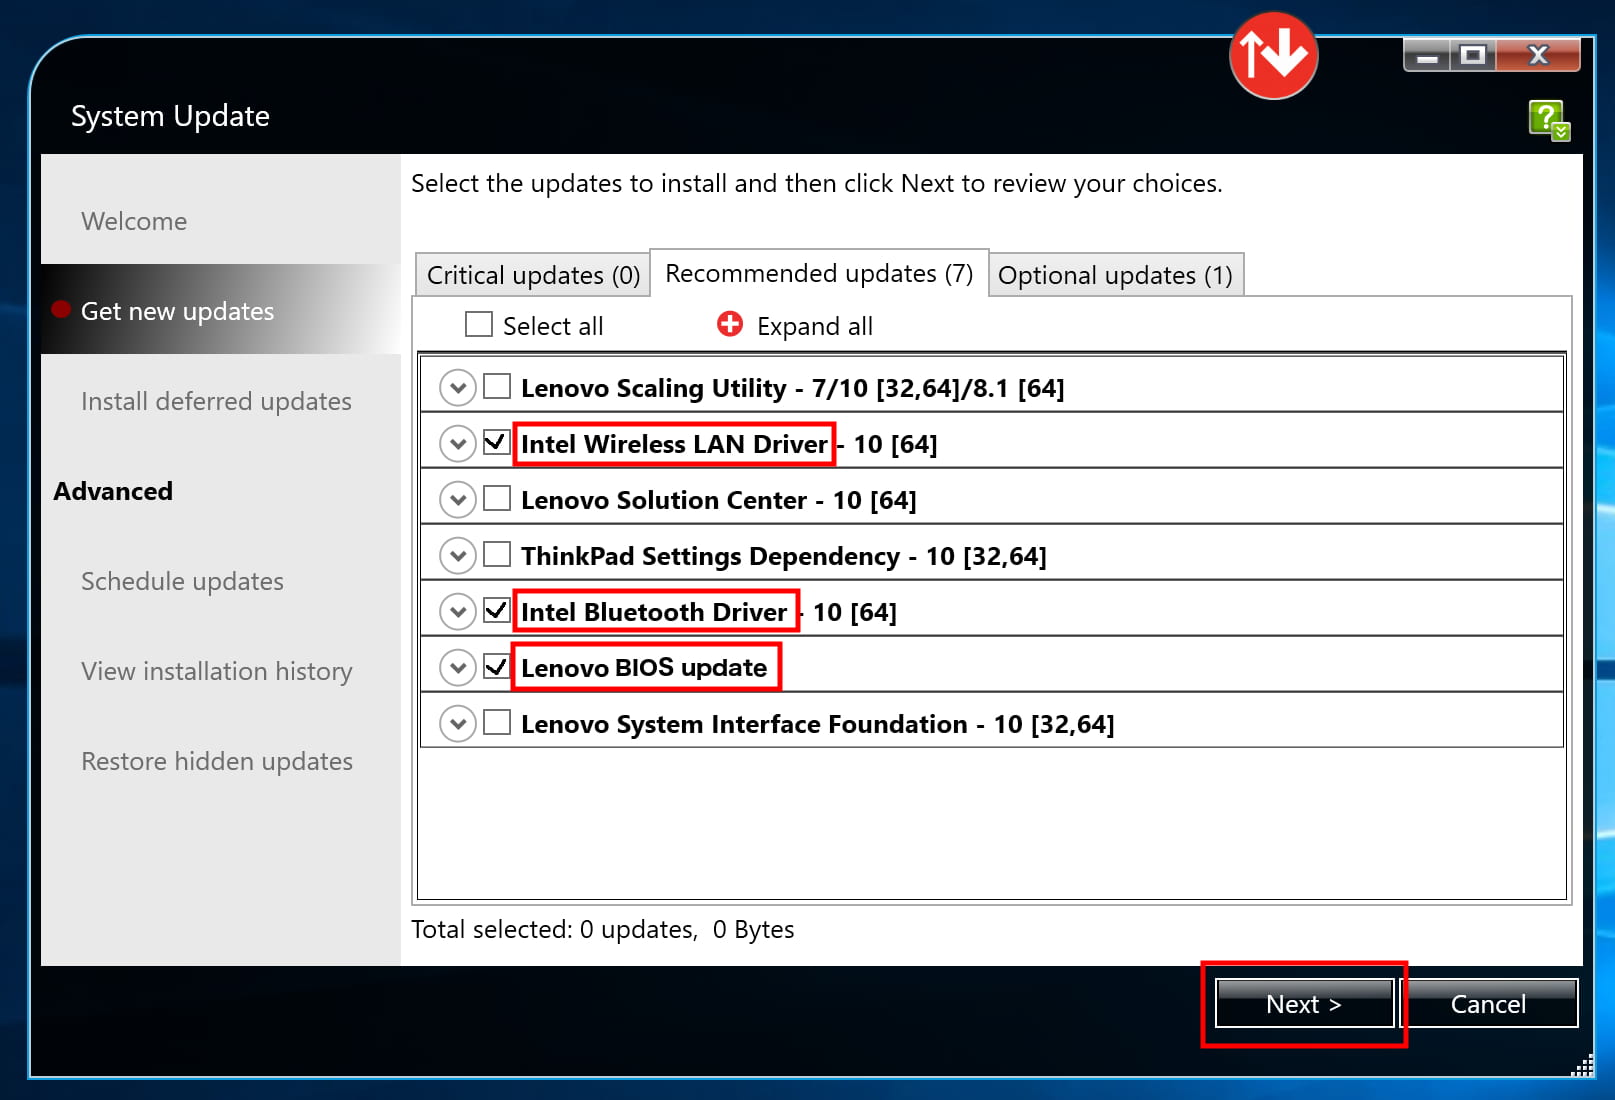
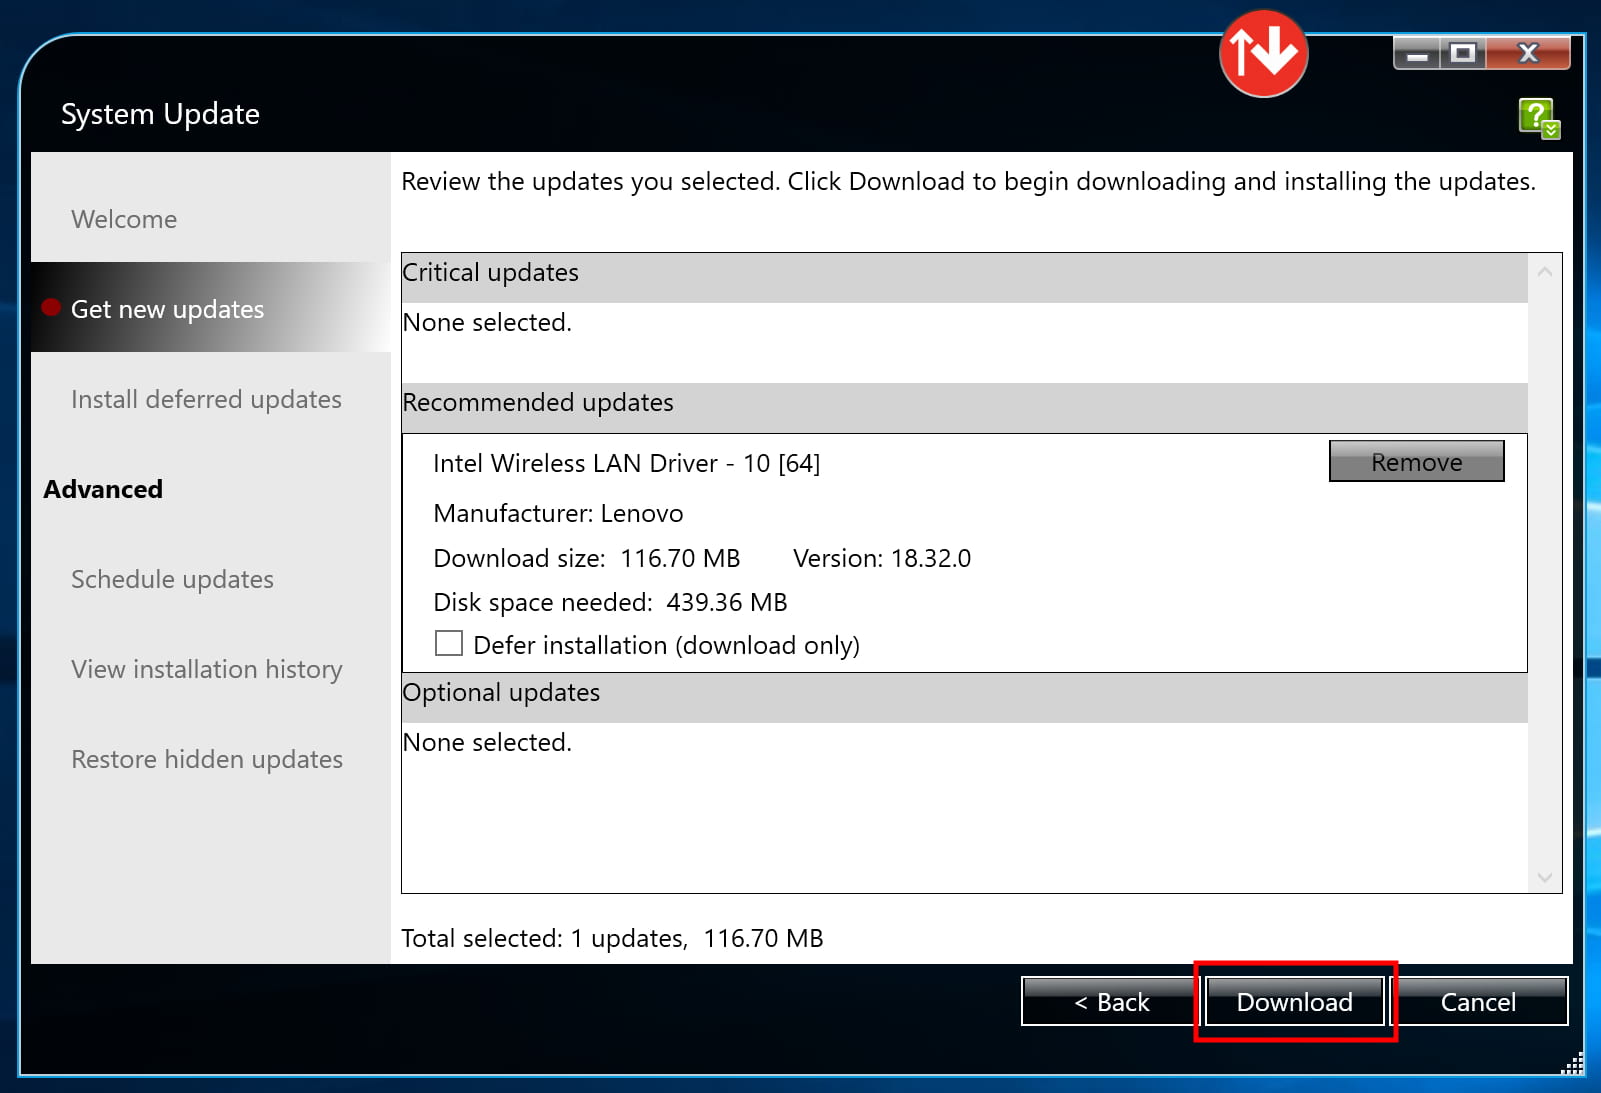
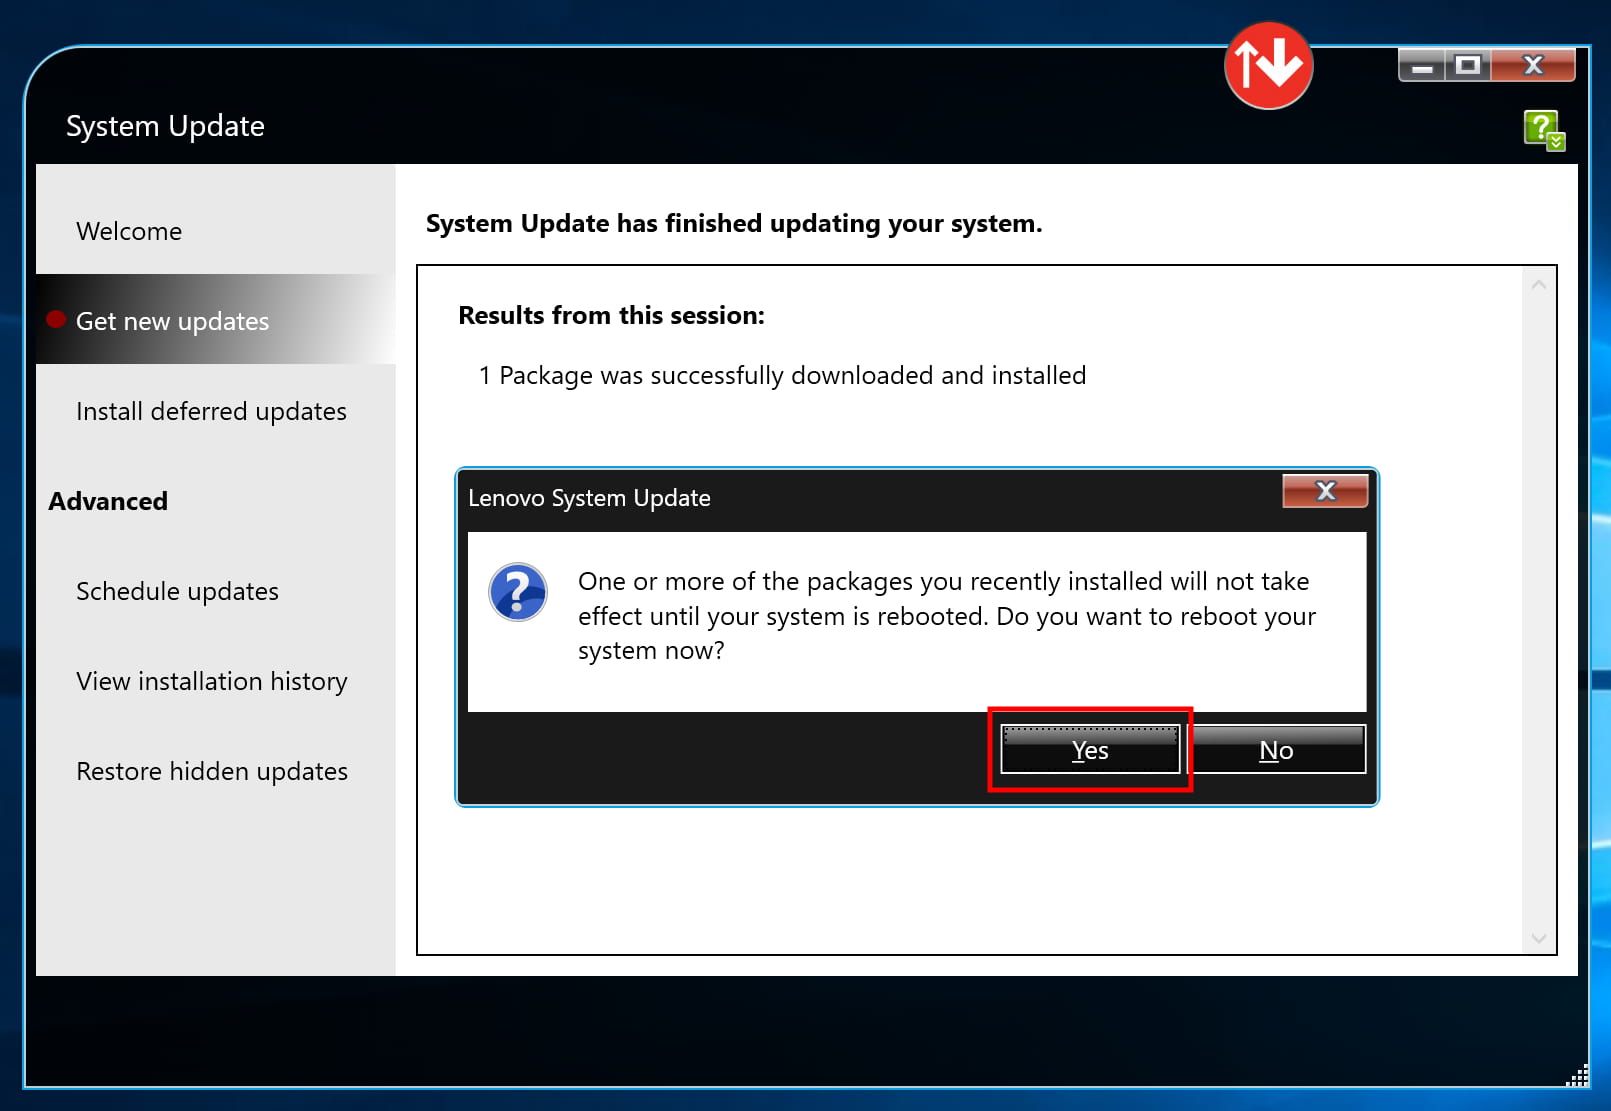
9) Install the Code42/CrashPlan file backup software by following the steps on this web page: Install the CrashPlan file backup software

Use the Code42/CrashPlan software to restore files from a previous computer if necessary. Detailed directions are on this web page:

How to restore files using the Code42/CrashPlan application

Restoring files via Code42/CrashPlan is not necessarily a trivial step. Please contact the iSchool IT Help Desk if there are any questions about restoring files via Code42/CrashPlan.

10) If the Windows device is a laptop, complete the “Eduroam” WiFi network onboarding steps as described on this web page: Eduroam Onboarding Guides

At this point, your iSchool Windows computer has completed the necessary one-time-setup-steps and is ready to use but may not have all of the customizations you need. Some examples of further actions you may need to take:

If Microsoft Outlook is your email application of choice, find and start the Microsoft Outlook application. Follow the instructions provided by Outlook to add your @uw.edu email address.

If you have access to a shared @uw.edu email account and need to add the account to Outlook follow the steps on this web page: https://www.kb.ischool.uw.edu/how-to-add-shared-netid-email-account-to-outlook/

If you need to install Zoom: https://zoom.us/download

If you need to install SecureCRT (to access The UW Student Data Base): https://itconnect.uw.edu/uware/securecrt/

You may need or want to sign in to your web browser of choice to sync/retrieve bookmarks:

Google Chrome sync directions

Firefox sync directions

Microsoft Edge sync directions

Group Policy update (gpupdate /force)

Group Policy update (gpupdate /force)

Occasionally iSchool IT will ask you to perform the following steps to troubleshoot a setting or solve a problem with your Windows computer. The steps below reapply any “Group Policies” set to apply to your computer:

1) Save any files you may be working on. Quit unnecessary, open applications. The process may require restarting the computer.

2) If you and your computer are off campus, connect to the UW Husky OnNet VPN.

3) Right-click the lower-left Windows icon, click Windows PowerShell (Admin).

4) Click Yes when prompted with the “Do you want to allow this app…” question.

5) In the “Windows PowerShell” window that opens, type:

gpupdate /force

Press Enter on your keyboard.

6) You will see wording like “Updating policy…”. The process could take a few minutes. You should see wording that the process completed successfully. You may be asked to restart your computer, if so, restart your computer.

7) If a computer restart is not needed, close the Windows PowerShell window by clicking the top-right “X”.

Lenovo System Update

Lenovo System Update

iSchool-issued Lenovo brand laptops come with an application named “Lenovo System Update” installed.

The Lenovo System Update application regularly runs in the background to install driver updates.

Every once in a while, you may be faced with a notification telling you updates that require a computer restart are available. See example message below.


If you see the message, follow the instructions to apply the updates. In general, you should apply the updates as soon as you are able. While you have the option of clicking “Cancel”, you will need to install the updates sooner or later.

While the Lenovo System Update application does run on a regular schedule, you have the option to run it on demand, to look for driver, BIOS, and firmware updates by following the instructions on this page:

Lenovo System Update driver, BIOS, and firmware updates search

Lenovo laptop reset button

Lenovo laptop reset button

Lenovo laptops with non-removable batteries have a “power/battery reset” button that is useful to use when troubleshooting problems with:

– laptop not powering on
– external devices (including monitors) not being recognized by the laptop
– power adapters (battery chargers) not being recognized by the laptop
– messages about the power adapter

The actions below do not affect any software or settings.

—-

Follow these steps to use the “power/battery reset” button:

– Disconnect computer from all cables, including monitors and power adapters.
– Shutdown computer.
– Find a paperclip, toothpick, or other small pointy object.
– Turn computer upside down.
– Stick the paperclip (or other object) in the small hole on the bottom of computer. You should feel a click.

– Click the button a few times.
– Click the button and hold it down for 60 seconds.
– Plug the power adapter back into the computer.
– Turn the computer back on.
– Plug external devices and/or cables back into the computer.

BitLocker

The iSchool has BitLocker configured on all faculty, staff, and PhD student Windows computers. BitLocker is a Microsoft disk encryption technology. Once BitLocker is turned on, your UW NetID credentials will continue to allow you to sign into the computer; you should see no noticeable change in behavior.

If you are ever prompted for a BitLocker Recovery Key, please contact the iSchool IT Help Desk.

More about BitLocker can be found at the websites below:

https://docs.microsoft.com/en-us/windows/device-security/bitlocker/bitlocker-overview

https://en.wikipedia.org/wiki/BitLocker


Driver, BIOS, and firmware updates

Driver, BIOS, and firmware updates

If a specific hardware part of your computer is not working correctly, updating “drivers”, “BIOS”, or “firmware” is worth trying to attempt to fix the problem.

Before proceeding with the instructions, save whatever documents you are working on. You will likely need to restart your computer to install updates.

My computer is a:

iSchool issued Lenovo


update drivers on an iSchool issued Lenovo

1) Click the lower-left Windows icon to bring up the Start menu.


2) Start typing the words “system update.” Click the System Update icon to start the application.

search_for_system_update


3) Click Next, the application will search for updates applicable to your computer. If there is an update available for the Lenovo System Update application itself, follow the on-screen instructions to apply the update.

system_update_next


4) Once search results appear, for the “Critical updates” and “Recommended updates” sections, select only the items that have the words “Thunderbolt” or “Driver” or “BIOS” or “Firmware” in the title. Click Next.

note: The picture below is an example. The updates that appear for your specific computer will likely be different from what is pictured below. Select only the items that have the words “Thunderbolt” or “Driver” or “BIOS” or “Firmware” in the title.

driver_bios_updates


5) Click Download.

download_selected_drivers


6) The selected items will be downloaded and installed. Follow any specific on-screen instructions presented.

download_and_install_progress


7) When the installation is finished, you may be prompted to restart the computer. Follow the specific on-screen instructions.

restart_if_needed

Activation Required Prompts and Microsoft Software

iSchool owned Windows computers are set up to periodically check-in with a license server on campus to verify the activation of Windows (the operating system itself).

If your computer has been off campus for quite some time and your computer has not connected to the Husky OnNet VPN for quite some time (at least once every 180 days), you can expect to see a prompt or message telling you that you are required to activate Microsoft Windows or your license will expire soon.

If you see a message about needing to activate Windows, connect to the Husky OnNet VPN, then wait. You may continue working. Your computer will automatically “check in” with the on-campus license server, activate Microsoft Windows, the “activation required” message will disappear, and you can disconnect or exit the Husky OnNet VPN application.

More about how activating Microsoft products works at the UW, can be found on UW-IT’s website:

https://itconnect.uw.edu/wares/msinf/software/activating-microsoft-products/

All about iSchool backup (what, who, when, where, how, why)

The goal of backups performed by iSchool IT is to allow you to recover from a hardware disaster or transfer to a different computer easily and not to provide archival backups. We currently only backup iSchool-issued computers.


HOW

Files are backed up using an application named Code42/CrashPlan.


WHAT

All the default Windows and macOS user folders are backed up. This means:

on Windows, every file and folder under:

C:\Users\your UW NetID

and on Mac, every file and folder under:

/Users/your UW NetID

is getting backed up.

Sidenote – Although Code42/CrashPlan does backup Firefox and Chrome bookmarks modern web browsers provide a way to backup/synchronize bookmarks across different devices/computers . If you use Firefox or Chrome, we recommend you sign into the browser itself, using your UW email address and use the browser’s built-in sync feature to save all your bookmarks to the cloud:

set up Firefox sync
set up Chrome sync


WHO

All permanent iSchool faculty, staff, and PhD students that have been issued an iSchool computer will have said computer backed up via Code42/CrashPlan.

It is standard operating procedure to backup one computer per person.

If you are not a permanent employee and/or you are using a checkout or loaner computer your machine will not be backed up via Code42/CrashPlan. Please take appropriate actions to safeguard your data.


WHEN

The Code42/CrashPlan application will check for changes and make backups every fifteen (15) minutes.

For the Code42/CrashPlan application to work, your computer needs to be:

a) powered on (not in Sleep Mode)
b) connected to the Internet


WHERE

The Code42/CrashPlan application works whether your computer is on or off campus.

All files are copied/uploaded to a server accessible only by the iSchool IT team.

All files are stored on disk and none are copied to tape.


WHY

The goal of backups performed by iSchool IT via the Code42/CrashPlan application is to allow you to recover from a hardware disaster or transfer to a different computer easily.

Code42/CrashPlan does support some file versioning history by default.


RESTORE / RECOVER FILES

Basic instructions for recovering files from Code42/CrashPlan can be found here. Contact the iSchool IT Help Desk with questions.


UW-IT DOCUMENTATION

UW-IT Code42/CrashPlan documentation

Deep Freeze/Administrative rights on lab computers security model

In order to give students at the iSchool the greatest possible flexibility in achieving their academic work, everyone who uses an iSchool lab computer is automatically logged in to that computer as a local administrator. This allows the user to have full permission to install software and to make any number of configuration changes to the computer’s operating system.

While The iSchool believes in providing an open learning environment, it also wants to give its lab users secure, reliable machines. For this reason, it has chosen to run Deep Freeze on all lab machines.

Deep Freeze is a program that restores a computer to a “fresh state” after each system reboot. Consequently, if you install a program on an iSchool lab machine and then reboot the machine, the program will no longer be installed when the machine restarts. Deep Freeze returns the computer to its original pristine state, so if you ever experience any problems with a lab computer they can be fixed by rebooting.

Using Deep Freeze ensures that our machines stay up and running with the least amount of interruptions due to accidental configuration changes, software bugs, spyware, malware, and viruses.