
Introduction
As you may understand, Microsoft 365 tools are not natively available on Linux.
Many people as of time of writing are leaving Windows for GNU/Linux (for a variety of reasons, often being privacy, dissatisfaction increasing bloat, recall/AI spyware, etc…), but some believe they cannot (despite that they would like to) because they need to use tools like Microsoft Outlook or Microsoft Word.
However, there are free and open source alternatives that can integrate just fine. This is mainly a list of applications, methods, and alternatives to Windows software that can be used on Linux. This often takes the form of free and open source (FOSS) alternatives.
Using OneDrive and SharePoint
Although Linux does not have an official OneDrive client, a free open source fully functional command line interface with an optional GUI can be found here. It can be used to interface with OneDrive systems, with full functionality.
The repository and installation instructions can be found here:
https://github.com/abraunegg/onedrive
Using Microsoft 365 Tools/Email
Microsoft 365 tools like Word are not available natively on Linux, because Microsoft would rather you stay in their ecosystem, because they make money that way.
However there are multiple ways to use these products regardless.
Webapps
All Microsoft 365 tools are available as platform agnostic web apps, that fully integrate with other Microsoft 365 services. All you need is a web browser of choice, and to login with your MS account.
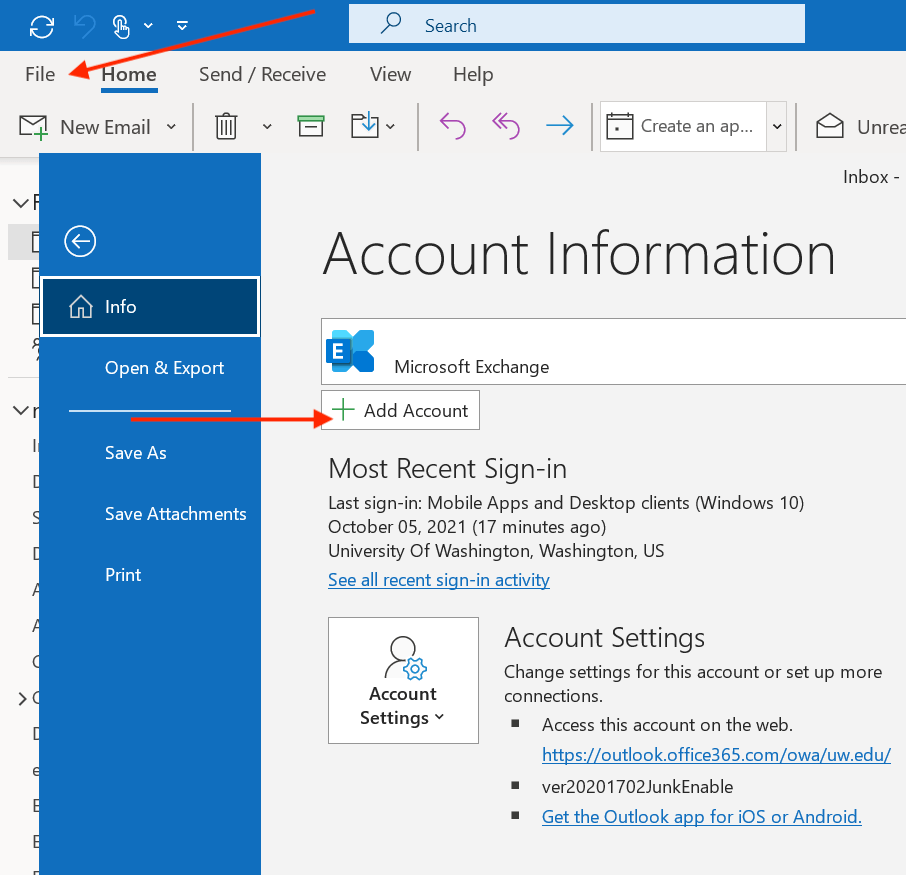
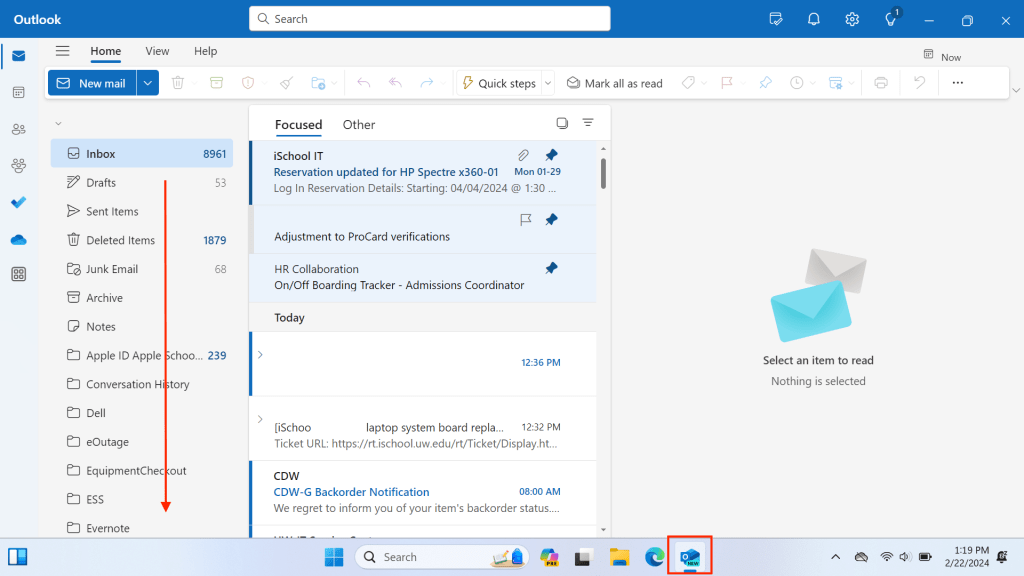
You can even use things like Microsoft Outlook this way, allowing you to access your inbox and emails without needing an application.
Compatible Native via WINE
You can try to run software like Microsoft Word through a Windows-Linux compatibility layer such as WINE, though this is not recommended and often has issues.
Alternatives
Some popular alternatives to the Microsoft application suite include LibreOffice, for example. Unlike Microsoft’s paid subscriptions, many of these are free and open source. They can fully read and write all types of Microsoft documents, and when integrated with the previously mentioned OneDrive client can be used very similarly to how you would on Windows, enabling you to edit documents and even push them to the cloud.
For Email Clients, Mozilla Thunderbird is a popular alternative to Microsoft Outlook, and for good reason. You can even forward your UW Outlook Email to it if you so desire.
Graphic Design & Digital Drawing/Art
A lot of people like Adobe Photoshop for some reason. Of course, because Adobe is motivated by profit, they do not have a Linux native version. Again, you could try to run it via compatibility layers, but ideally you want something native.
GIMP, or GNU Image Manipulation Program is a good alternative for more image editing related tasks and is FOSS software.
If you are more into digital drawing/animation or like a more intuitive interface (GIMP has a bit of a learning curve), Krita is a solid choice, and also FOSS software.
If you need to work with scalable vector graphics (SVG) things, Inkscape is ideal for this kind of work.s
3D Rendering/Modeling/Animation/Art
A lot of proprietary 3D Modeling and Rendering software is not available on Linux. There are some outliers that have Linux native versions, but those are less common. You may want to run a majority of these with WINE if possible.
However there is one outlier, that being Blender, which you have most likely at least heard of. Blender is a FOSS 3D modeling and rendering tool, and is sometimes regarded as better than it’s proprietary alternatives. It is the main choice for Linux users and is very versatile. You may know it for creating movies such as Flow.
In fact, Blender was originally developed for Linux operating systems, and only ported to other operating systems later. It runs significantly better on Linux operating systems as a result.
CAD
As with 3D Modeling and Rendering, a lot of proprietary CAD software is only available for Windows natively (because companies are profit driven, there is no intensive for them to provide Linux options or improve the software). You can again run these with WINE if possible, but this is not a perfect solution and can have issues. Some people may opt for a virtual machine.
As for Linux native options (native options are always ideal for performance reasons, and why would you use a software that refuses to support your operating system of choice), a popular choice is FreeCAD, which is FOSS software for aforementioned CAD. From the writer of this article’s experience, it works very well.
Video Calling/Chat
Most video call or chat applications are webapps, and for those that are not there is usually a Linux version (Discord, matrix.org, etc).
A popular option for video calling in professional spaces, Zoom, has packages for major distributions available on their website.
This article is incomplete and could use more detail. Unfortunately the original writer does not have much time. If you are knowledgeable in these topics and have the ability to, please improve this (albeit do not remove my existing suggestions even if you think you know better alternatives, just list both please. we don’t need softwarewars as a bootleg of stupid distrowars here).


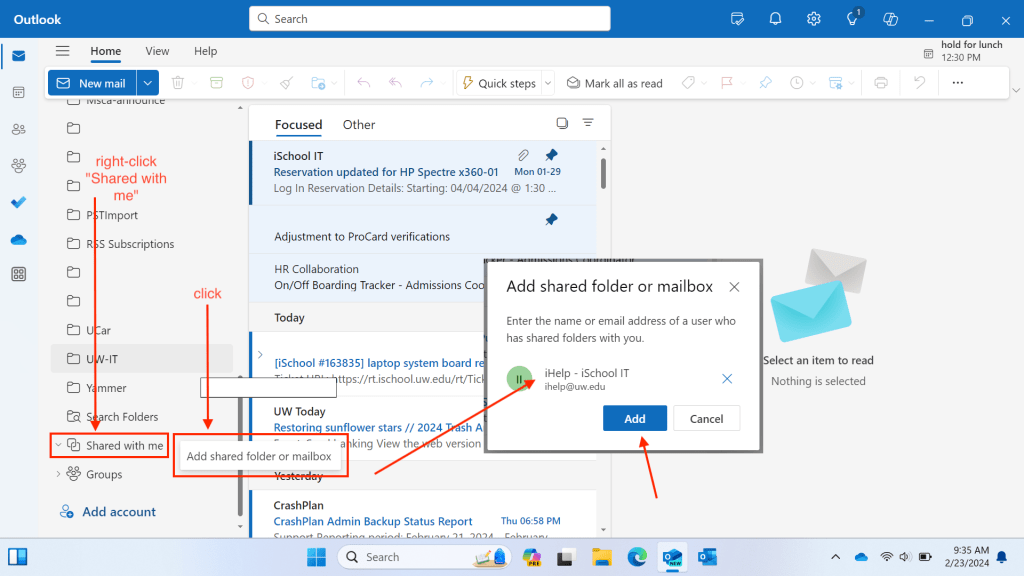
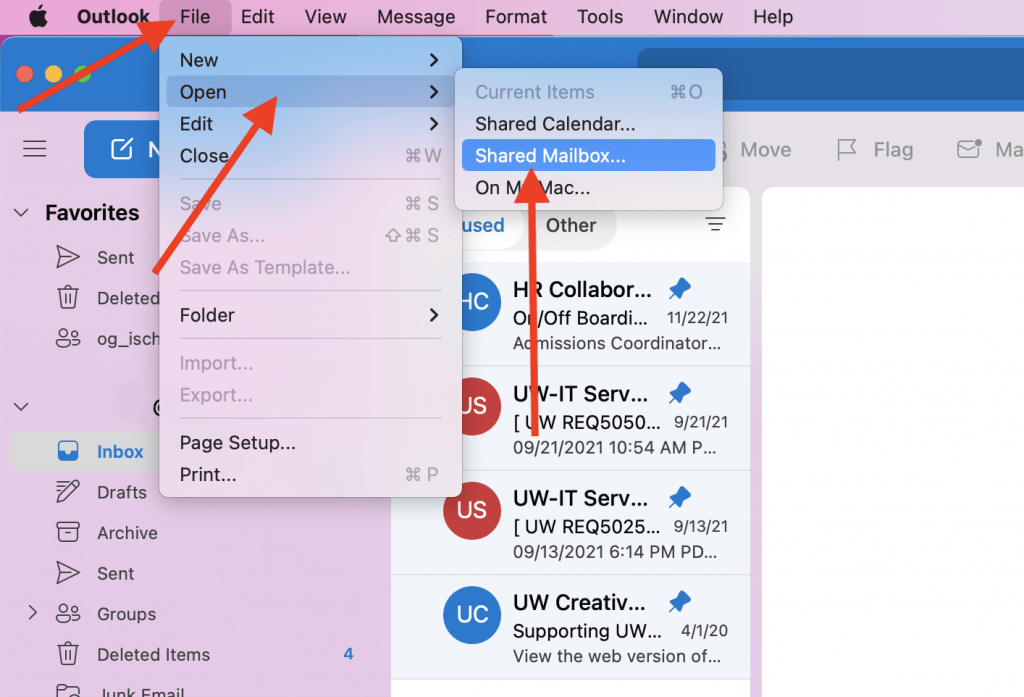


 Calendar with others at the UW and with External Users")