Performing a Mail Merge using a supplemental account

iSchool staff often have supplemental/additional accounts in Outlook. It can be useful to be able to send Email using the Mail Merge feature from a supplemental account so that replies go to the supplemental account instead of to your personal Email account. This is ideal, as the recipients might not recognize or be expecting an email from your personal account but they do recognize your supplemental account.

To perform a Mail Merge on Microsoft Outlook using a supplemental account, on a computer running the Microsoft Windows operating system:

  1. Be sure you have the proper access to the supplemental Account. If you do not or you do not know, ask iSchool IT.
  2. The supplemental account needs to be added to Outlook as an additional/separate account.
    1. If you do not know if you have a second account on Outlook, go to File > Account Info.
    2. You should see more than one account in the dropdown.
    3. If you do not see a second account, here is a guide to setup multiple accounts in Outlook on Microsoft Windows.
  3. To use your supplemental account for Mail Merge, you need to set the supplemental account as the default account in Outlook.
    1. Go to File > Account Settings > Account Settings. Click on the supplemental account to select it and then click on “Set as Default”.
    2. Then, you need to set the Email address to send messages from so that mail merge will work properly.
    3. In Outlook, go to File > Options > Mail > Send messages, and make sure that the “Always use the default account when composing new messages” is checked.

NOTE: Once you are finished using Mail Merge, be sure to uncheck “Always use the default…”  (classic only) and set your personal Account as the Default Account in Outlook. If you do not, you will end up sending all your mail from your supplemental account by accident, because your supplemental account is set as the Default.



How to Create a Rule for Outlook or OWA

Sorting email into folders automatically can be a huge time saver and can keep you focused on the messages that demand your immediate attention. You can create rules to let Outlook or OWA (Outlook Web App) sort them into the folder of your choice. Rules can sort messages based on the sender, the subject, the recipient or a combination of various characteristics. When you are creating a rule for Outlook, make sure that:

RULES

  • If you have a UW Spam Gauge rule applied, always move the Spam rule to the top of your list of rules so that it is processed first.
  • All your rules are server-side unless you are creating rules for client only actions, such as coloring your emails or otherwise personalizing your email. You can make your rules on OWA to ensure it’s server-side.

Here is an article from Microsoft about how to make rules in Outlook:

https://support.office.com/en-us/article/manage-email-messages-by-using-rules-c24f5dea-9465-4df4-ad17-a50704d66c59

And one about how to make rules in OWA:

https://support.office.com/en-us/article/inbox-rules-in-outlook-edea3d17-00c9-434b-b9b7-26ee8d9f5622

UNREAD MAIL

Once you have rules in place that sort your email you need the ability to find them. This is best done using the Unread Mail Search Folder:

https://support.office.com/en-us/article/View-only-unread-messages-F2C8450C-9CD0-4037-A5D3-26F6946727CA

Office 365 SLA (Service Level Agreement)

Many of us expect email to be delivered instantly. Although it is usually very fast, there are many factors that affect the delivery time and most of us have unreasonable expectations based on the service that we use. This article will hopefully explain some of the things that can affect the delivery of email and spell out the level of service guaranteed by Microsoft.

In summary:

  • The service design goal of Exchange Online is the delivery of email in less than one minute, but this is an average over a month and not for any one email message.
  • Broken is considered an average delay of greater than 10 minutes over a month, again this is an average and does not apply to any individual email message.
  • Any one message is considered delayed after three hours at which point the sender should get an information email.
  • Any one message that is not delivered in three days is failed and the sender will get a NDR (Non-Delivery Report).

There are also other factors that affect the delivery of email.

  • Exchange on-premise adds additional delay for Exchange Online users, this is usually under one minute (20-30 seconds seems normal) but can be up to five minutes. Currently, because of a requirement of a small number of users, all Exchange Online email is routed through an on-premise Exchange server. If there is a delay, this is usually where it occurs rather than with any Microsoft infrastructure.
  • That said, routing email through an on-premise Exchange server has mitigated numerous other risks with corresponding cost reductions that would have been incurred by addressing them. It also lets the UW comply with ISO 27001, ISO 27018, Safe Harbor, SSAE16 SOC1 Type II, SOC2 Type II and FISMA. Very few cloud-only (or even any) email providers can claim this.

Recover a deleted Contact in Outlook

Sometimes we delete things accidentally and sometimes we even empty the Deleted Items folder before we figure out what we did. Fortunately, if you realize what you have done within a few days, there is a recourse.

Follow these instructions:

https://support.office.com/en-us/article/Recover-a-deleted-contact-in-Outlook-51c83288-6888-4dcd-8c99-4932daabf643?ui=en-US&rs=en-US&ad=US

Edit your Office 365 Profile

How to edit your Profile Picture in Office 365, Outlook, Teams, etc.

1) Browse to here: https://www.microsoft365.com  and log in.

2) Click on your old picture or your initials in the circle in the top, right corner.

3) Click the “My Microsoft 365 profile” link.

4) Click on the camera icon and upload a picture of yourself (you can use your iSchool staff picture if you like) in the popup dialog.

5) Optionally, you can also edit your Profile to add additional information to your profile here.

Note that your Name, title, etc is locked by UW and cannot be updated here.

Activation Required Prompts and Microsoft Software

iSchool owned Windows computers are set up to periodically check-in with a license server on campus to verify the activation of Windows (the operating system itself).

If your computer has been off campus for quite some time and your computer has not connected to the Husky OnNet VPN for quite some time (at least once every 180 days), you can expect to see a prompt or message telling you that you are required to activate Microsoft Windows or your license will expire soon.

If you see a message about needing to activate Windows, connect to the Husky OnNet VPN, then wait. You may continue working. Your computer will automatically “check in” with the on-campus license server, activate Microsoft Windows, the “activation required” message will disappear, and you can disconnect or exit the Husky OnNet VPN application.

More about how activating Microsoft products works at the UW, can be found on UW-IT’s website:

https://itconnect.uw.edu/wares/msinf/software/activating-microsoft-products/

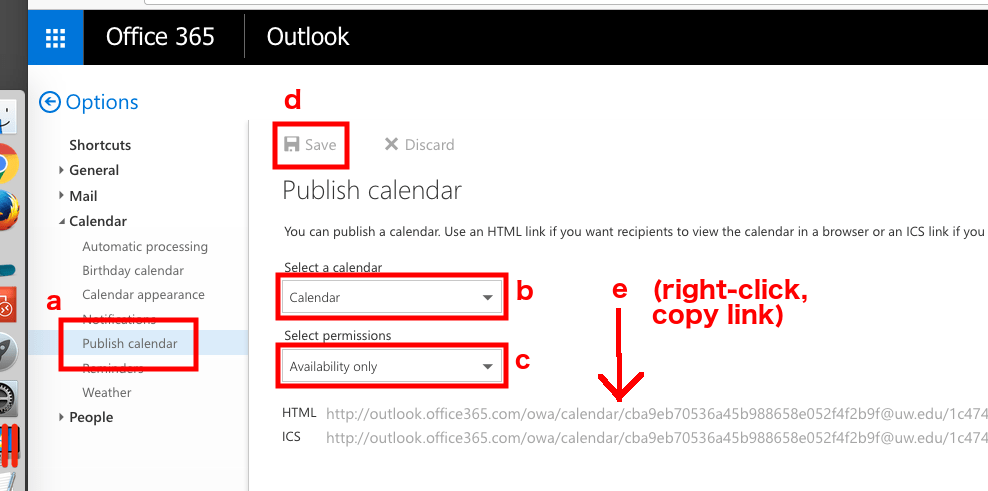
How to share your Outlook (read: Exchange) Calendar with others at the UW and with External Users

How to share your Outlook (read: Exchange) Calendar with others at the UW and with External Users

Before you proceed, note that by default everyone at the iSchool (and everyone else at the UW that uses the UW Microsoft 365/Office 365 service) can already see the default free/busy info of everyone else. This means people can already see when you are free, when you are busy, what your working hours are and when you are out of the office.

“Advanced” sharing options are possible if you want to give someone access to more details. This could be allowing someone outside of UW the chance to view to your calendar, or if you want to give someone “delegate” (edit) rights to your calendar.

It is recommended that you configure “advanced” sharing options using the Outlook Web App. Detailed directions from Microsoft are available on this web page: Advanced Microsoft 365 Calendar sharing directions.

Mailbox best practices when using Microsoft Outlook – how to keep your Mailbox small

Microsoft Outlook stores data (E-mail, Calendar items, Contacts, etc.) in a file. If you use Outlook at home and like many users are not connected to an Exchange server, the file is called a PST (Personal Storage) file and is stored on your computer. If you are employed as a faculty or staff member at the iSchool or another business and connect to an Exchange server, the file is called an OST (Offline Storage) file. It contains copies of all the data, which is subsequently stored on the server.

Regardless of what type of file you have, the size of this file is limited if you want good performance and reliability. Although the absolute maximum size of OST files keeps growing (at the UW the limit is currently 100GB), for optimal performance we recommend you keep your OST file much smaller, less than 10GB is ideal.

These instructions will explain some best practices so that your mail store (read: Mailbox size) never grows too much and shows you how to determine the size of your mail store.

NOTE – this process can take anywhere from 30 minutes to 2 hours to complete (depending on the size of your Mailbox), so please allow enough time.

General Best Practices

  • Regularly empty your Junk E-Mail and Deleted Items folders.
  • Don’t save attachments in Outlook. Instead, save the files to your cloud storage, your computer (or some other media), and then delete the message. At the iSchool your computer is backed up so all the files saved locally will be safe.
  • Do not send messages to yourself.
  • Do not send large (read: bigger than a couple of MB) attachments via email, instead put the file in the cloud and send a link to the location so the recipient can view or download it.
  • If you do forward a message with a large attachment, delete the item from your Sent Items. There is no need to keep the file in your Inbox and your Sent Items folder.

Outlook Microsoft 365

1) Check to see how big your mail store is.

– In the left pane of Outlook, right-click your account and select Data File Properties.

– Under the General tab click Folder Size.

2) Sort mail by size.

– In the left pane of Outlook expand Search Folders.

– Click on Large Mail to activate it. By default, your large mail items will be sorted by size with the largest on top. Since large items always contain attachments now you can easily save the files and delete the messages.

3) Using the Mailbox Cleanup tool.

– Click the File menu > Tools > Mailbox Cleanup

– We recommend all the options in the Mailbox Cleanup tool except AutoArchive. We do not ever recommend archiving your email and instead always recommend keeping all of it in your Exchange Mailbox.

– The Cleanup tool can remove redundant messages in any folder or any conversation. Cleaning up redundant items in conversations is a great way to free up space. Here is a video demo of the Cleanup tool, the “Clean Up Conversation” feature is mentioned at 5:12:

Outlook on the web

1) Check to see how big your mail store is.

– Click the gear icon (Settings) > View all Outlook settings > General > Storage

2) Clean up your Mailbox.

– While in Storage, empty your Deleted Items folder.

3) Apply Retention Policies.

– Right click every top level/parent folder and select Assign policy. We recommend choosing 6 Month or 1 Year.