Before you proceed, note that by default everyone at the iSchool (and everyone else at the UW that uses the UW Microsoft 365/Office 365 service) can already see the default free/busy info of everyone else. This means people can already see when you are free, when you are busy, what your working hours are and when you are out of the office.
“Advanced” sharing options are possible, for example, if you want to give someone access to more details, if you want to give someone outside of the UW a view to your calendar, or if you want to give someone “delegate” (edit) rights to your calendar.
It is recommended that you configure “advanced” sharing options using the Outlook Web App. Detailed directions from Microsoft are available on this web page:
iSchool faculty, staff, and PhD students have access to several, physical rooms, for meeting purposes. Some rooms have Exchange Mailboxes and Calendars. Said rooms can be scheduled/reserved directly via an Outlook Meeting Request, similar to scheduling a meeting with a person.
.
A list of rooms and information about the rooms can be found on this webpage:
01) Click the arrow button next to New Email, click Meeting. (“1” in the screenshot below)
02) Click Meeting. (“2” in the screenshot below)
03) Click Required. (“3” in the screenshot below)
04) Search for the room you want to reserve/schedule. The most accurate way to search for a room is by using either the email address or the “display name” from the list above. (“4” in the screenshot below)
05) Add the room you wish to schedule/reserve to “Required“; double-click the room from the list or click “Required”. Click OK. (“5” in the screenshot below)
06) Click Scheduling Assistant to see when the room is available, add other attendees’ NetIDs as necessary, and adjust meeting times.
07) Click Appointment, add meeting information as necessary, click Send.
All attendees will receive the meeting request including the room itself. The request for the room will be accepted or rejected based on room availability.
macOS, Outlook
01) Click New Items, click Meeting.
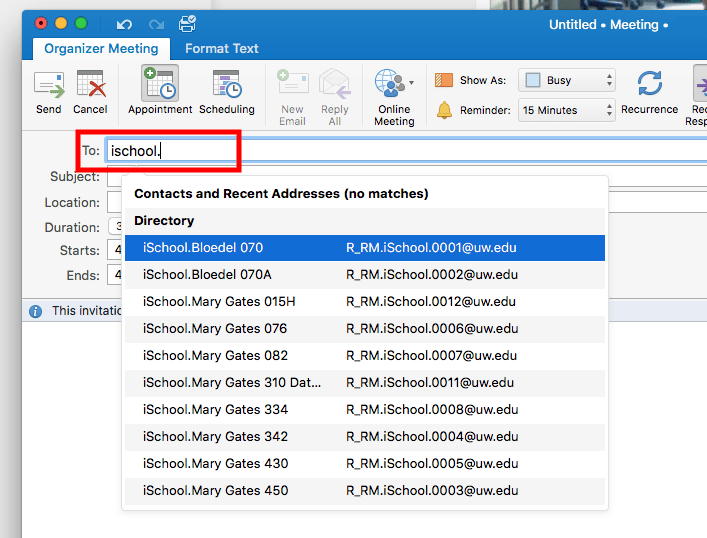
02) In To: field, the most accurate way to search for a room is using either the email address or the “display name” from the list above. Select the desired room.
03) Click Scheduling to see when the room is available and adjust meeting times.
04) Click Appointment, add other attendees’ NetIDs in the To: field as necessary, click Send.
All attendees will receive the meeting request including the room itself. The request for the room will be accepted or rejected based on room availability.
Outlook Web App
1) Sign into the Outlook Web App, use your @uw.edu email address and UW NetID credentials when prompted.
2) Click the Calendar icon in the bottom-left corner.
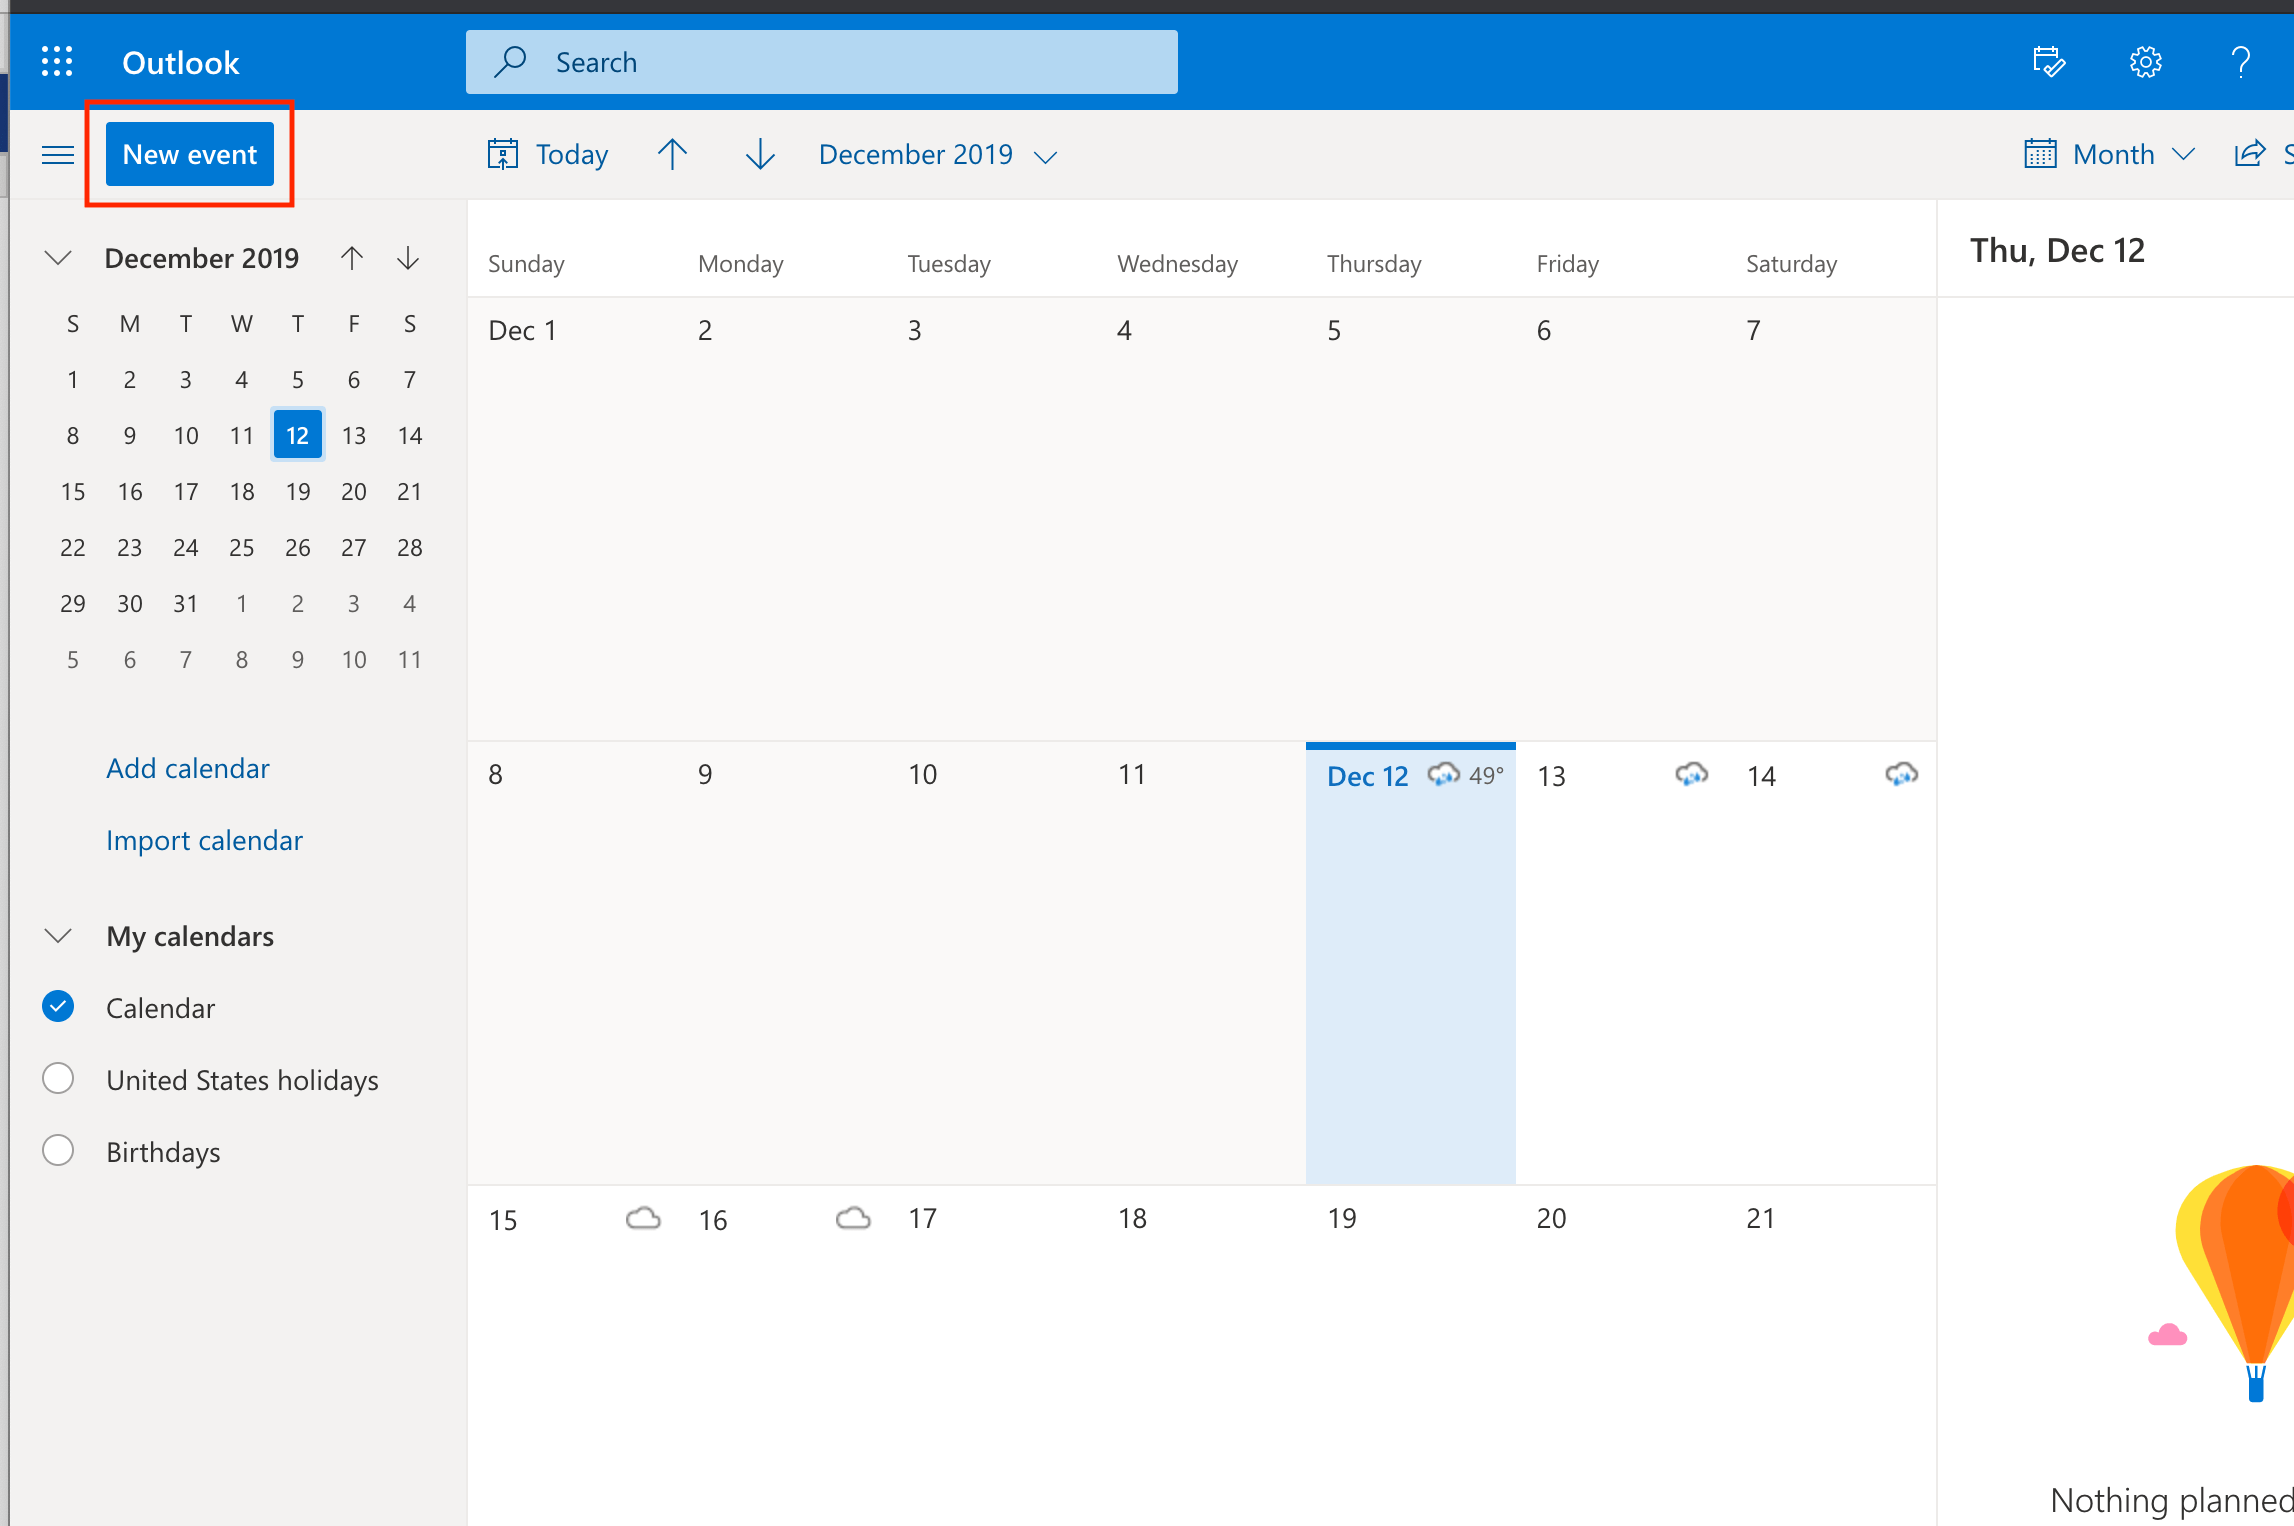
3) Click New event.
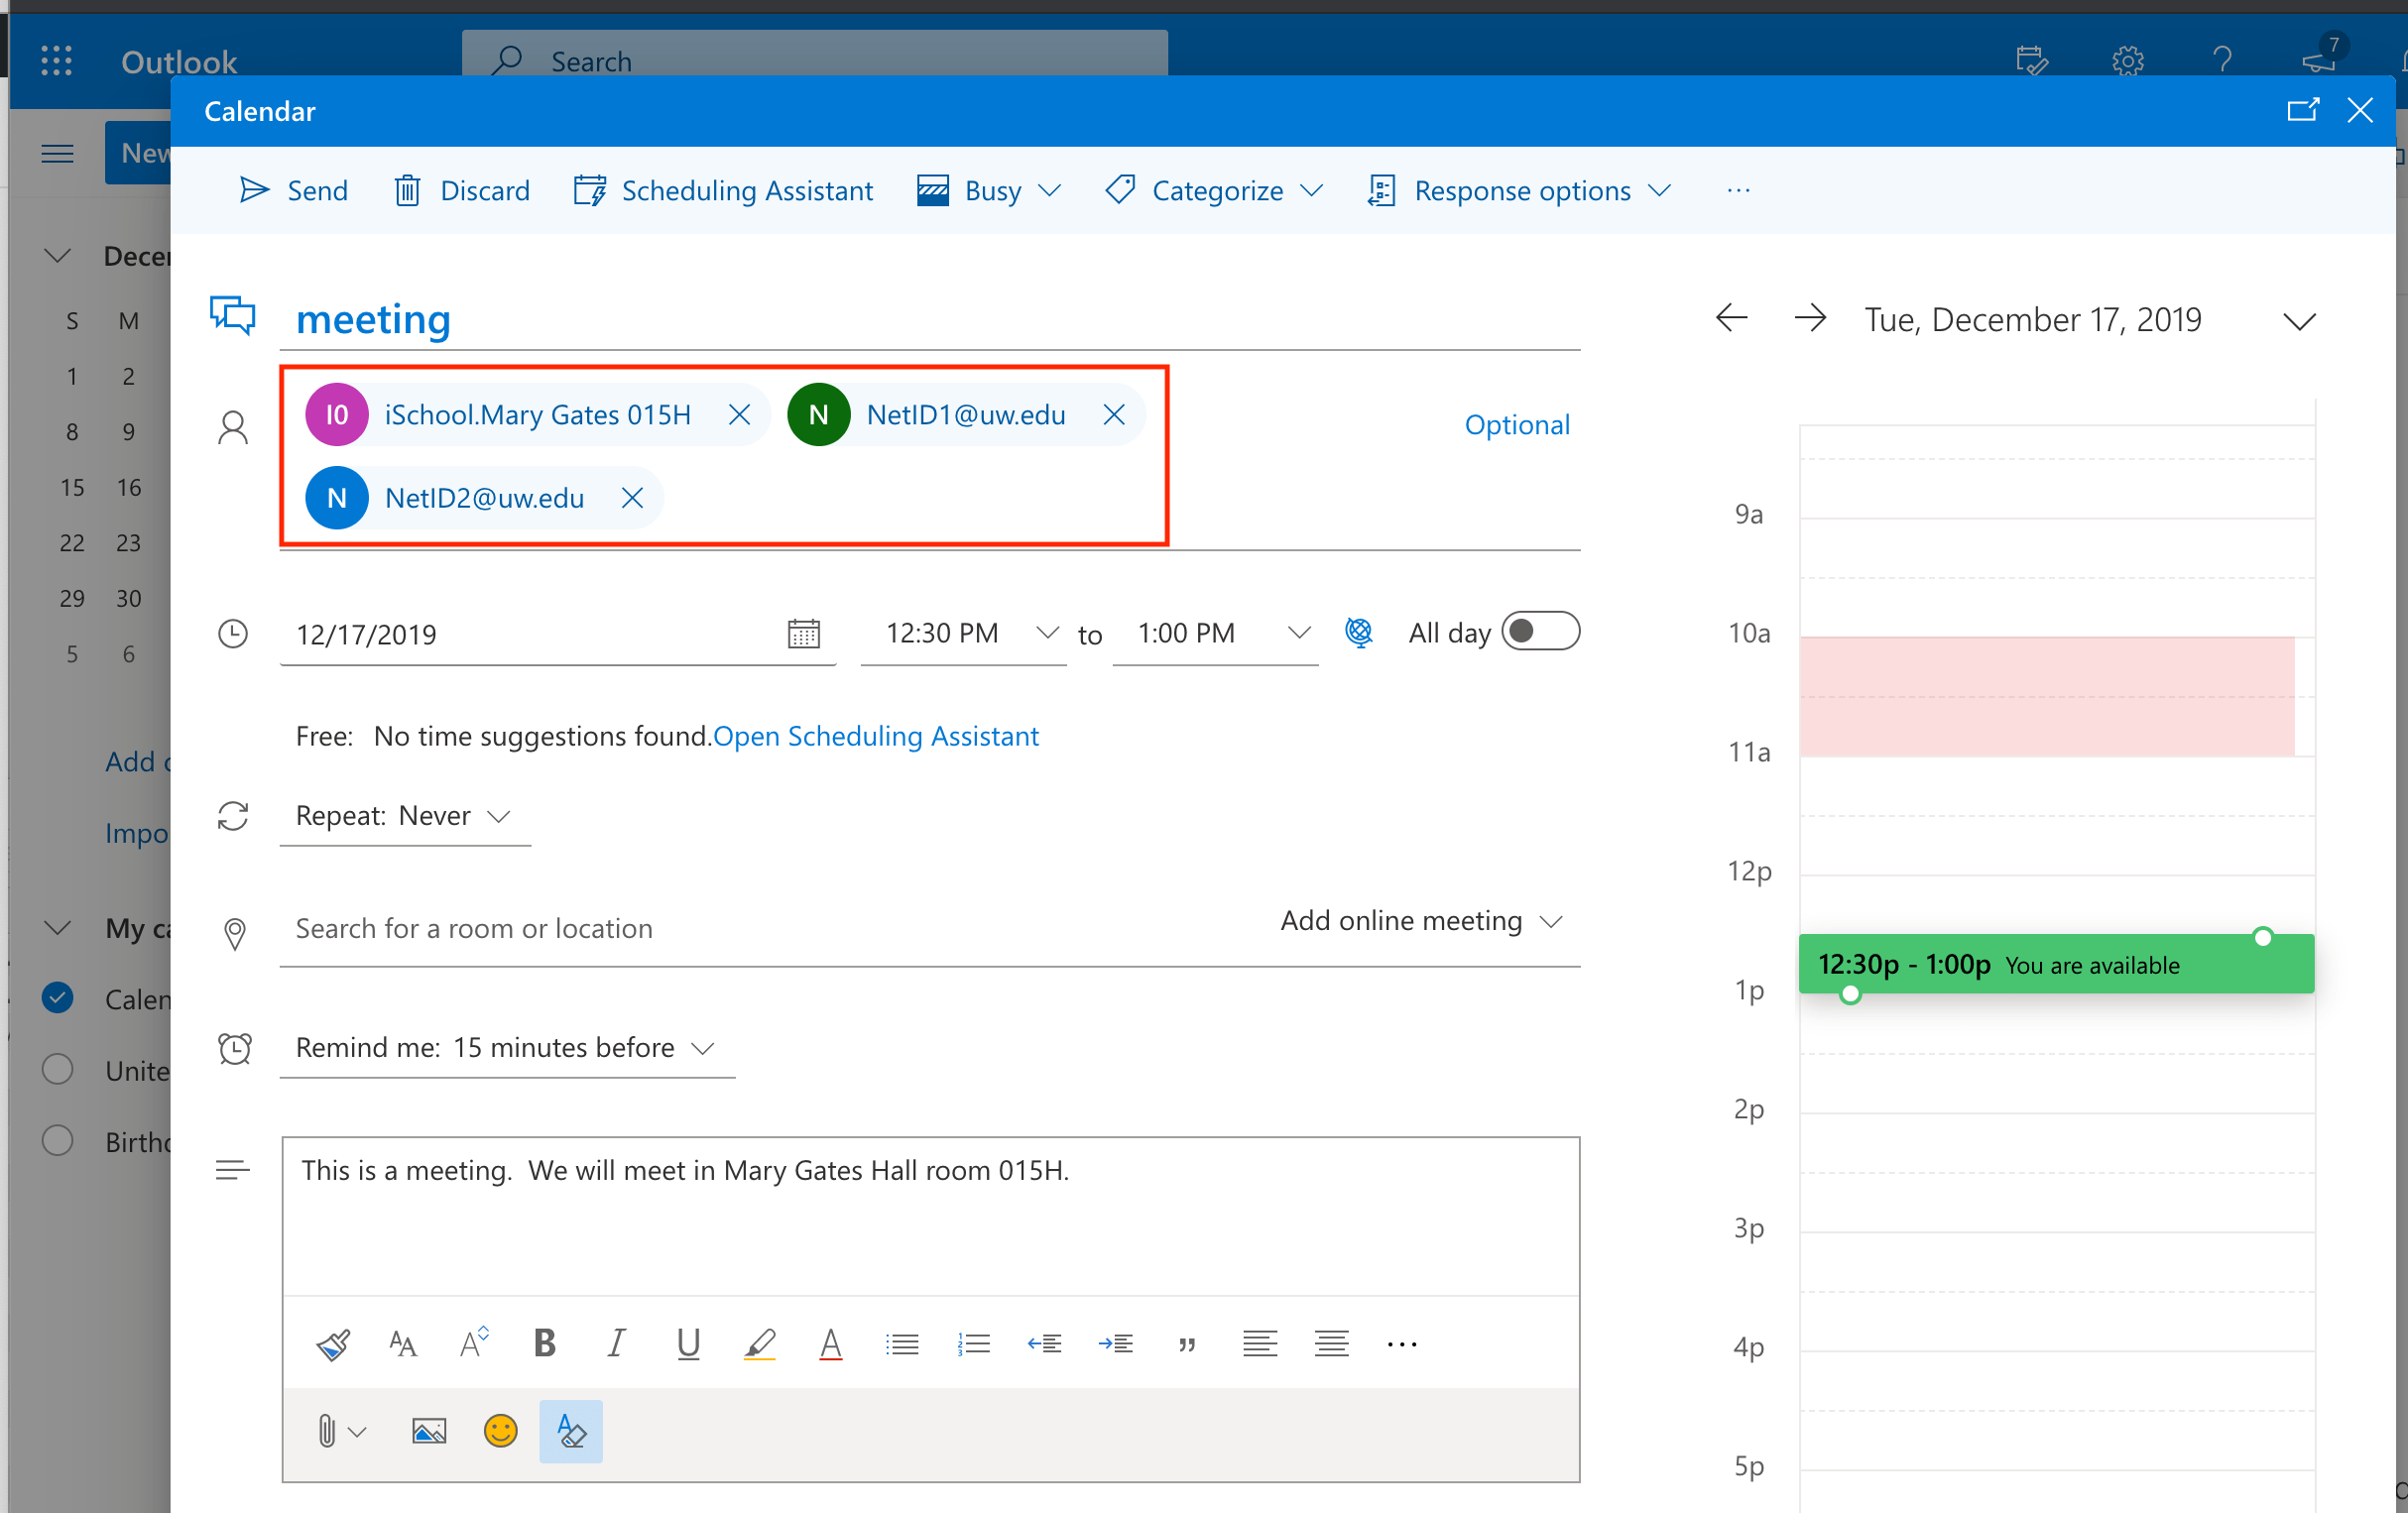
4) In the Invite attendees field, add desired room using email address from the list above. Add other @uw.edu email addresses as necessary. Use the Scheduling Assistant to confirm all attendees, including the room itself, are available. Click Send once all other meeting details are finalized.
All attendees will receive the meeting request including the room itself. The request for the room will be accepted or rejected based on room availability.
If you have any questions after reading this article or if you need any help, please don't hesitate to contact the iSchool IT Help Desk.
https://ischool.uw.edu/help
(206) 616-3086

 Calendar with others at the UW and with External Users")