There are many tasks with PDF’s that can be performed without Adobe Acrobat Pro. Some of the most common tasks are:
Edit a PDF using Microsoft Word
Create a PDF from a Microsoft Office application
Saving an email as a PDF
Sign a PDF
Split or break up a PDF
Combine multiple PDFs
Create a PDF from a web page using Google Chrome
Use Optical Character Recognition (OCR) in Microsoft OneNote
How to edit a PDF with Microsoft Word
Windows 10
Word includes the ability to convert a PDF to a Word document, allowing you to then edit the content:
1) start Word
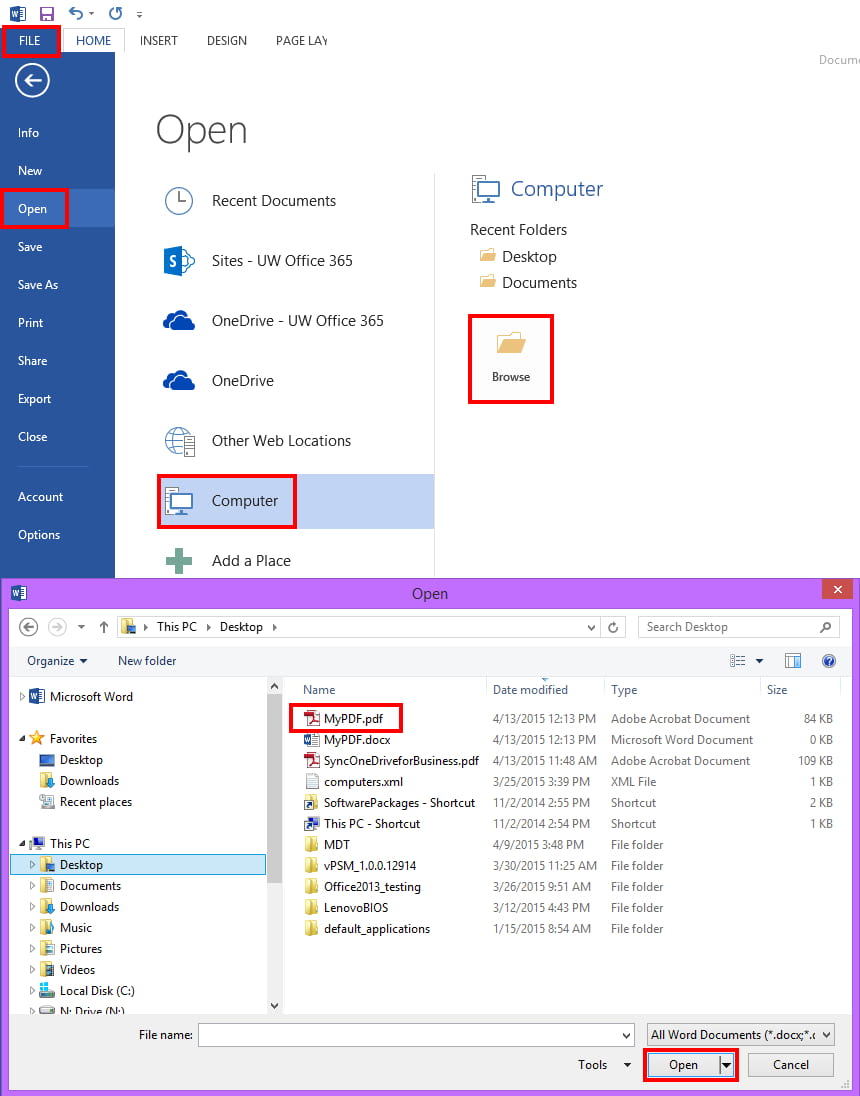
2) click File, click Open, navigate and find the PDF you wish to edit, click Open
3) a message will appear letting you know the converted-and-editable-document may not look perfectly like the original, but, you will be able to use and edit the original content
This works best with files that are mostly text. There are some elements that do not convert well.
More information about editing PDF’s in Word can be found at these websites:
Edit PDF content in Word
Unlock PDFs with Word 2013
Why does my PDF look different in Word?
How to create a PDF using a Microsoft Office application
Although the following instructions are specific to Word, they work for other Office applications like Excel, Visio, etc.
1) create the document in a Microsoft Office application
2) click File, click Save As, click the “Save as type:” drop-down, select PDF (*.pdf), click Save
Outlook does not include a way to save an email directly to PDF. You must first copy the contents of the email to a Word document, then save the document as a PDF.
1) open the message in Outlook
a. (optional) if you want to include the subject and “To” and “From” email address information: click Reply (you will not actually need to reply to the email)
2) on your keyboard, press CTRL and A to select all message content
3) on your keyboard, press CTRL and C to copy selected message content
4) start Word and create a new document
5) on your keyboard, press CTRL and V to paste selected message content
6) click File, click Save As, click the “Save as type:” drop-down, select PDF (*.pdf), click Save
How to sign a PDF using Adobe Acrobat Reader (free application)
1) open the document you need to sign with Adobe Acrobat Reader
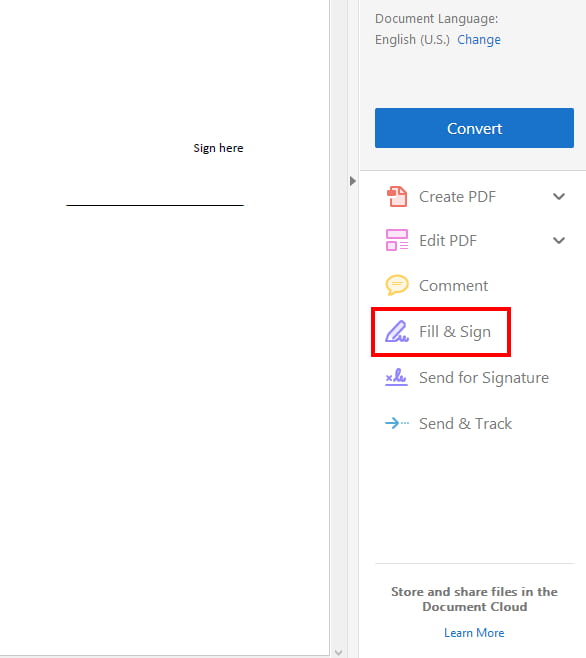
2) click Fill & Sign
3) click Sign, click Add Signature
4) select the option of typing or drawing your signature, enter your signature, select the option of saving your signature for later use, click Apply
5) position the signature, click File, click Save to save the document with your signature
How to split or break up a PDF
There are a few ways to split or break up a PDF:
Split a PDF using Microsoft Word
Split a PDF using the Google Chrome web browser
How to split or break up a PDF using Word
2) copy whatever content you need, paste content into a new Word document
3) save the new document as a PDF
How to split or break up a PDF using the Google Chrome web browser
1) start the Google Chrome application
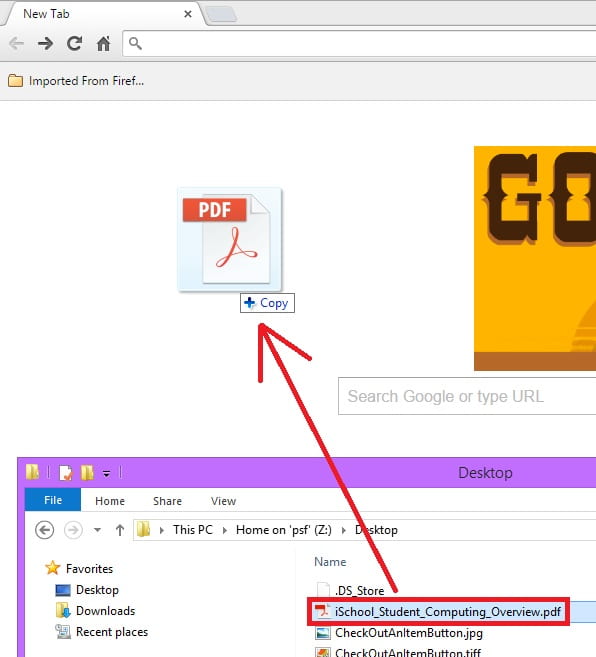
2) find the PDF in a Windows Explorer folder, click and drag the PDF into Google Chrome to open it
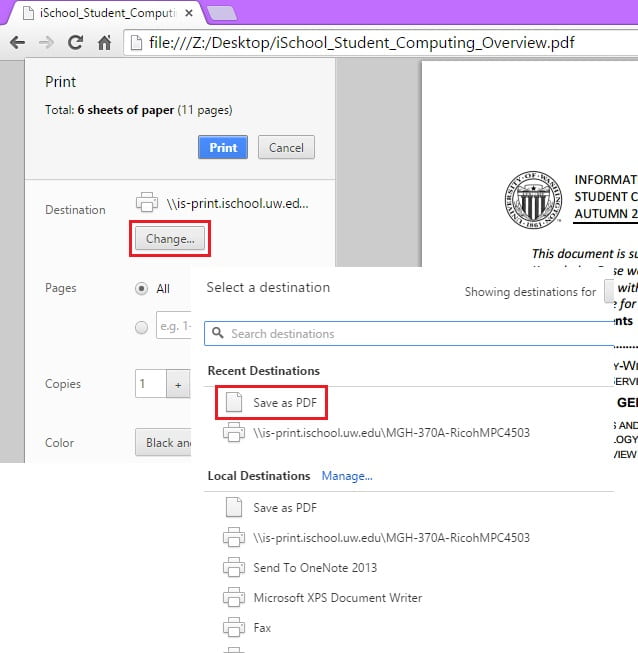
3) bring your mouse to the bottom of the screen to bring up the menu buttons, click the Print button
4) click Change… (destination), click Save as PDF
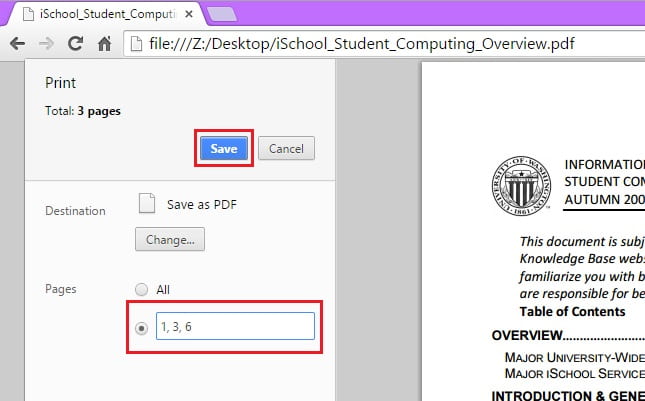
5) enter the specific pages or range of pages you need, click Save
2) copy and paste the contents of each PDF into a new Word document
3) save the new document as a PDF
How to create a PDF from a web page using Google Chrome
1) use Google Chrome to navigate to the web page you intend to create a PDF of
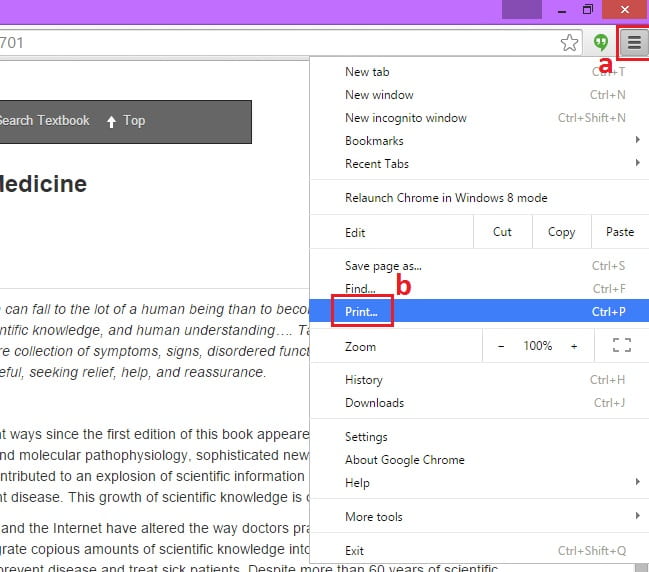
2) click the top-right Chrome menu button, click Print…
3) for Destination click Change…, select Save as PDF, click Save
How to use Optical Character Recognition (OCR) in Microsoft OneNote, Windows Version
Microsoft OneNote, Windows version, has the ability to extract text from scanned images.
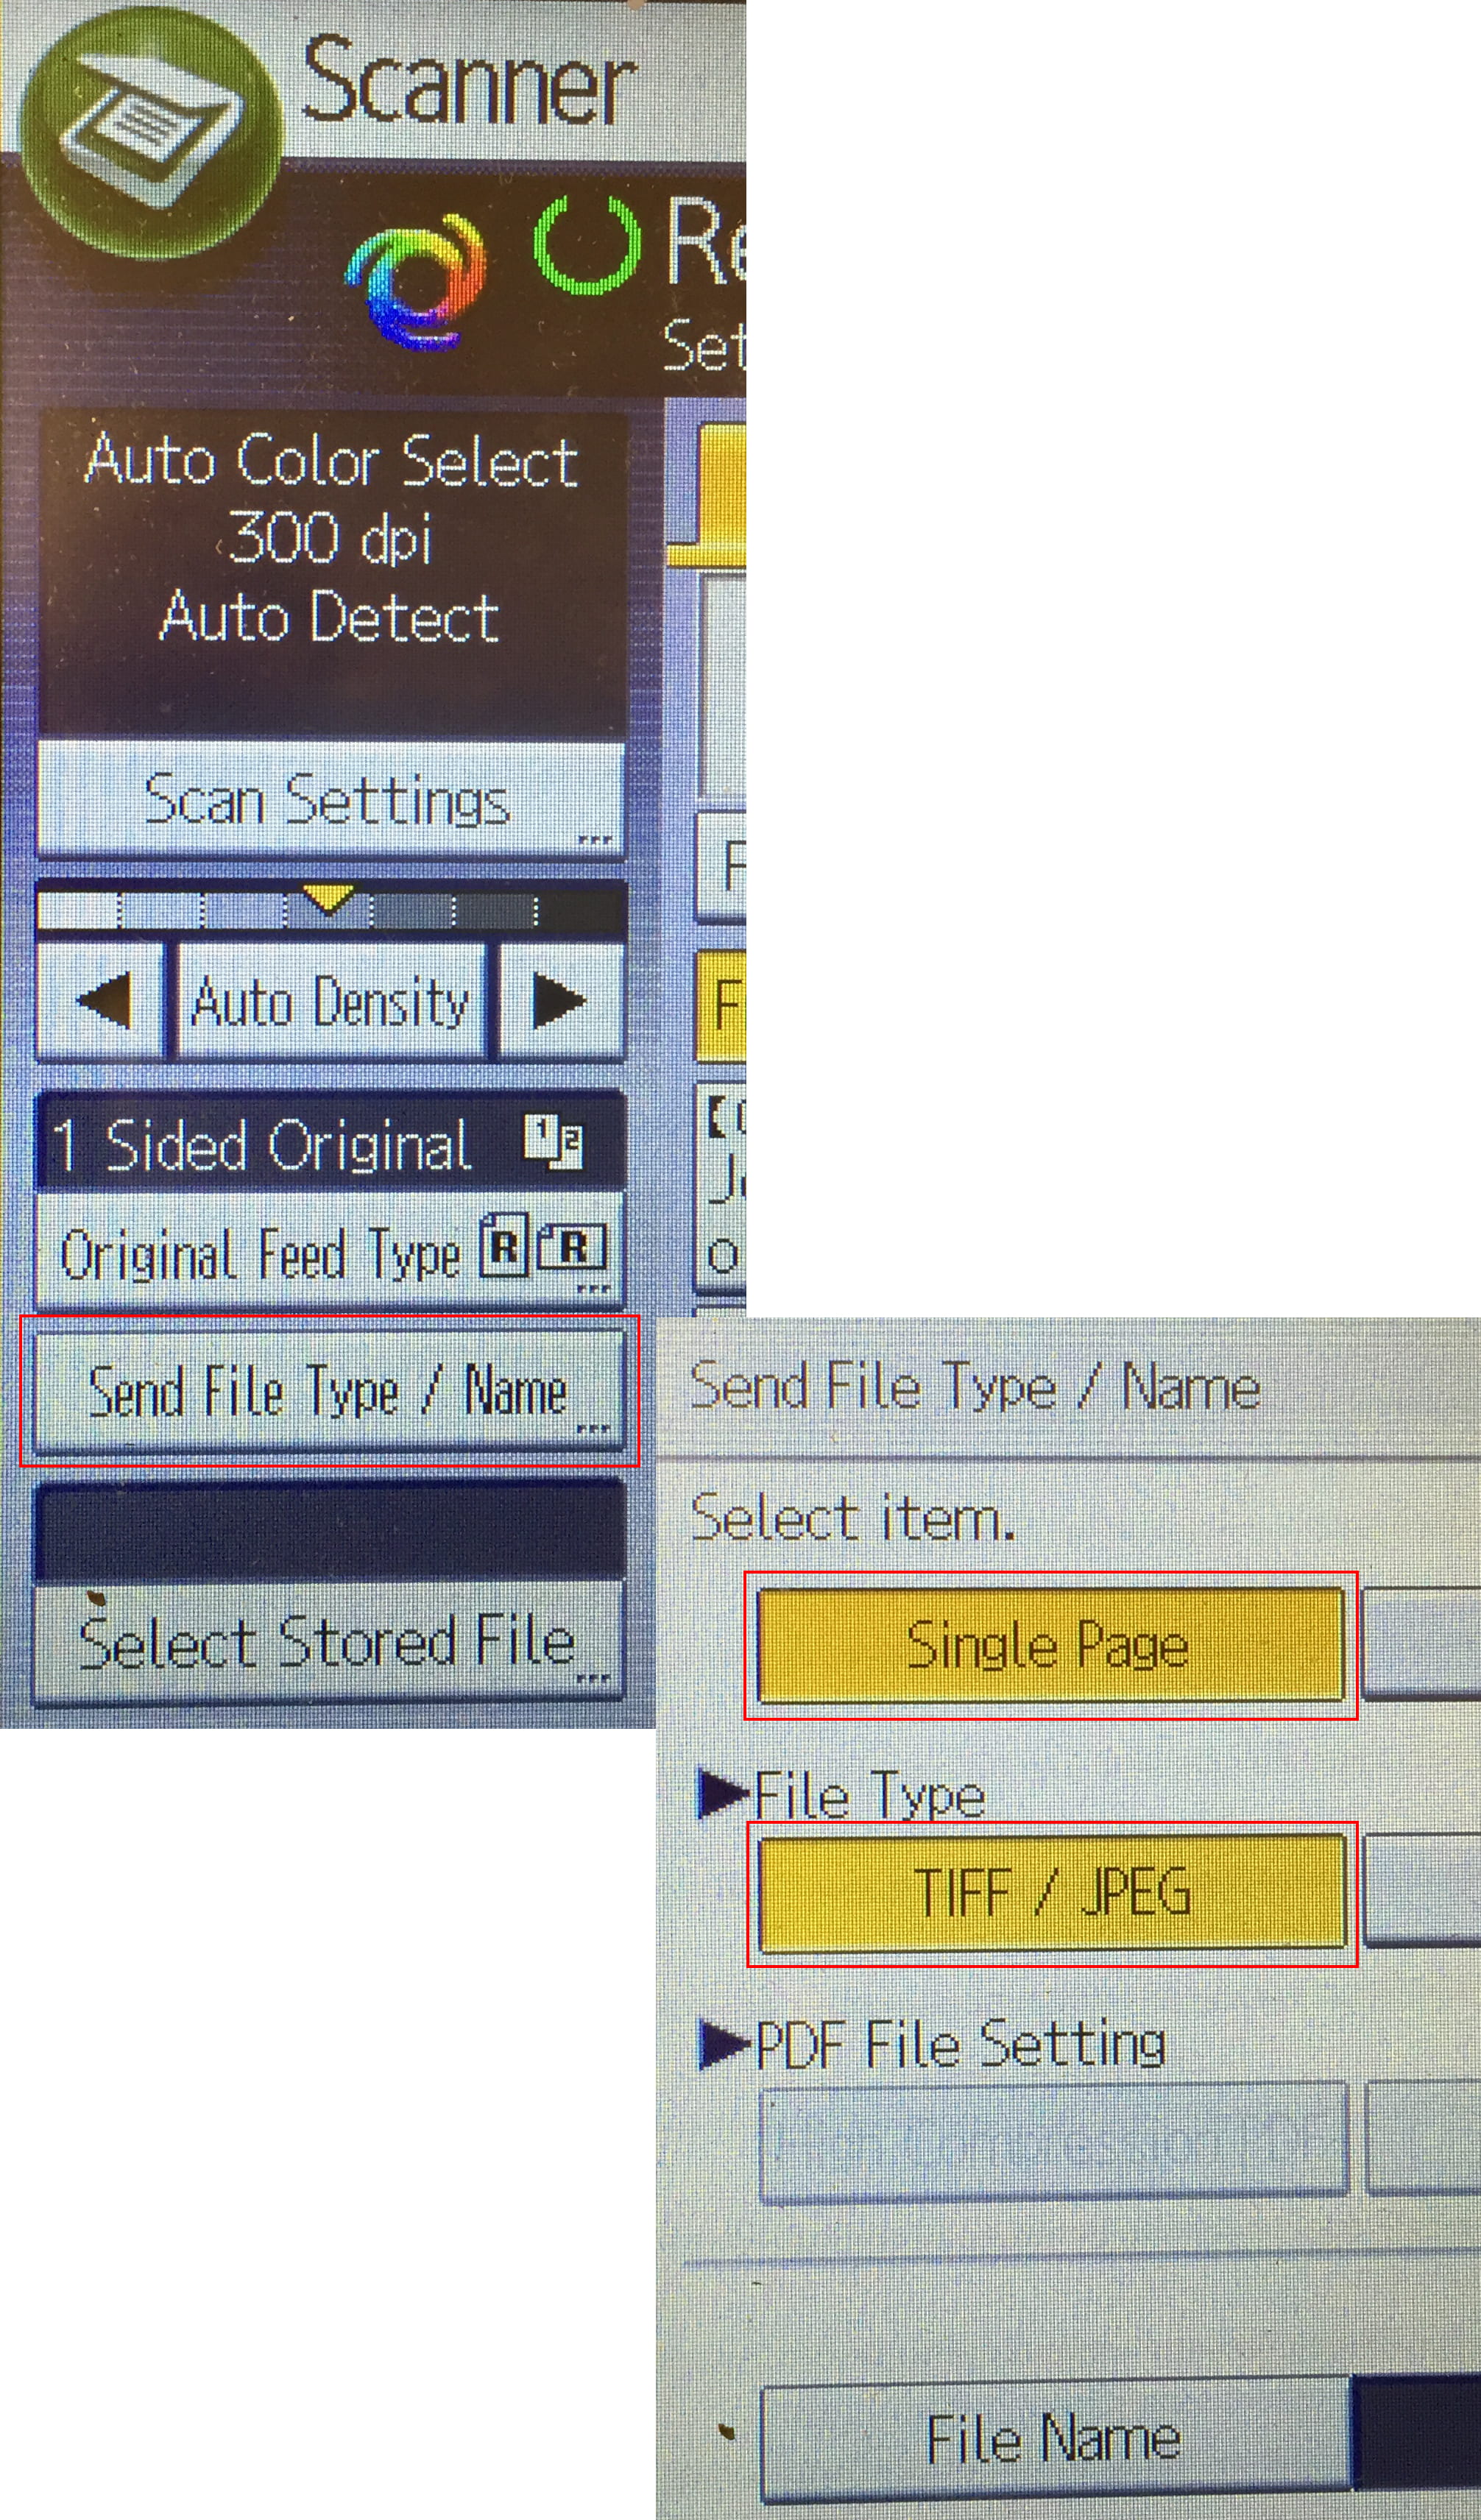
1) Scan the document you intend to use as a TIFF/JPEG image. On iSchool Ricoh scanners, this option can be set in the Scanner menu -> Send File Type / Name… -> Single Page -> TIFF / JPEG
2) start Microsoft OneNote in Windows, create a new notebook
3) click the plus sign to create a new section
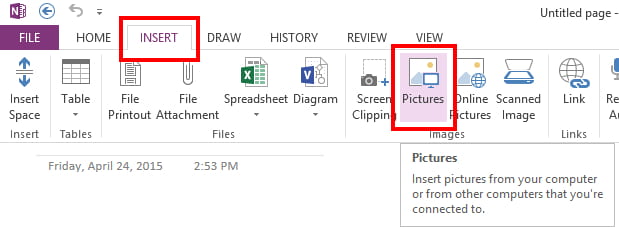
4) click Insert, click Pictures, find and select the image you scanned in step 1
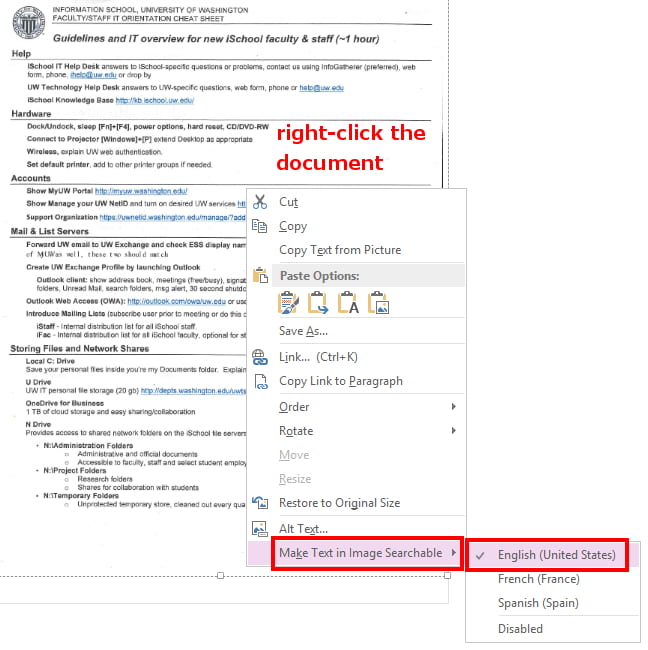
5) right-click the document, select Make Text in Image Searchable, select the language
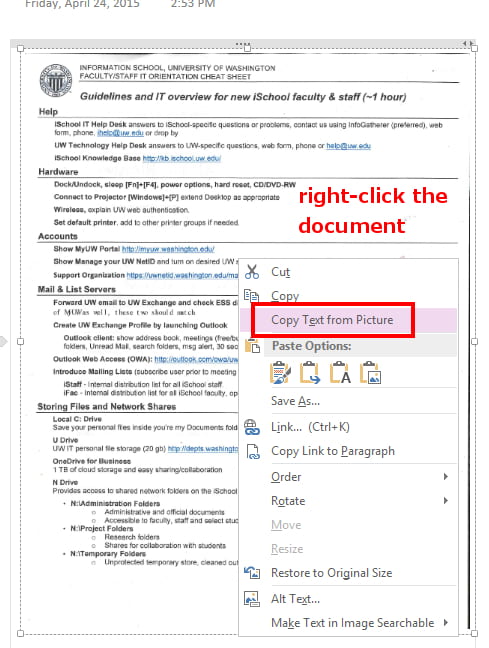
6) right-click the document, click Copy Text from Picture
7) start Word, paste the text into a document, whatever text was able-to-be-copied from the image will be available in the document
Note: This method strips all formatting leaving you with only editable text.

