Add printer to iSchool computer

Add printer to iSchool computer

This web page includes detailed directions for adding an iSchool printer to an iSchool-issued computer:

Windows

macOS


Windows

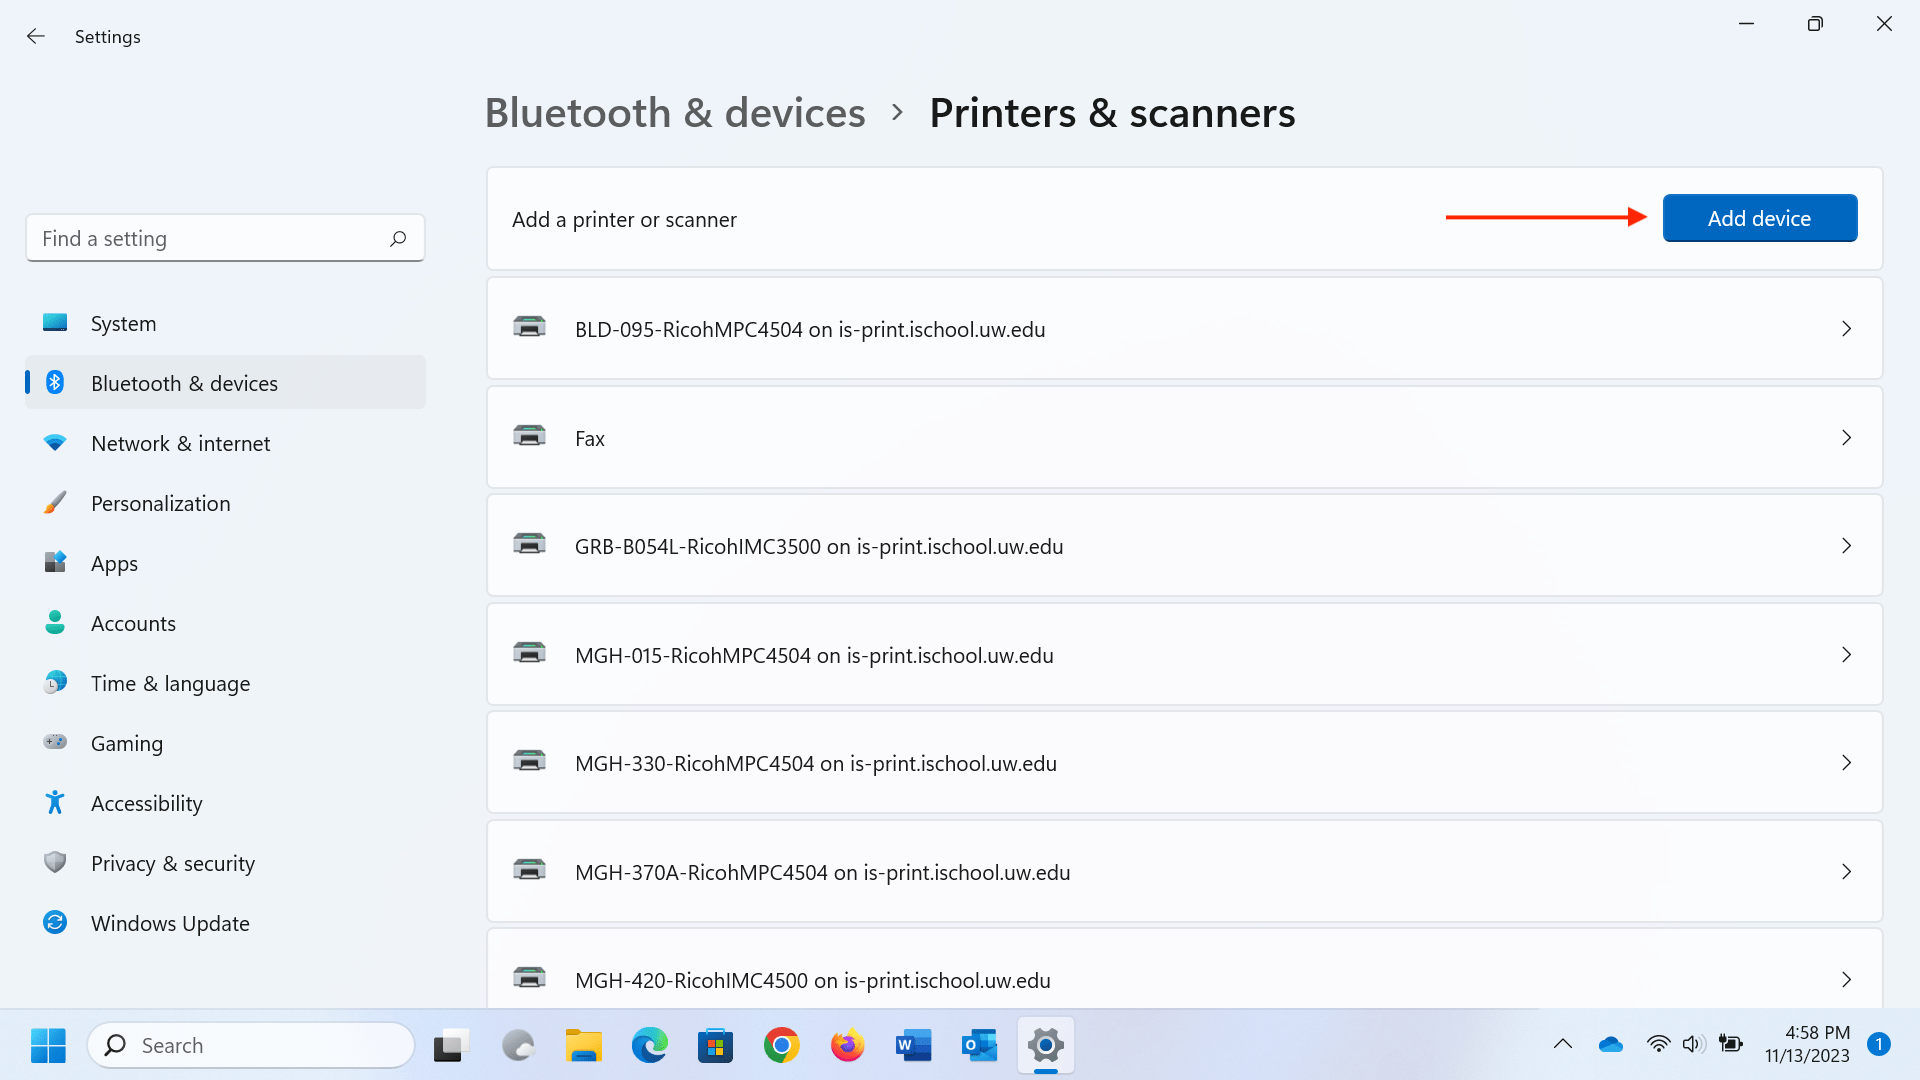
1) Windows computers should arrive to you with all iSchool printers available to you. You should be able to print to any of the printers listed in Settings -> Bluetooth & devices -> Printers & scanners.

If the printer you need to use is not listed, proceed to step 2.

2) In the “Printers & scanners” settings, click Add device.

3) In a handful of seconds a “The printer that I want isn’t listed” message and an Add manually button should appear. Click the Add manually button.

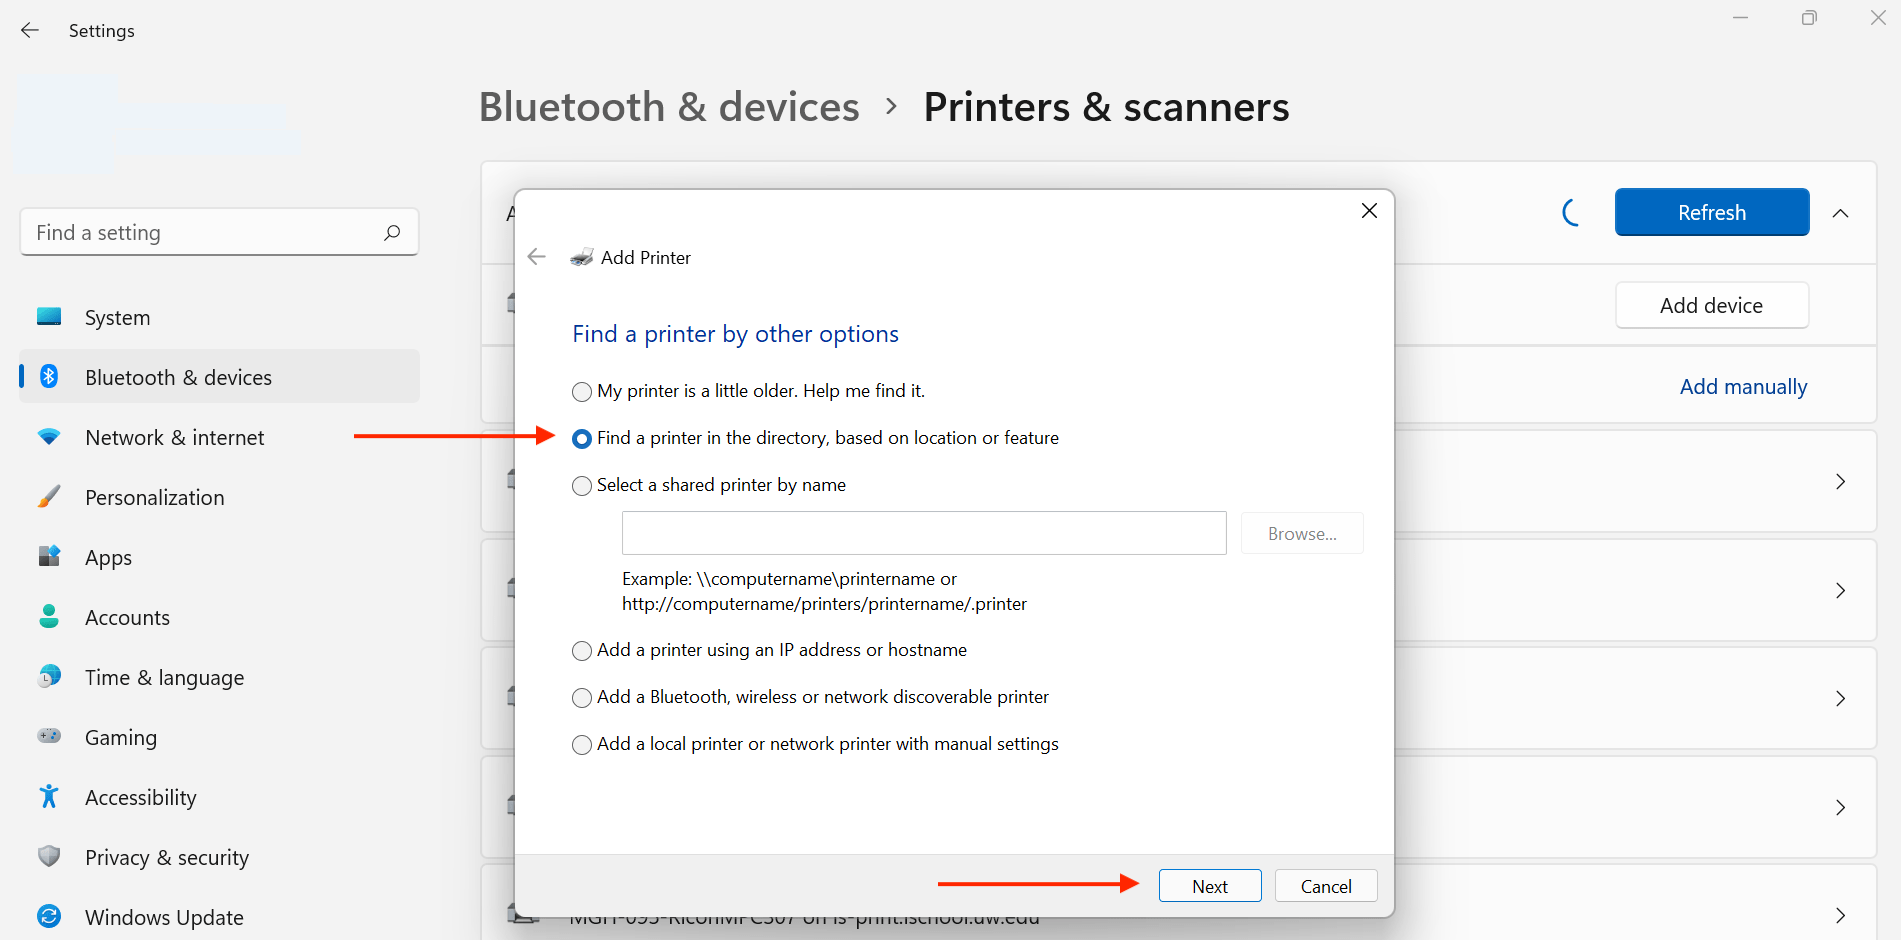
4) Select “Find a printer in the directory…“, click Next.

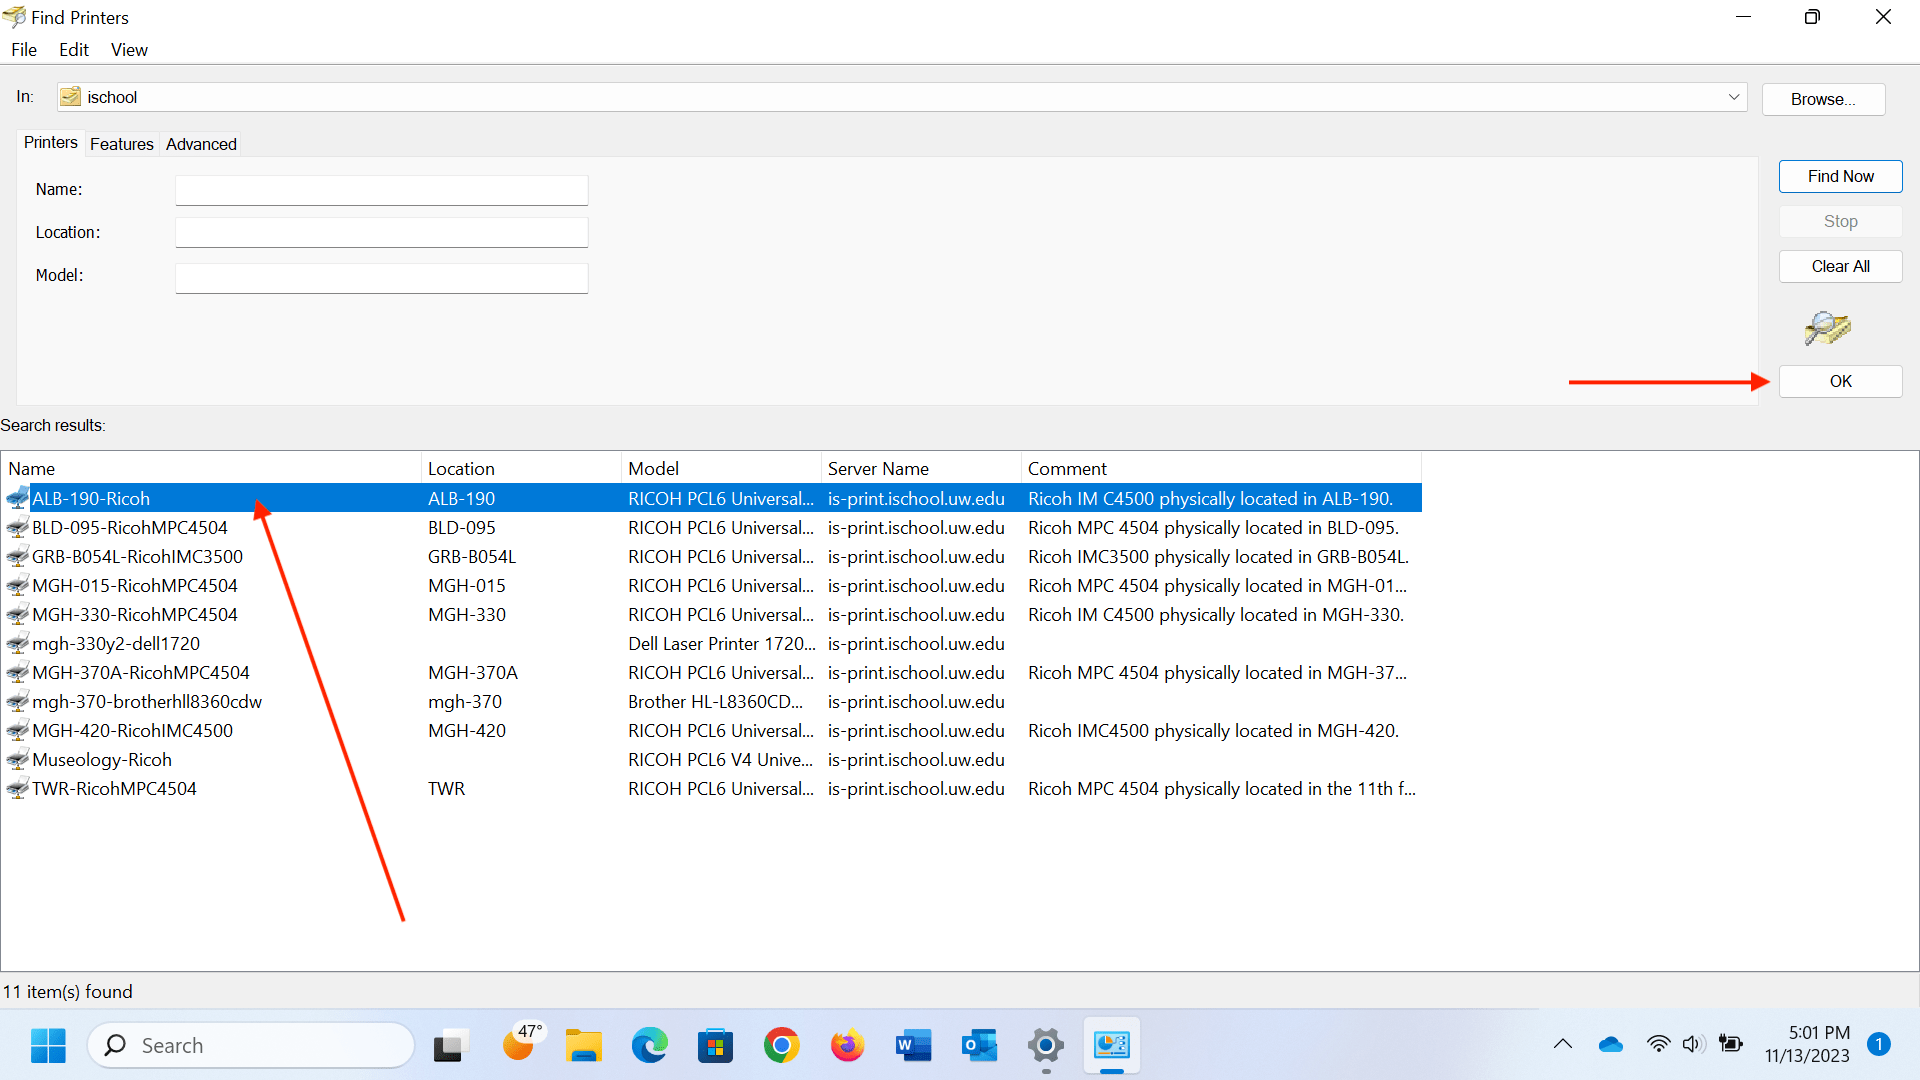
5) Select the printer you need, click OK. Printer names should be self explanatory. Contact iSchool IT, ihelp@uw.edu, if there are any questions.

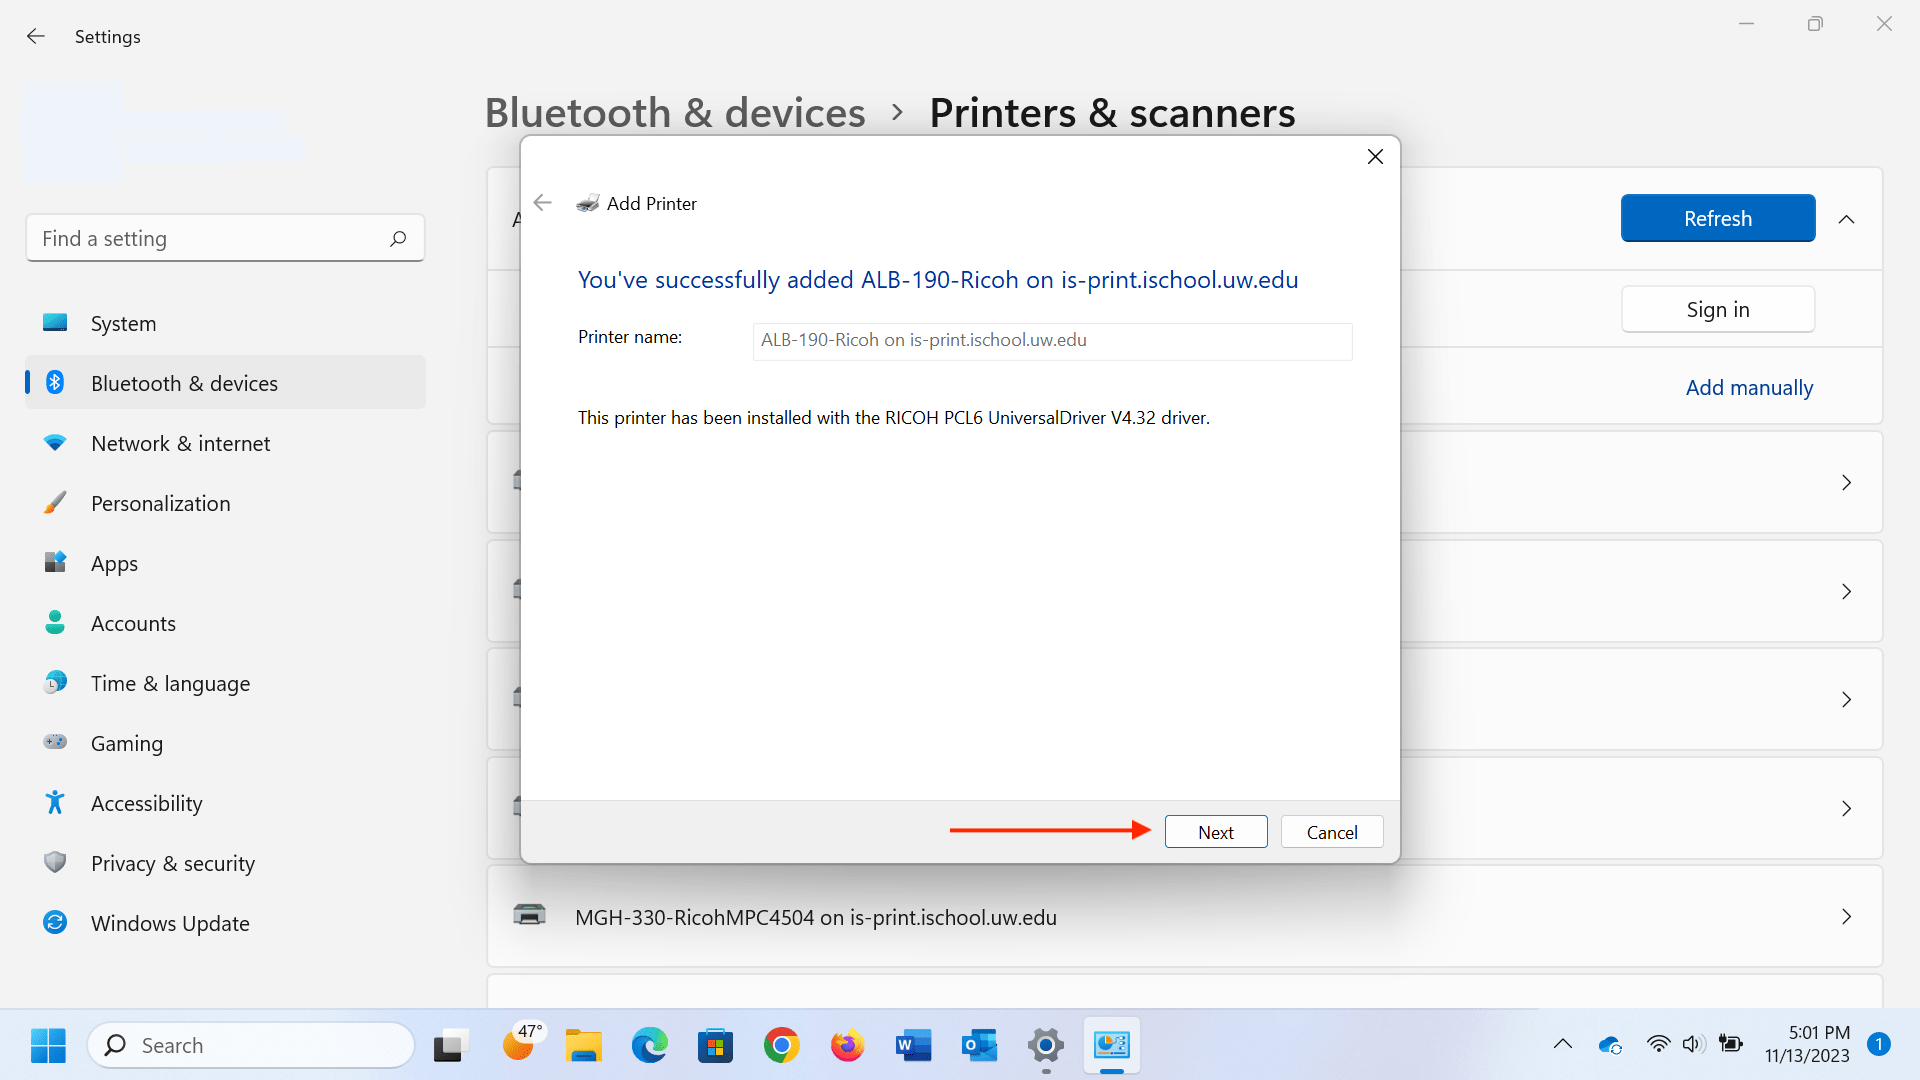
6) After a few seconds you should see a “…successfully added printer…” message. Click Next.

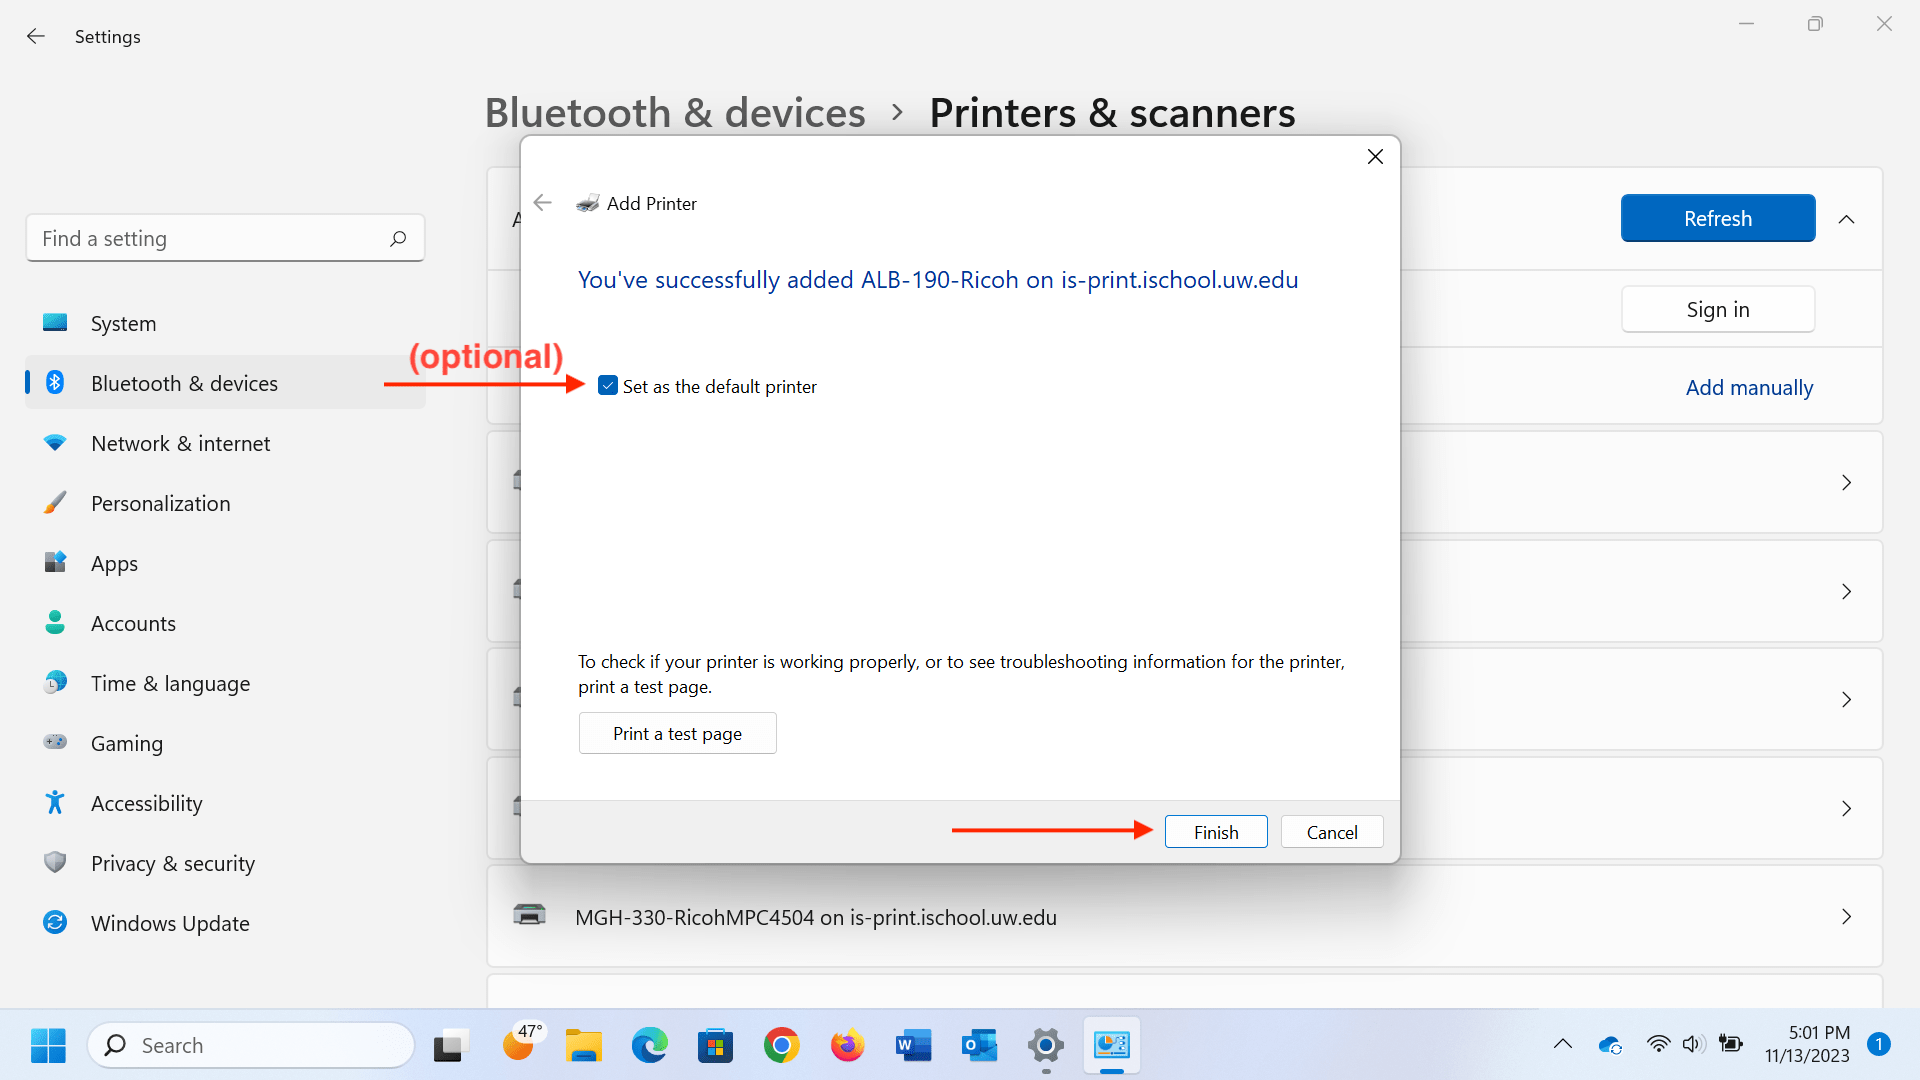
7) You should see another “…successfully added printer…” message. The “Set as the default printer” checkbox is optional. Click Finish.


macOS

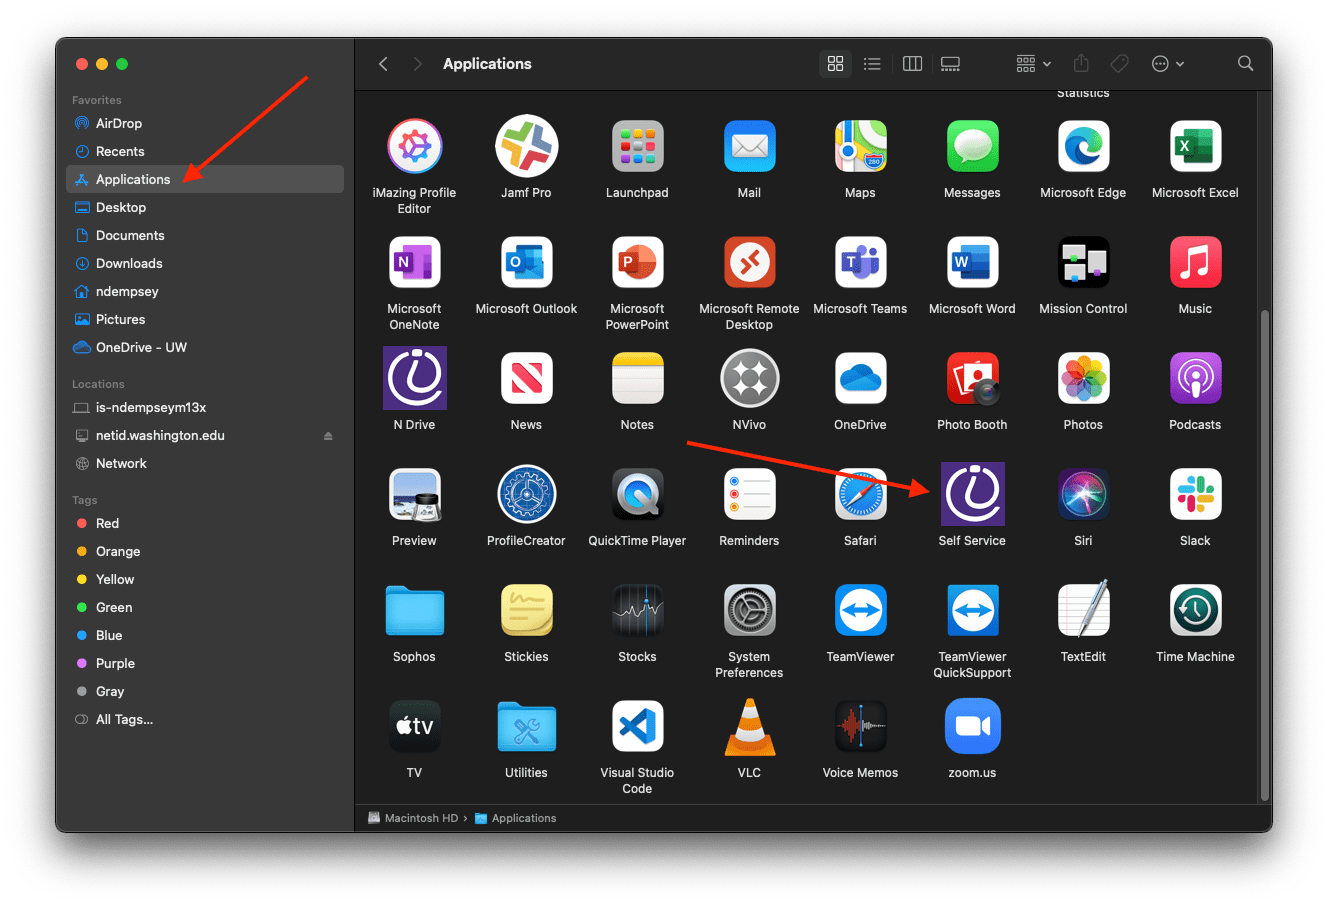
1) Open a Finder window, click Applications, start the application Self Service, sign into Self Service with UW NetID credentials if prompted for credentials.

3) Click the Printers category, click Install for any and all printers you need to use.

Basic procedure for saving scan files on a USB Flash Drive for a Ricoh printer

Notes:

  1. This machine only supports FAT16 or FAT32 formatted USB drives
  2. SD cards must be 2GB or smaller
  3. Saving might fail if the USB flash memory features password protection or other security features
  4. Only connect USB flash memory to the USB slot
  5. Insert the USB drive directly into the media slot
  6. Do not remove the media while data is being written. Doing so will result in corrupted data.

1. Press the [Home] key on the top left of the control panel, and press the [Scanner] icon on the [Home] screen.

Screen Shot 2013-08-08 at 3.05.07 PM


2. Insert a removable memory device in the media slot. You can connect only one removable memory device at a time. The media slot cannot be used if both an SD card and a USB flash memory are inserted into it at the same time.

3. Make sure that no previous settings remain. If previous settings remain, press the [Reset] key.

4. Place originals.

5. Press [Store File].

6. Press [Store to Memory Device].

7. Press [OK].

8. If necessary, specify the scan settings according to the original to be scanned.

Screen Shot 2013-08-12 at 2.49.54 PM

9. Press the [Start] key. When writing is complete, a confirmation message appears.

10. Press [Exit].

11. Remove the memory device from the media slot


Basic Procedure for Sending Scan Files by Email with Ricoh Printer

Basic Procedure for Sending Scan Files by Email

1. Press the [Home] key on the top left of the control panel, and press the [Scanner] icon on

the [Home] screen.

Screen Shot 2013-08-08 at 3.05.07 PM

2. Make sure that no previous settings remain.

If a previous setting remains, press the [Clear Modes] key.

3. Press the [E-mail] tab.

Screen Shot 2013-08-08 at 3.17.09 PM

4. Place originals.

5. If necessary, specify the scan settings according to the original to be scanned.

Screen Shot 2013-08-08 at 3.17.09 PM

6. Specify the destination. You can specify multiple destinations.

7. To specify the e-mail sender, press [Sender Name].

8. Press [Manual Entry].

9. Enter the e-mail address.

10. Press [OK].

11. Press the [Start] key.