Add a Printer to an iSchool Computer
This web page includes detailed directions for adding an iSchool printer to an iSchool-issued computer:
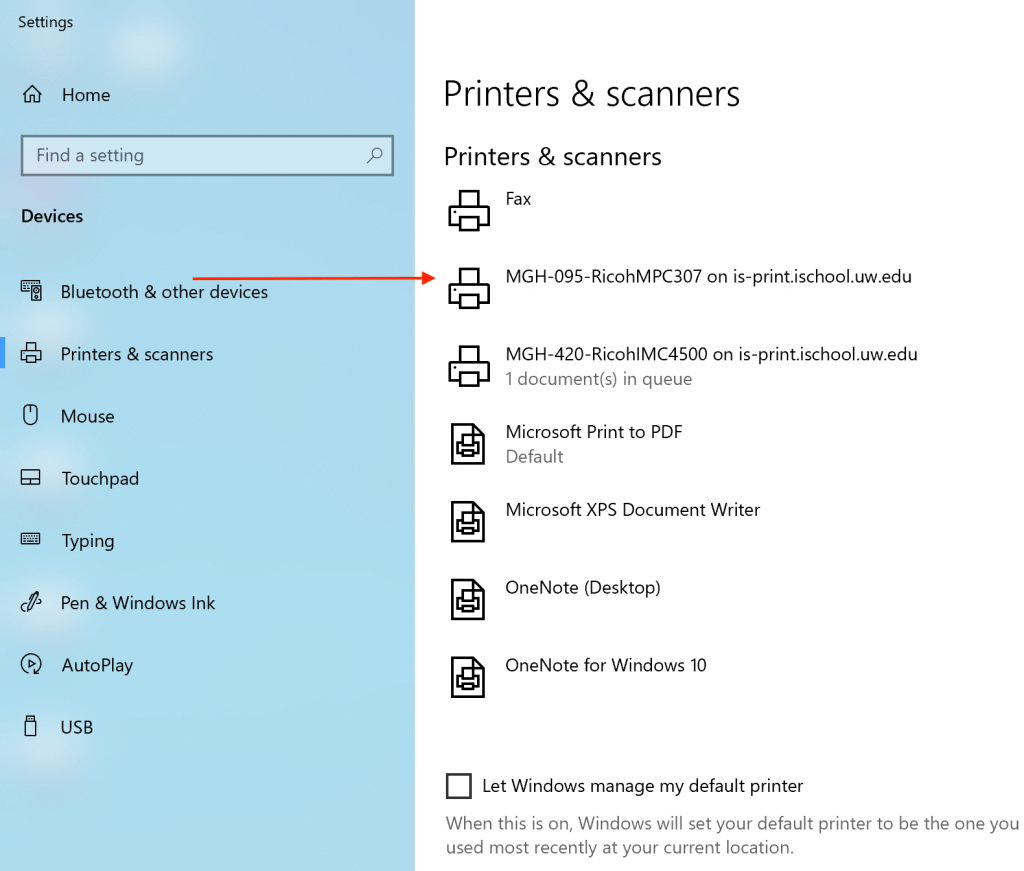
1) Windows computers may arrive to you with iSchool printers already available to you. You should be able to print to any of the printers listed in Settings -> Bluetooth & devices -> Printers & scanners.
If the printer you want to use is not listed, proceed to step 2.
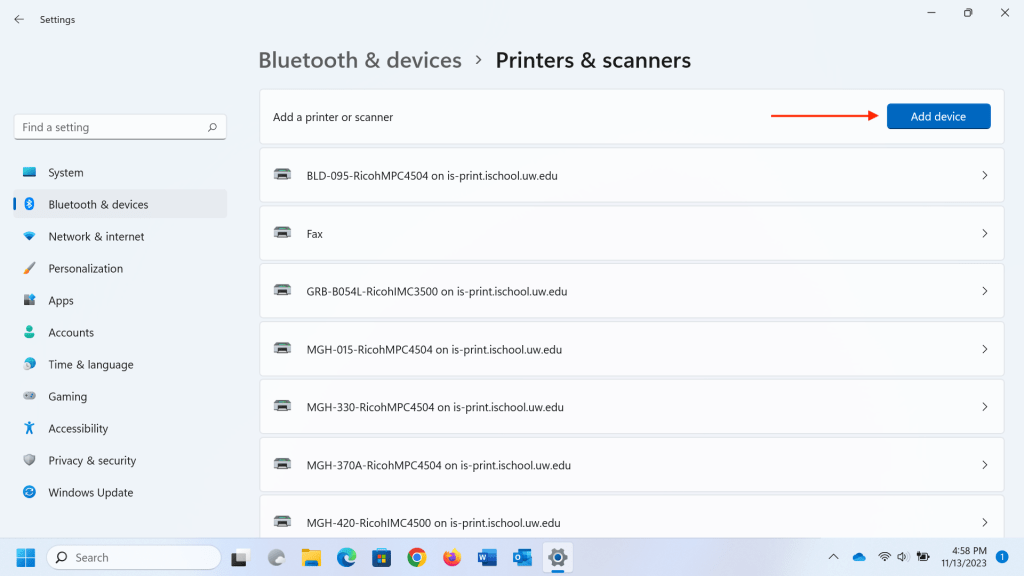
2) In the “Printers & scanners” settings, click Add device.
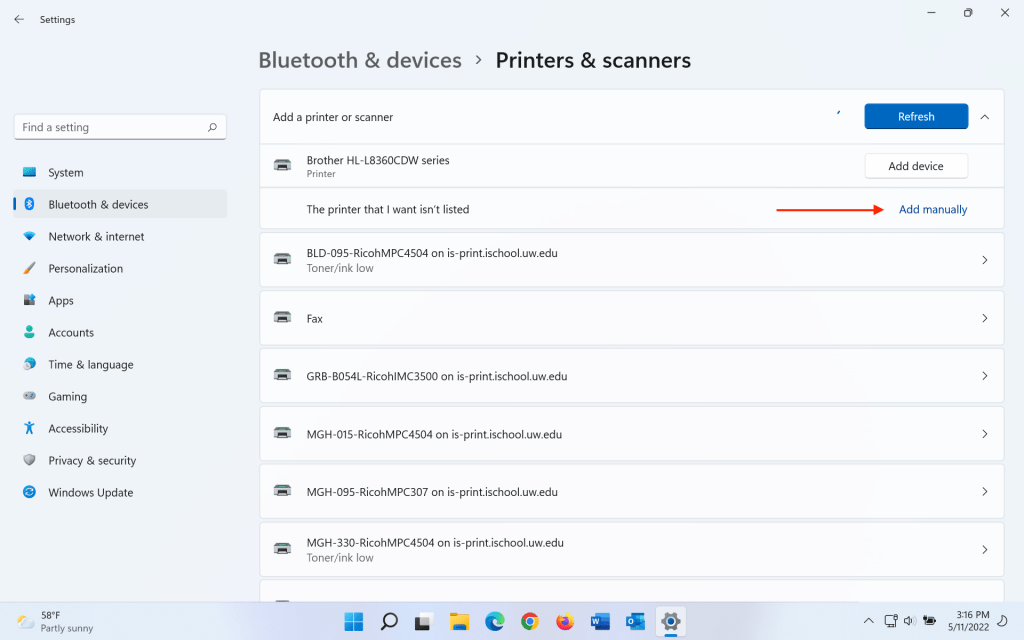
3) In a handful of seconds a “The printer that I want isn’t listed” message and an Add manually button should appear. Click the Add manually button.
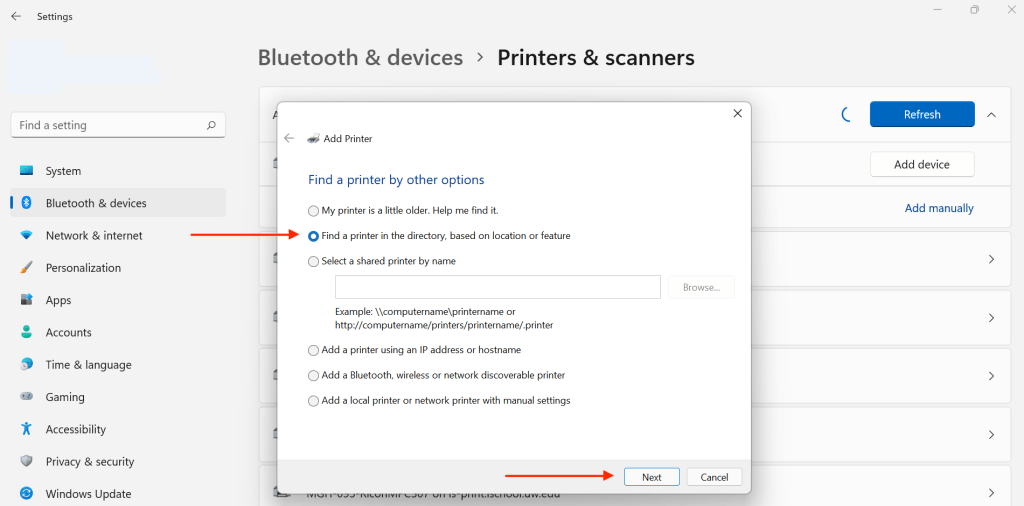
4) Select ” Find a printer in the directory… “, click Next.
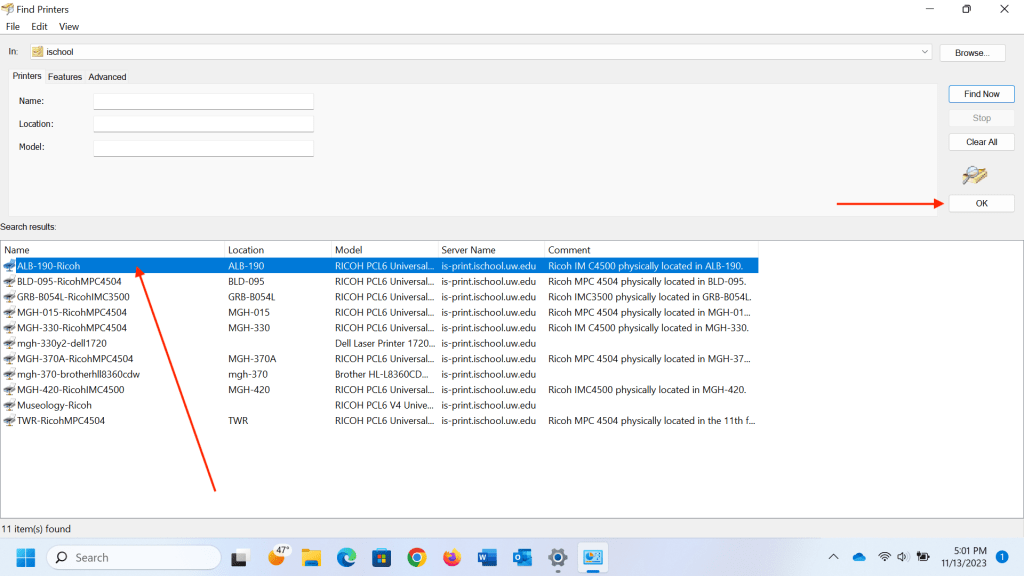
5) Select the printer you need, click OK. Printer names should be self explanatory. Contact iSchool IT, ihelp@uw.edu, if there are any questions.
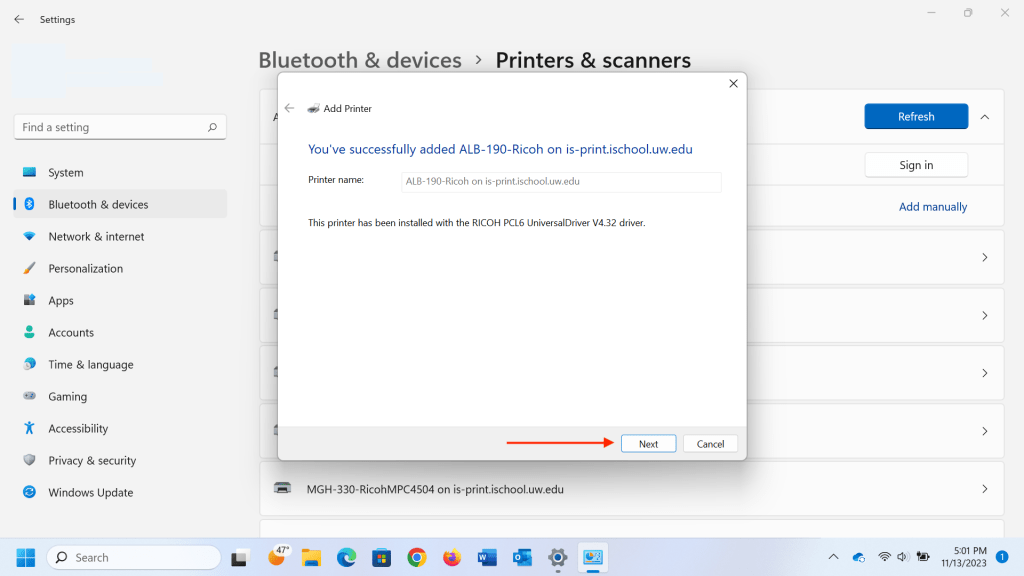
6) After a few seconds you should see a “…successfully added printer…” message. Click Next .
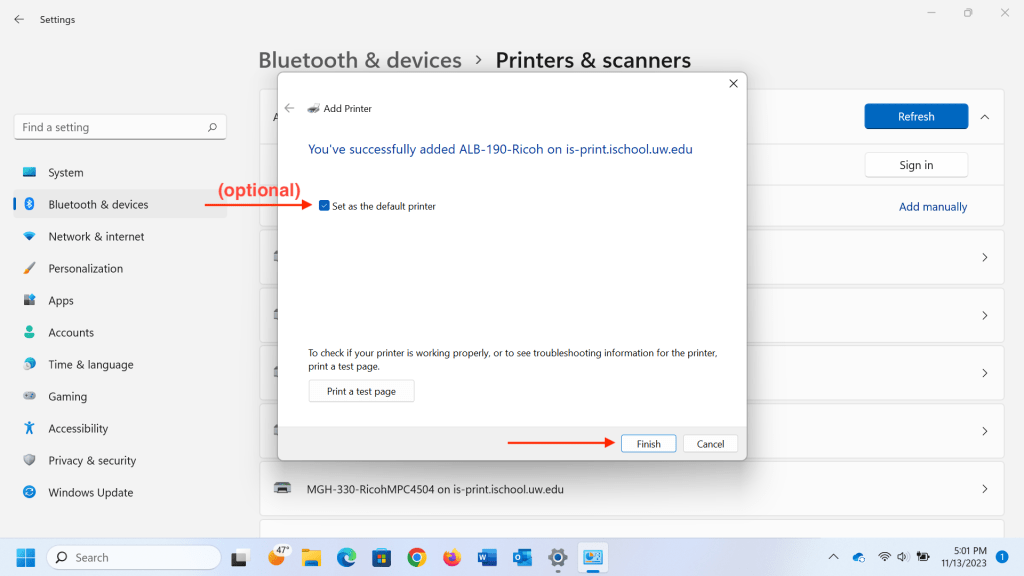
7) You should see another “…successfully added printer…” message. The “Set as the default printer” checkbox is optional. Click Finish .
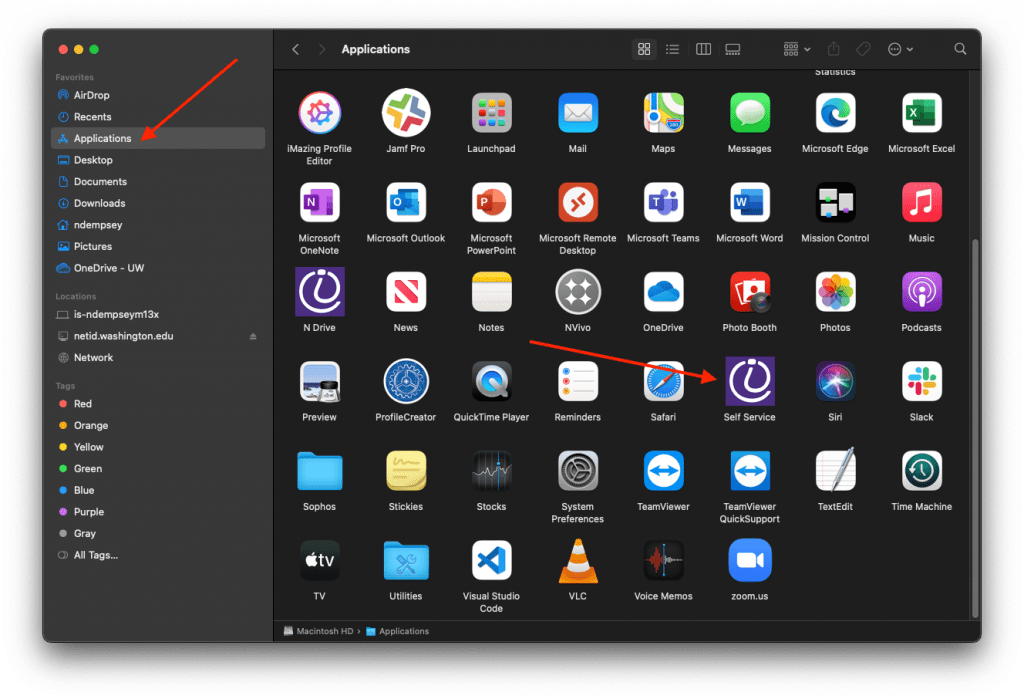
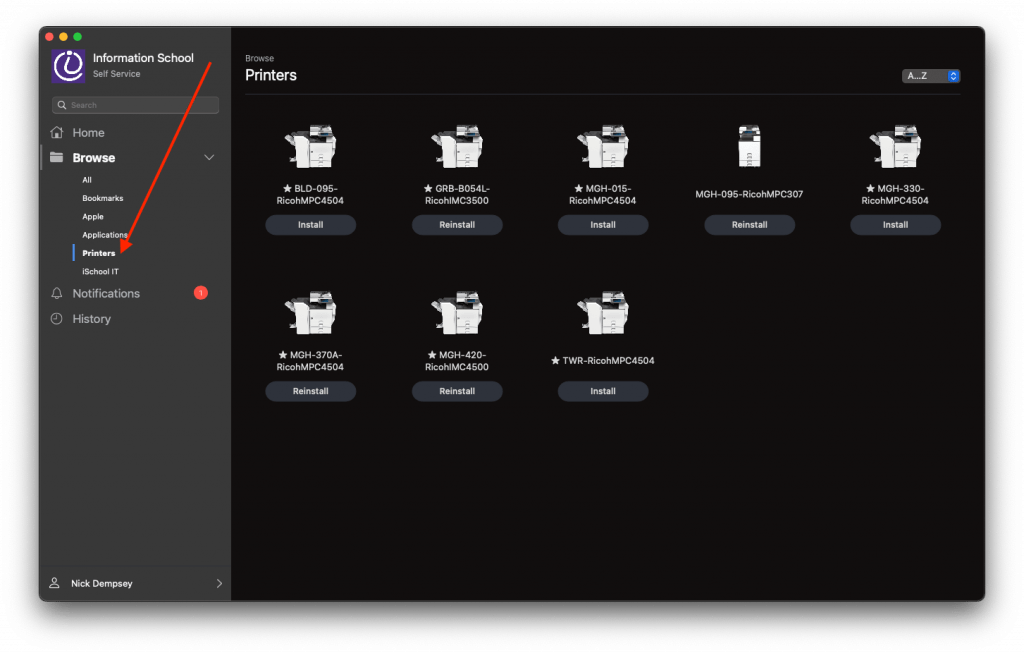
1) Open a Finder window, click Applications, start the application Self Service, sign into Self Service with UW NetID credentials if prompted for credentials.
3) Click the Printers category, click Install for any and all printers you need to use.


